Chapter 5, Getting Familiar with Your Workspace
| Setting User Preferences | Other Workspace Functions | ||
Chapter 5, Getting Familiar with Your Workspace |
|||
Create user defined attributes (UDAs) to let you expand the limited number of already defined attributes associated with the different data types. There are three types of UDA:
Composition (version)
Project
User

Composition UDAs are the most important UDA as this allows you to associate data you have in your facility with projects, users and versions of compositions in Toxik. This data could be used to find compositions or help determine information about the material referenced in the setup, such as camera setup. Composition UDAs are associated with the versions of compositions, and can have different information in the UDAs.
Project UDAs allow your facility to store job related information within the Toxik workflow. This could be used by an artist to find out who is responsible for a given shot or it could be used to store project information to be used in a Python script.
User UDAs let you store information related to a specific user in Toxik. This could be used to send a user an email as part of a Python script or to store job information.
A scoped UDA is a UDA that has an artificial scope defined by the user. For instance, a UDA called Status has no scope whereas a UDA called Project:Status has a scope. These UDAs are just a way for you to keep track of what the UDA applies to; Status applies to all data types while Project:Status should only apply to the project data type (although there is nothing stopping you from referencing a project UDA from the metadata tab in your project preferences).
Creating a scoped UDA for a project, user, or composition can be done in one of two ways: through the metadata tab in the Tool Details, Project Preferences or User Preferences, or with the XML editor. If you're using the XML editor, you must specify a UDA in the XML file associated with the given data type. Each UDA in the XML resource file will be created automatically in the database, if not already present, when the XML file is loaded--see XML Resource Files.
From the Tool Details, Project Preferences or User Preferences, select the Metadata tab.
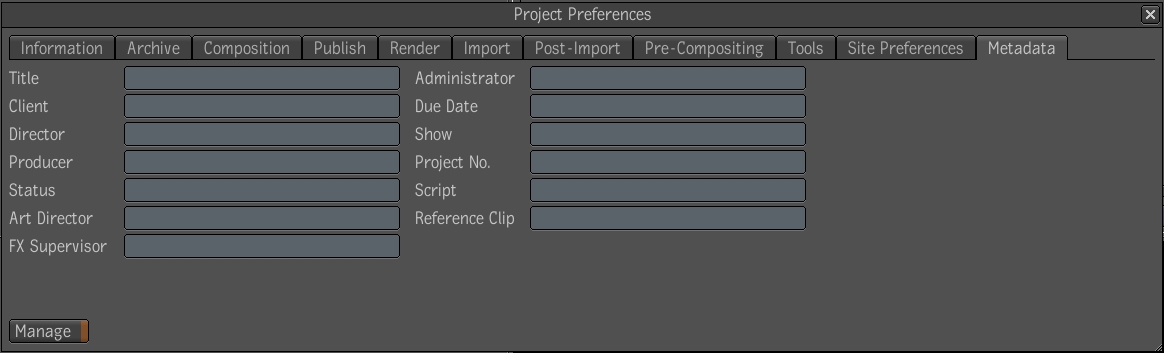
 "Show full-size image")
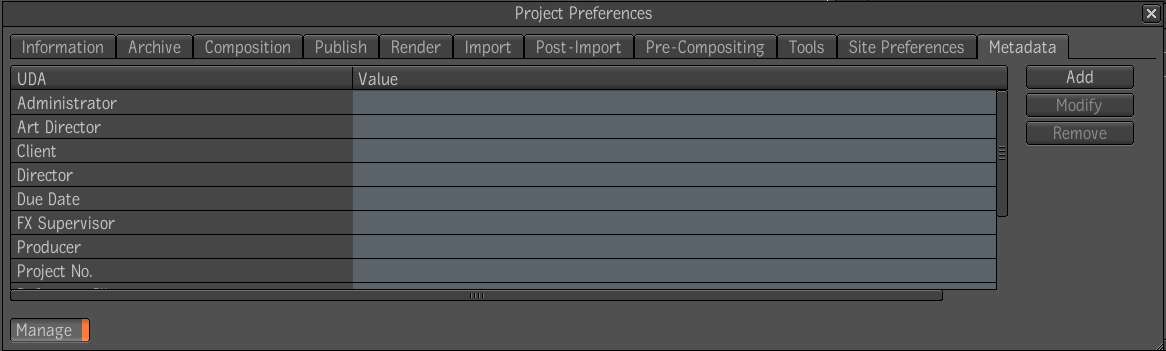
Click the Manage button. This will reveal a list of user defined attributes. You will now be able to add, remove or modify UDAs in your project.
 "Show full-size image")
You can add information to each of the UDAs by clicking in the value field next to the UDA.
Note: The Add, Modify, and Remove buttons are disabled unless you have read/write privileges for the project you are working in. Furthermore, even with read/write privileges, these buttons will only be enabled when a UDA is selected.
Add button -- clicking this button reveals four additional buttons: UDA Type, Create, Cancel and Done.
Modify button -- clicking this button modifies the information in the UDA field.
Remove button -- clicking this button disables the selected field and removes it from the list of UDAs, but not from the Metadata tab. If you remove a pre-created UDA, the control associated with that UDA in the Metadata tab will be disabled.
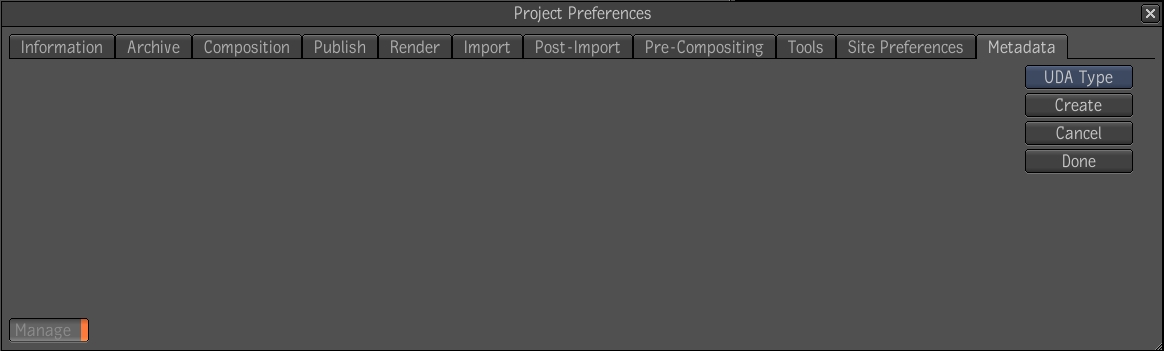
 "Show full-size image")
UDA Type -- clicking this button will reveal four types: Toggle, Menu, Numerical and Text.
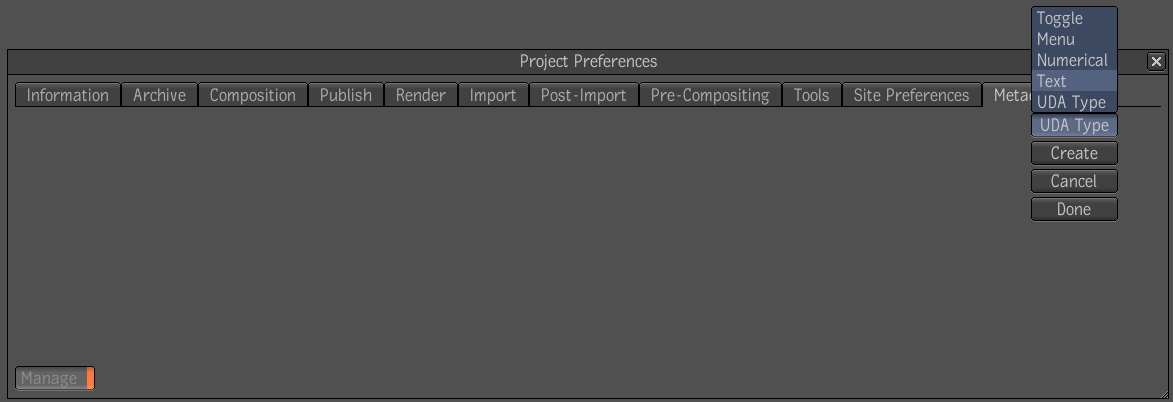
 "Show full-size image")
Toggle: this control allow you to toggle between two states.
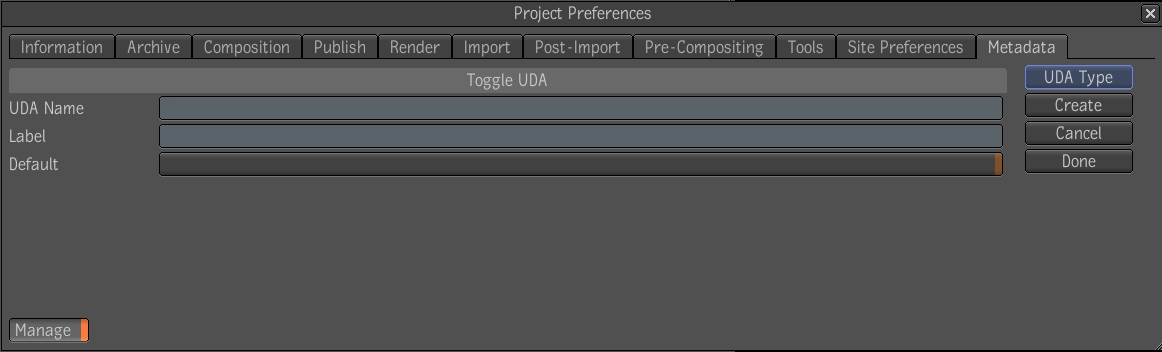
 "Show full-size image")
Menu: this control allows you to choose between multiple states. You can specify the valid values by listing items separated by a comma. You can also decide which item will be the default by clicking Default.
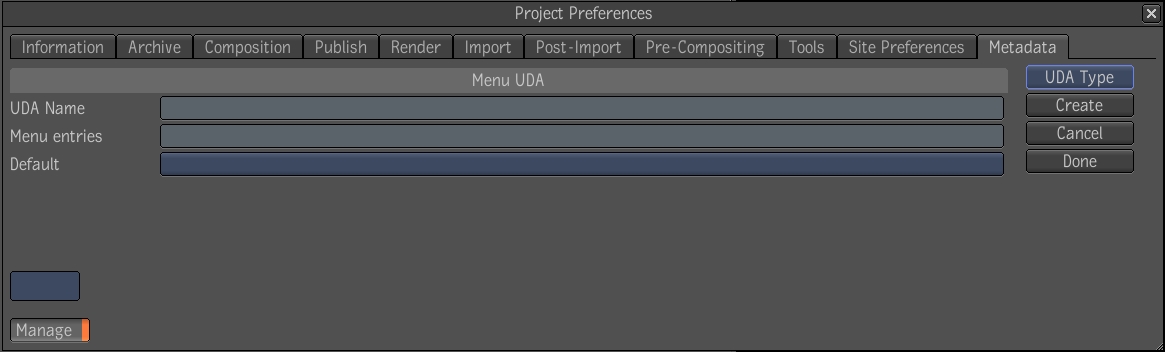
 "Show full-size image")
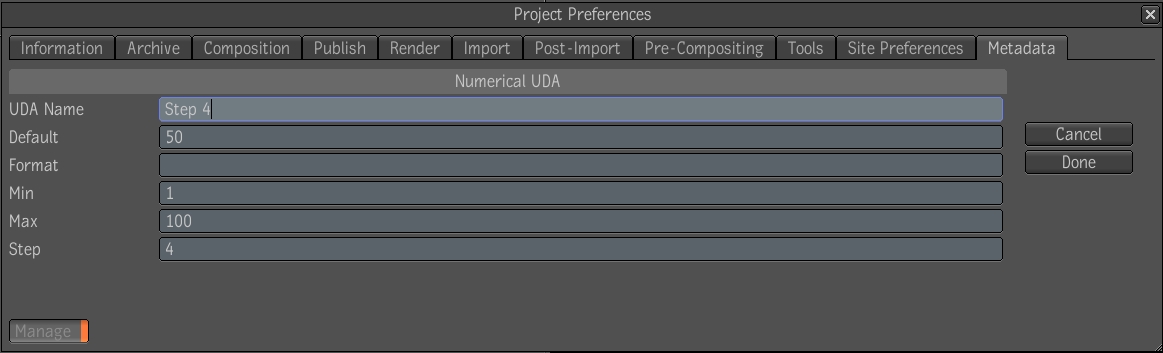
Numerical: this control allows you to define a numerical UDA.
Note: It is not necessary to fill out all the fields, only the ones that apply to your project, with the exception of the name field, which must be filled.
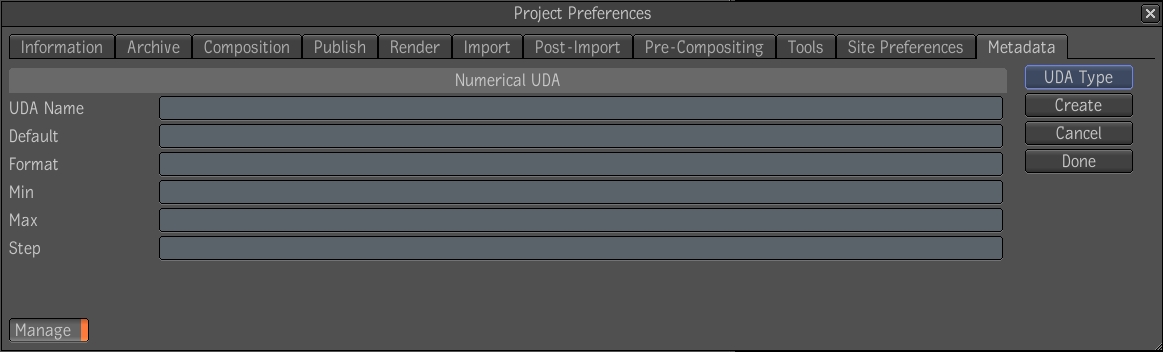
 "Show full-size image")
Text: this is a text field for data entry.
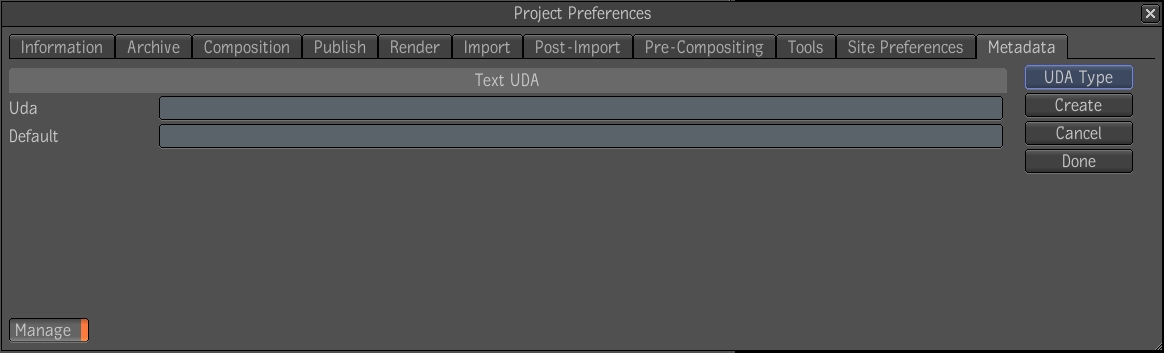
 "Show full-size image")
Create -- implements the changes.
Cancel -- cancels the changes and brings you back to the list of UDAs.
Done -- implements the changes and brings you back to the list of UDAs.
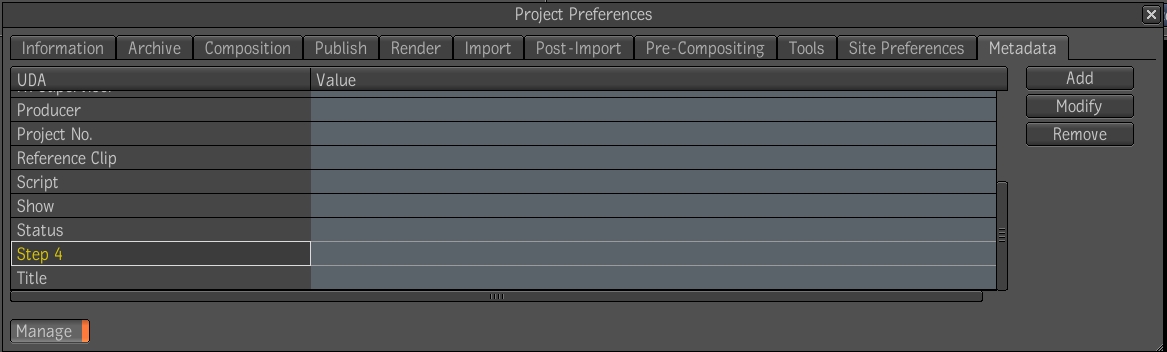
Once you have completed your changes, they will be visible in the original list of UDAs.
Note: The metadata tab will not reflect the changes made in the manage mode. If you delete or rename the UDA that appears in the metadata tab, the associated control will be disabled.
 "Show full-size image")
 "Show full-size image")
Since it is possible to have more than one data type visible in the browser, UDAs that have the form Version:..., Project:..., User:... will not be displayed by default as individual columns in the browser. If the UDA is created by use of the XML resource file, it will be shown in the Metadata tab in the detail view area of the tool UI. The UDA can be displayed by right-clicking on the title bar and selecting the UDA if desired but the preferred method of displaying and editing scoped UDAs are through the Metadata tab.
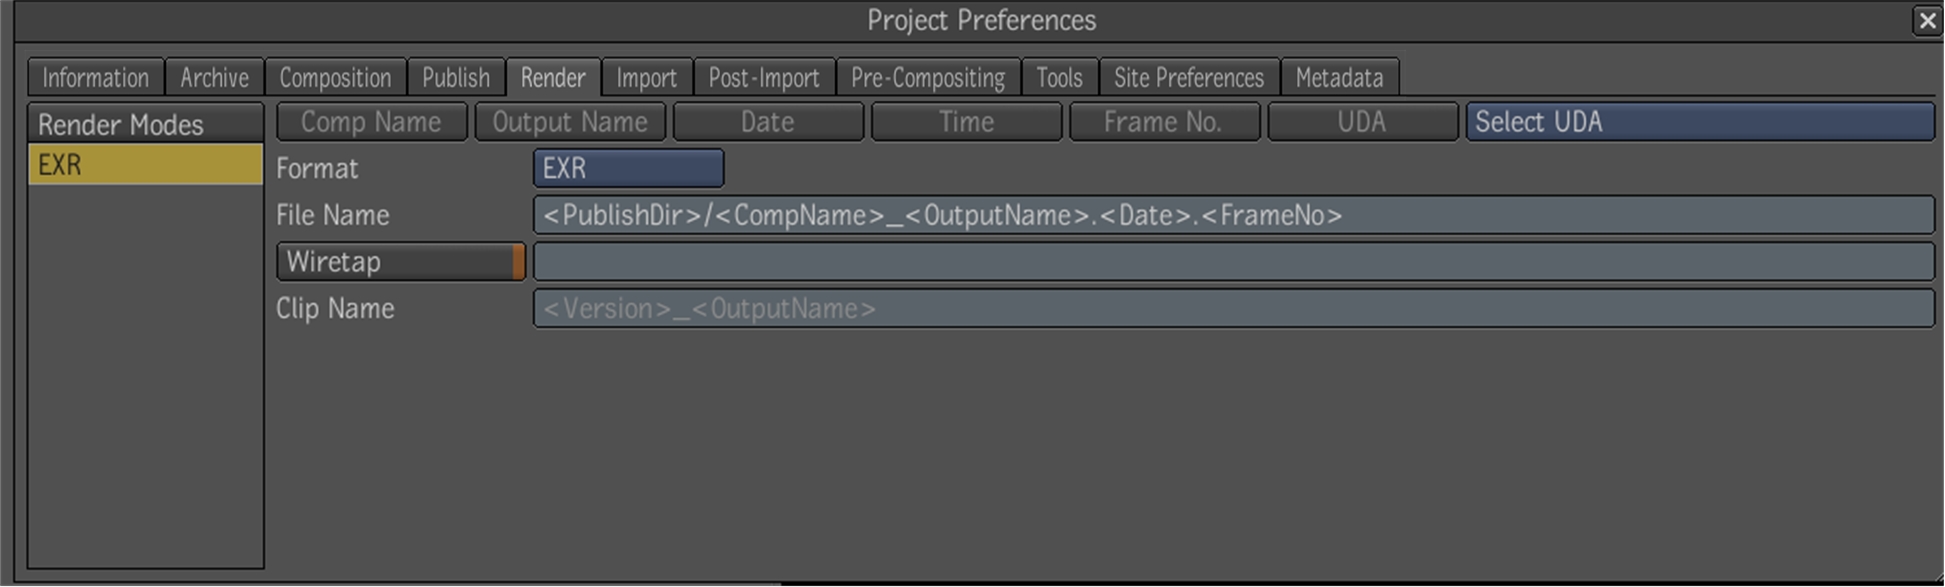
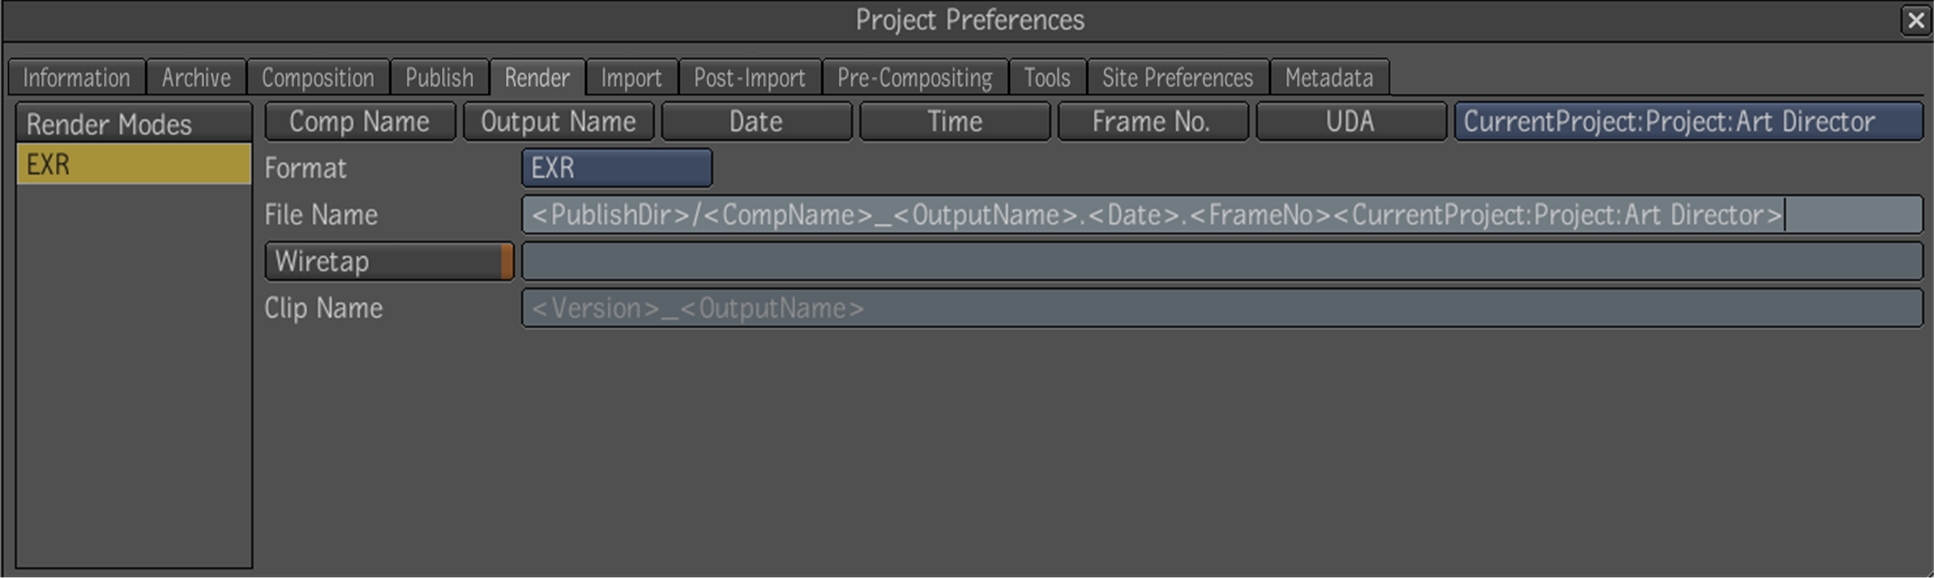
When specifying, for instance, a render file name, there is an option for entering UDAs in the string. The UDAs may be scoped or not and can be selected from the default lists available or can be created by the user see--Creating UDAs.
Open the Project Preferences window by clicking on the project icon in the task bar then select the Render tab.
 "Show full-size image")
Click open the Select UDA menu and select the UDA you want to add to the File Name string. In this example the scoped Project:Art Director UDA is selected, loaded and ready to insert into the string.
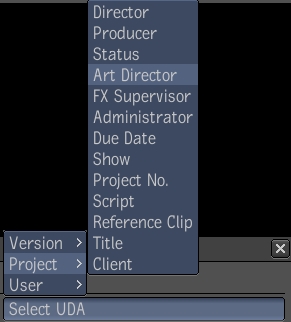
 "Show full-size image")
Place the cursor in the File Name string where you want the UDA to appear and select UDA.
The UDA is added to the string.
 "Show full-size image")
Repeat steps 2 and 3 to add more UDAs to the string.
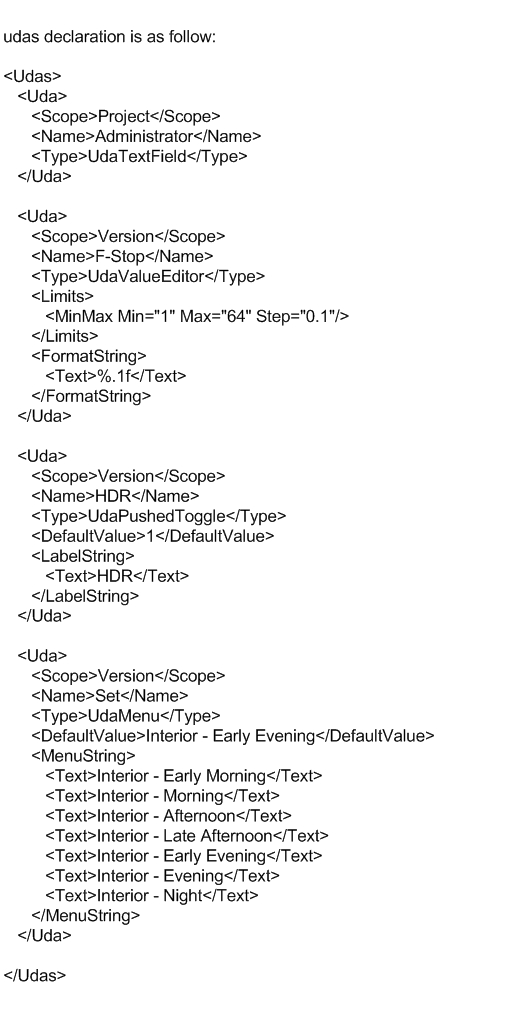
Toxik is shipped with a default set of XML resources files, one for each of the above mentioned data types; metadata.composition.xml, metadata.project.xml, etc. These XML files can be found in the resTables subfolder of the resources folder of the Toxik application folder (udas.xml file contains the UDAs declaration; the metadata.*.xml file contains the UI metadata tab UI).When Toxik is launched, the udas.xml file is parsed and any UDA that does not already exist will be created.
These resource files are only used to create the layout to display and edit the UDAs within the application. If you wish to modify these files and share them with other workstations running toxik, there is a site preference called Shared Settings that indicates the path to these XML files. This path, or more specifically, directory, can be located on the network so that each workstation uses the same resource file for displaying and creating UDAs. If the files exist in this directory, they will be used, otherwise the resources files in the default location will be used.
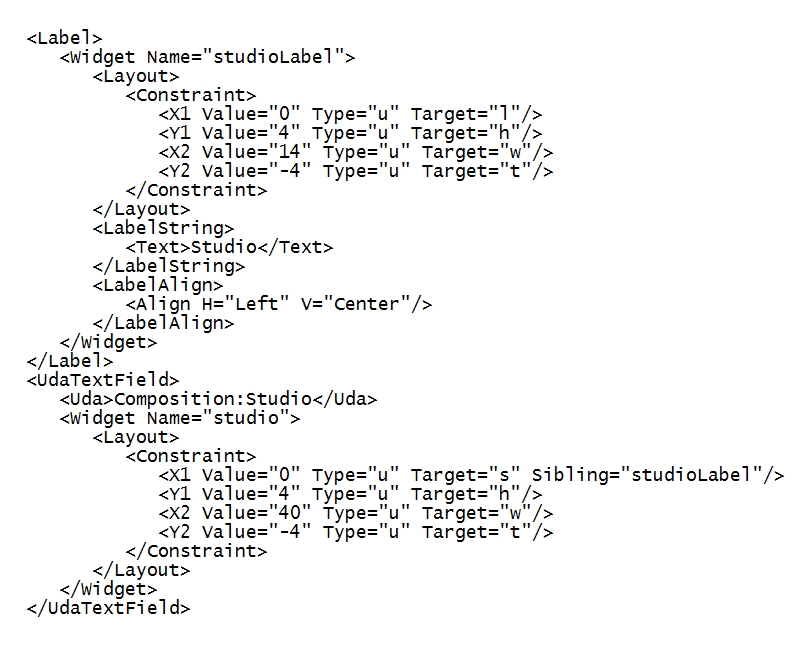
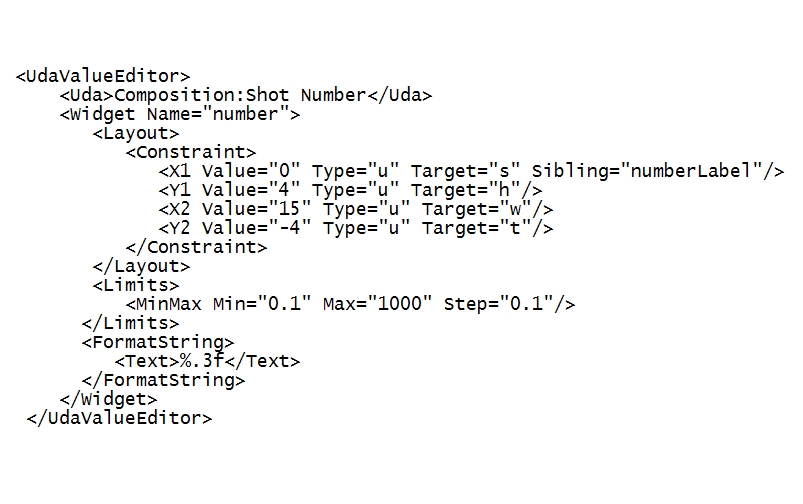
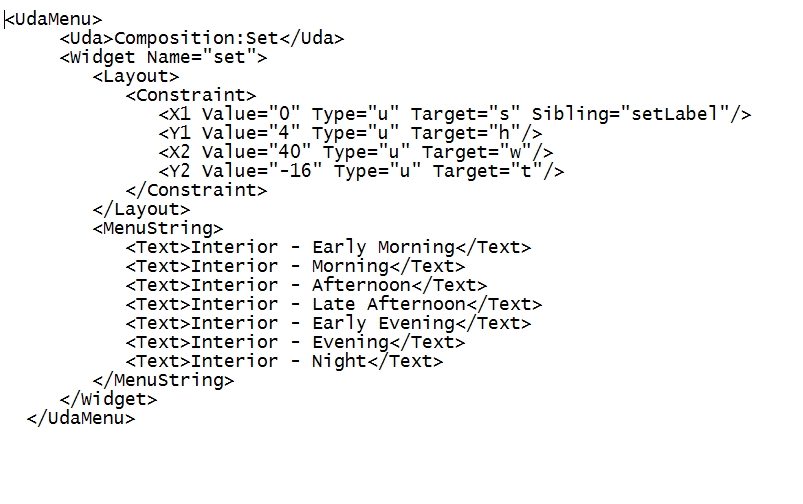
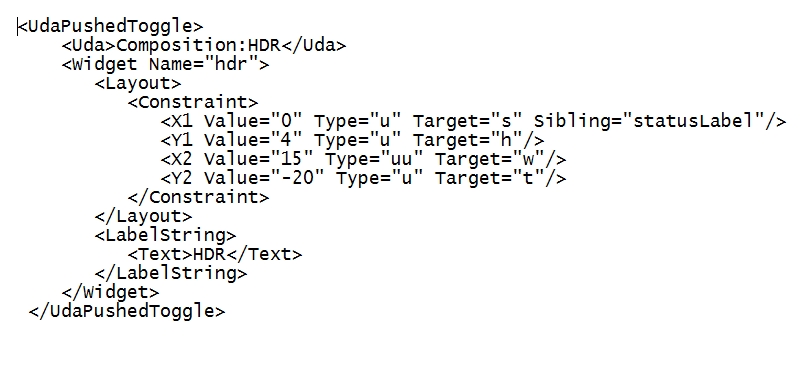
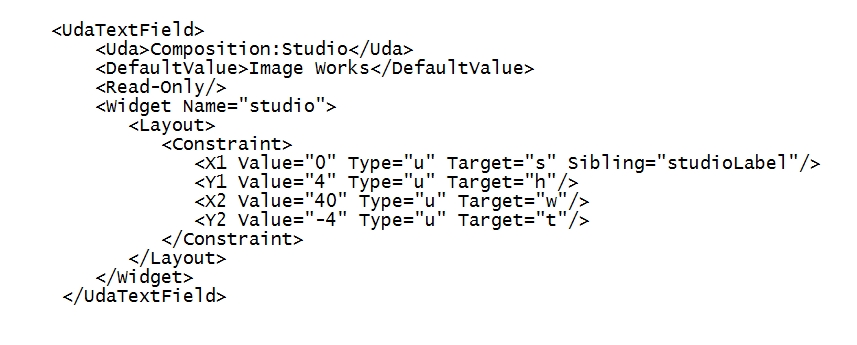
Shown below is an example of how the create a text field, value editor, menu, and toggle button. Note the <Uda> name. To make the UDA unique, it should be prefixed with the data type.
 "Show full-size image")
 "Show full-size image")
 "Show full-size image")
 "Show full-size image")
 "Show full-size image")
An optional XML tag in the resource file is used to specify the default value for each of UDAs when a data type that has that UDA is created. If no default tag is specified, the UDA will be empty. The XML tag is <DefaultValue>.
 "Show full-size image")
An optional XML tag in the metadata.*.xml resource file is used to specify the whether the UDA is read-only. If no read-only tag is specified, the UDA will be read-write. The XML tag is <Read-Only>. For example <Read-Only></Read-Only> or just plan <Read-Only/>. Don't forget the '/'. See the example above. The read-only tag is only for the UI element so that the user cannot modify its value.
