When you sort the timeline with C-mode, you are organizing the shots based on the reel name and the source timecode. If the shot does not have a reel/folder name, then the source timecode is used for sorting. The shots are displayed one after another on a single layer and dissolves and retimes are not displayed. You can choose to have your timeline sorted by EDL reel name, folder name, or DPX reel name.
You want to sort the shots by EDL if you are working with a cut that has been assembled from an EDL, or a cut that is based on a Wiretap EDL. When you sort the timeline using the EDL option, the shots are arranged by the EDL reel name in alphanumerical order (numerical before alphabetical), and then by source timecode in ascending order (e.g., from 00:00:00:00 to 23:59:59:29). This data is read from the cut file EDLReelName XML tag.
If you are sorting the timeline with the Folder option, the shots are arranged in alphanumerical order (numerical before alphabetical) by the folder or directory name where you are storing your scans or captured footage (see Recommended Directory Structure for Projects). You can view the folder name in the file browser. This data is retrieved from the cut file AliasName XML tag. This tag is based on the name of the reel folder or directory when you are working with imported scans or captured footage.
Lastly, you can sort the timeline of DPX files by their reel name. This data is read from the XML tag DPXReelName within the cut file. This XML tag is based on the data in the DPX header of the imported film scans. For more information on XML tags, see XML in Lustre.
To sort the shots using C-mode sort:


The shots are now sorted according to your criteria. A green border appears around the timeline canvas to indicate that you are working in a sorted timeline.
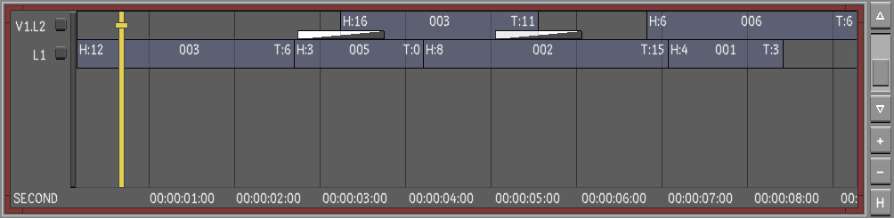
The following image is a C-mode sort using the EDL option with heads and tails enabled. The heads and tails are showing 0 (zero), so you can work on every single frame within the shot.
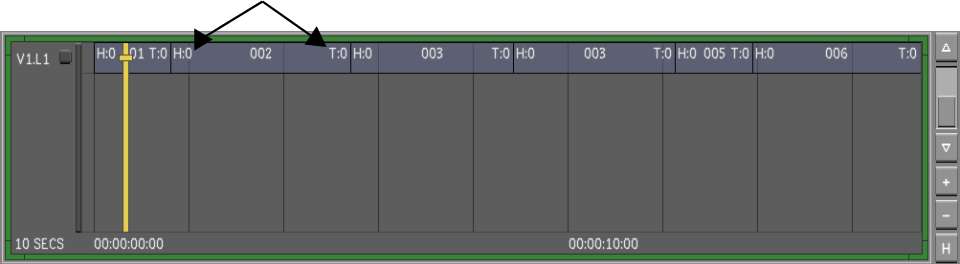
This image shows the timeline being sorted by the C-mode EDL option and the heads and tails are disabled.

Once you have completed grading the shots, you can do one of the following:
To return the sorted shots to the original EDL:
You can also sort the shots without accessing the Assemble menu. You can sort the shots by using the hotkeys.
| Press: | To: |
|---|---|
| Alt+F11 | Sort the timeline in C-mode by EDL reel name and heads and tails are enabled. |
| Alt+F12 | Sort the timeline in C-mode by EDL reel name and heads and tails are disabled. |
| Ctrl+Alt+F11 | Sort the timeline in C-mode by folder name and heads and tails are enabled. |
| Ctrl+Alt+F12 | Sort the timeline in C-mode by folder name and heads and tails are disabled. |
| Ctrl+Alt+Shift+F11 | Sort the timeline in C-mode by DPX reel name and heads and tails are enabled. |
| Ctrl+Alt+Shift+F12 | Sort the timeline in C-mode by DPX reel name and heads and tails are disabled. |


