Use the Project settings to define:
For the project's directory structure, follow the guidelines described in Recommended Directory Structure for Projects. When entering a directory path, you can:


(a) Percent/Pixel option box (b) Drop Frame button (c) Frame Rate field (d) Pixel Ratio slider
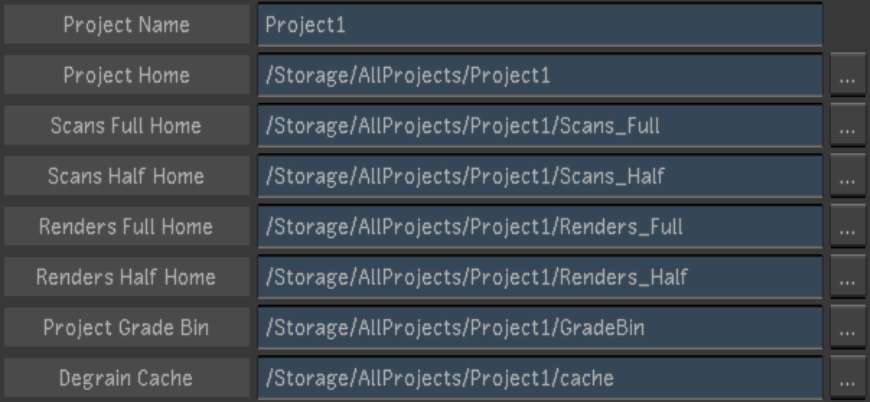
Project Name fieldEnter the name of the project.
Project Home field Enter, or browse to, the location of the main project directory.
Scans Full Home field Enter, or browse to, the location of the scanned footage directory.
Scans Half Home field Enter, or browse to, the location of the proxy footage directory.
Renders Full Home field Enter, or browse to, the location of the render directory for renders of (full resolution) footage.
Renders Half Home field Enter, or browse to, the location of the render directory for renders of proxy footage.
Project Grade Bin field Enter, or browse to, the location of the grade files for the current project.
Degrain Cache field Enter, or browse to, the location of the user-defined cache location for degrained frames. When there is no access to the Scan directories, and the Degrain File Location option box in the Rendering menu is set to Saved with Scan, cached frames are saved in this location. See Rendering Settings.
Architecture option box Toggle to set the default grading architecture and colour space while working in Lustre to logarithmic or linear.
Scan Type option box Toggle to set the default scan type.
Frame Rate buttons Enable the default frame rate for the project's timeline and editing tools.
Drop Frame button Enable when your shot contains drop frames. For the majority, this button is greyed-out since most of the default frame rates do not support drop frames. This button becomes available when you select a frame rate that supports drop frames (e.g., you have selected 29.97 or you have entered a personal frame rate within the frame rate field).
Frame Rate field Displays the selected default frame rate or you can enter your own frame rate within the field.
Output Colour Space option box Toggle to set the default colour space architecture when rendering to logarithmic or linear.
Percent/Pixel option boxToggle to set whether Lustre will determine the proxy width as a percentage of the original footage, or as a fixed number of pixels.
Proxy Width sliderUse to define the default proxy width. Whether it is a percentage or a number of pixels is defined by the Percent/Pixel option box.
Pixel Ratio button Enable to configure the default aspect ratio.
Pixel Ratio slider Sets the default aspect ratio. Available if Pixel Ratio is enabled.
Stereoscopy button Enable to work on a stereoscopic project without selecting a stereoscopic raster.
RED Timecode option boxSelect which RED media timecode to transcode. Note that when conforming an EDL, overiding the timecode data of the clips with a different timecode track will prevent relinking in the Autodesk Visual Effects and Finishing applications. For more information about RED media and transcoding, see Transcode Options.
| Select: | To: |
|---|---|
| Primary | Select either the Time of Day or Edgecode timecode. Only select this option if you know which timecode has been set as the primary. |
| Time of Day | Establish a timecode field that is set by the internal clock from the RED camera. |
| Edgecode | Establish a timecode field that is set by the camera operator. |
Project Template fieldEnter the name of a project template you wish to create in this field before clicking Save.
Save button Click to save the project settings of the current project to the template named in the Project Template field. Use to create a new template or to update an existing template.
Load button Click to load a project template after you select a template in the Template Name list.
Delete button Click to delete a project template after you select a template in the Template Name list.
Template Name list Select an existing project template from this list before loading or deleting the selected template. See Working with Templates.