Saving Intermediary Grades


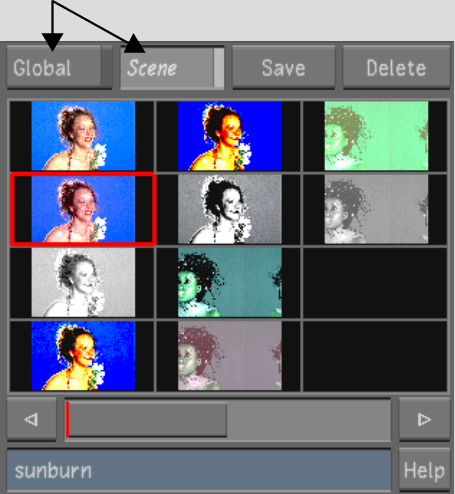
You can save intermediary grades to the Grade bin. When you save intermediary grades, all the settings are saved with a thumbnail for identification. Save your shot settings for use within a scene or throughout the entire project—by saving them to the Scene Grade bin or the Global Grade bin, respectively.

To save intermediary grades to a Grade bin:

  1. Using the various options on the menus, modify a shot to your satisfaction.
  2. Select the Grade bin you want to use.

    Show small imageShow large image

    Image courtesy of The House

    Click: To save:
    Scene Shots for use within the current scene.
    Global Shots for use throughout the entire project.
  3. Scroll to the area of the Grade bin you want to use. To scroll through a Grade bin, middle-click and drag right or left, or use the horizontal slider located immediately below the Grade bin.
  4. Do one of the following:

    Show small imageShow large image

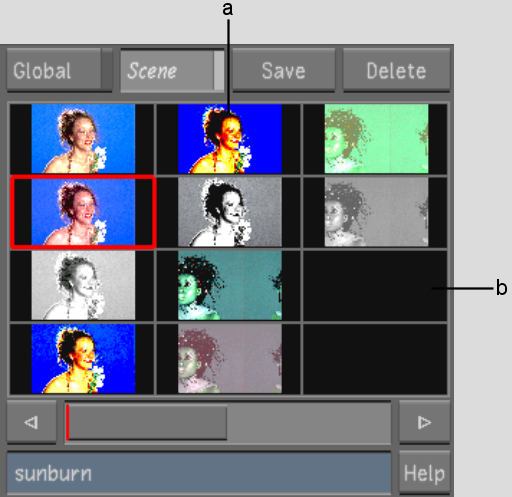
    (a) Used storage container  (b) Unused storage container  

    Image courtesy of The House

    The red line in the slider indicates the current position.

    NoteWhen you add a grade to a position in the last column of the Grade bin, three new columns are automatically added to the right. You can add an unlimited number of grades.
  5. Enter a name in the Name field.
    NoteSpaces are not permitted in naming conventions. It is recommended that underscores be used instead of spaces when working on either Linux or Windows.
  6. Click Save.

    The settings from the current shot in the timeline are saved to the intermediary grade and a thumbnail of the current frame appears in the Grade bin.

    TipYou can use the thumbnail as a reference image while you work on another shot. See Viewing Reference Images.

To save intermediary grading information from several shots to the Grade bin:

  1. From the Storyboard or the Multi-Layer Timeline, select shots whose grading information you wish to save to the Grade bin. For more information about selecting elements in the Multi-Layer Timeline, refer to Selecting Elements.
    NoteIf you do not select any shots, the entire timeline's grading information is saved.
  2. In the Grade bin, select the storage container where you wish to save your grade.
  3. Make sure the positioner is over a shot. If you are in the Storyboard view, see Navigating Using the Timebar and Storyboard. If you are in the Multi-Layer Timeline view, see Timeline Navigation Controls.
  4. Hold down the Shift key while pressing the Save button.
    WarningIf you are saving more than one grade to the Grade bin, each grade is saved into one storage container starting from the selected container and proceeding column by column from left to right. Therefore, be aware of the storage containers whose existing grading information will be overwritten.

    If you are saving to storage containers that already have grading information, Lustre prompts you to confirm you want to overwrite this grade.

  5. If prompted, confirm or cancel the action, as required. See Confirming and Cancelling Actions.

    The selected grades (or all grades if no shots are selected) are saved to the Grade bin.