Autodesk recommends archiving directly from a clip library. It allows you to organize your library entries in a clip library in advance. You can also archive from the desktop, but this method gives you less control over the organization of your entries before they are archived.
You can archive entries from any local or shared clip library.
When you save from a clip library, there are two methods for organizing the entries: Normal and Compact. Both methods perform some optimization to save space in the archive. The Compact method creates a backup set, which acts like a container that holds the archived material. It appears in the archive as an entry called Backup Set, and all selected entries are within it. Each time you use Compact, a new backup set is created. When entries are archived using the Normal option, the entries appear directly in the archive.
With Normal archives, if a frame appears more than once in a source clip, the frame is archived only once. This saves space on the archive and is most noticeable if your clips contain many still shots.
In a Normal archive, each source clip is archived individually, making restoring individual clips easier and faster and ensuring that frames are output to tape in play order. This makes clips viewable on a VTR archive.
Compact archives optimize archiving. If a frame appears more than once in any clip being archived, the frame is archived only once. No image data for duplicate frames is archived. This saves a significant amount of space on the archive if your clips contain a lot of duplicate frames.
When you create a Compact archive, the archived material is stored in a backup set. You can expand the backup set in the archive library to view and select the clips. You can restore selected clips from a Compact backup set without having to restore the entire archive.
Compact archives are the recommended archive type for Autodesk Smoke and Backdraft Conform projects since they are usually archived as a whole.
To archive entries from a clip library:


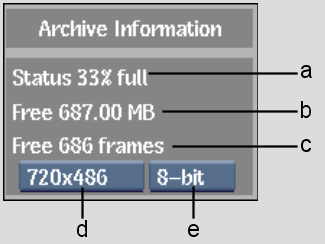
(a) Percentage of space used (b) Available space in MB (c) Available space in frames (d) Resolution box (e) Bit Depth box
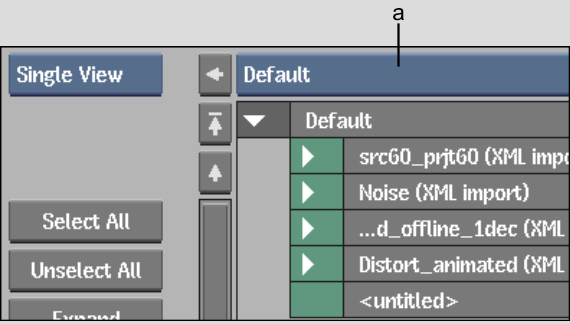
The current clip library appears.


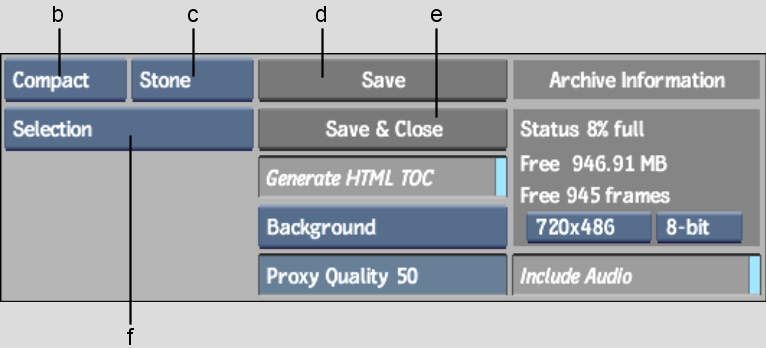
(a) Clip Library box (b) Backup Set box (c) Archiving Mode box (d) Save button (e) Save & Close button (f) Entry Type box
| Select: | To: |
|---|---|
| Compact | Maintain a highly organized archive and save space on the device. |
| Normal | Archive without using a backup set. Entries are archived directly to the table of contents. Source clips remain in play order on tape. |
| Select: | To: |
|---|---|
| Stone | Write the clip to the framestore and archive the content of the media file. |
| Linked | Archive only the path to the media file. |
| Select: | To archive: |
|---|---|
| Project + Shared | Project Desktop, setup directory, clip libraries, shared clip libraries, and metadata |
| Project | Project Desktop, setup directory, clip libraries, and metadata |
| Project Libraries | Current project clip libraries |
| Project Libraries + Shared | Current project clip libraries and imported (shared) clip libraries |
| Project Libraries | Current project clip libraries |
| Selection | Selected entries |
Both Normal and Compact archives add a second level of optimization by saving only one copy of clips. If a clip appears more than once in the archive, the clip is archived only once. Also, if you append to an archive and a clip already exists in the archive, the clip is not added to the archive—that is, no image data for the duplicate clip is archived.