


By default, nHair collides with other Nucleus objects, such as nCloth, nParticles and passive collision objects that are assigned to the same solver. In this section, you convert the sphere to a passive collision object. You then set hairSystemShape node attributes, such as Compression Resistance and Bend Resistance, to improve the behavior of the hair curves when they collide with the sphere.
To convert the sphere to a passive collision object
 .
.
Since the nHair curves already belong to nucleus1, assigning the passive collision object to the same Nucleus node means that the objects are part of the same Nucleus system. In addition to colliding with each other, Nucleus objects assigned to the same solver are affected by the same Nucleus node settings. For example, increasing the Nucleus Gravity or Wind Speed would affect the nHair as well as the passive collision object.
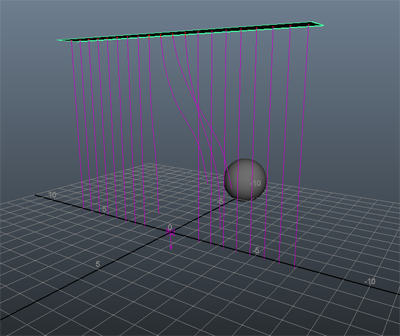
The sphere collides with the curtain, pushing the strands of hair aside as it passes through.
You can improve the behavior of the hair curves when they collide with the sphere by adjusting hairSystemShape node attributes such as Compression Resistance and Bend Resistance.
To enhance the curtain for collisions
 icon to open the Attribute Editor.
The new settings decrease the nHair's resistance to collisions, making the curves react more realistically when they collide with the sphere.
In the next section of the lesson, you a assign Paint Effects brush to the hair curves to create beads on the curtain.
 Except where otherwise noted, this work is licensed under a Creative Commons Attribution-NonCommercial-ShareAlike 3.0 Unported License