Show in Contents

Add to Favorites

Home: Autodesk MatchMover Online Help

Shake export

Importing and exporting

Inferno export

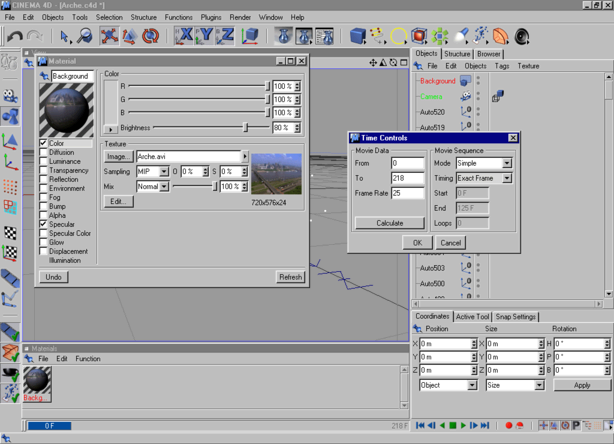
Cinema 4D export
Scenes exported by MatchMover
can be read directly in Cinema 4DTM; all points
are exported as Null objects.
Select File
> Open and choose the *.c4d file exported by MatchMover.
Compositing with your
footage requires some extra manipulations.
- Create a background object by selecting Objects
> Scene > Background.
- Open the Material Manager window
and create a new Material by selecting File > New Material.
- Open the Material Editor by
double-clicking on the newly created material.
- Open the image browser by clicking on
the Image button and choose your video
file.
- Press Edit to open
the Time Controls.
- Set the first frame, last frame and appropriate Frame
Rate. Also set the Timing to Exact
Frame.
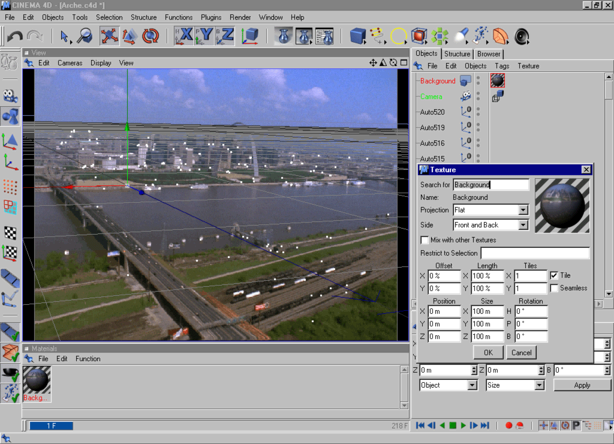
- Add a Texture property
to your Background Object.
- Set it to the newly created material.
Change the projection to Planar.