


Learning Resources > Tutorials > Getting Started with Maya > Polygon Texturing > Lesson 2: UV unfolding >
Outputting UVs
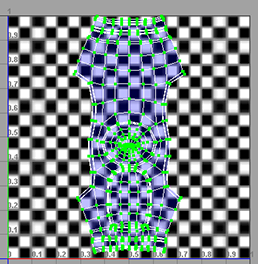
Now that you have your unfolded UVs, you need to export them so that you can draw a texture on them. You can do this by taking a snapshot of your UV layout.
 -click
the torso in the perspective view and select UV from
the marking menu.
-click
the torso in the perspective view and select UV from
the marking menu.
This step is necessary because a UV snapshot only captures what is in the 1 x 1 UV texture space (the upper right corner).
Maya creates a file named torso_UVs.iff in the Getting Started folder. If you open this file, you can see the exported UV mesh.
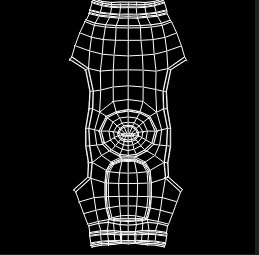
You can now open this file using an external image editor and paint your texture using the mesh as a guide.