Learning Resources > Tutorials > Getting Started with Maya > Live > Lesson 2: Solving with
survey data >
Creating additional Plane
constraints
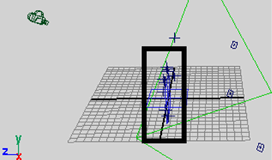
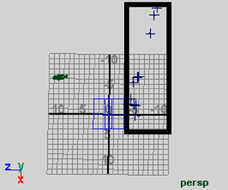
A top view reveals an illogical placement of the fence locators. Instead of being aligned with the XY plane, they are at an angle. To correct this problem, you need another Plane constraint that represents the fence.
To create a Plane constraint using the fence locators
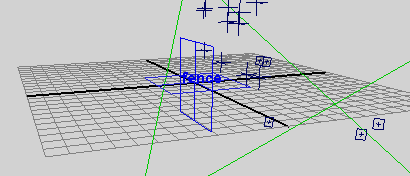
In this case, only the plane’s rotation matters, not where you move it. No matter where you move the fence Plane constraint, the fence points will remain on the grid because the solver must obey the ground constraint you created.
The scale of the Plane constraint never matters because the solver treats it as infinitely large.