Skinning a cylinder by
smooth skinning
This example is similar to
Skinning a cylinder by rigid skinning,
so that you can compare smooth skinning with rigid skinning.
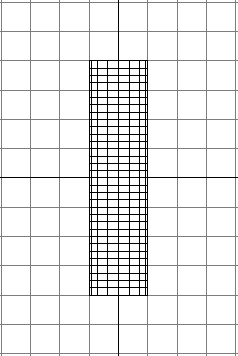
To create the cylinder
- Create a NURBS cylinder with the default
options, except set Height to 8, Number
of Sections to 16, and number of Spans to
32.
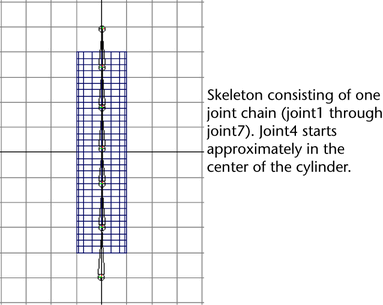
To create the skeleton for the cylinder
- Build a skeleton for the cylinder. Have
the skeleton consist of a single joint chain with about seven joints.
To bind by smooth skinning
- Select skeleton’s root joint (default
name: joint1).
- Select
Skin > Bind Skin > Smooth Bind.
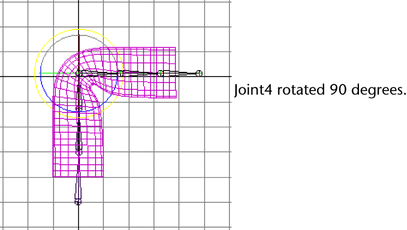
To exercise skeleton
- Select the joint approximately at the
center of the cylinder (for instance, joint4), and rotate it about
90 degrees.
To paint creasing effects
- Select smooth shaded display mode (hotkey:
press 5).
- Select the cylinder.
- Select
Skin > Edit Smooth Skin > Paint Skin Weights Tool >
 .
.
The Paint
Skin Weights Tool displays. The Influence box
lists the names of all the joints.
- In the Influence box,
click on a joint name. For example, click joint3.
- Click on another joint name. For example,
click joint4.
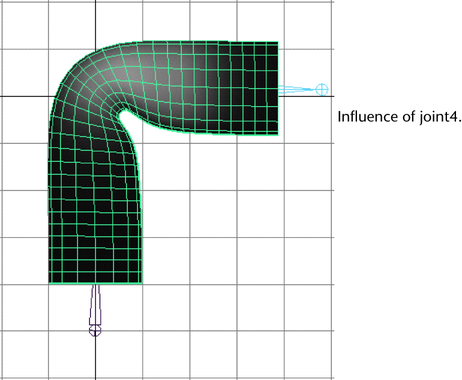
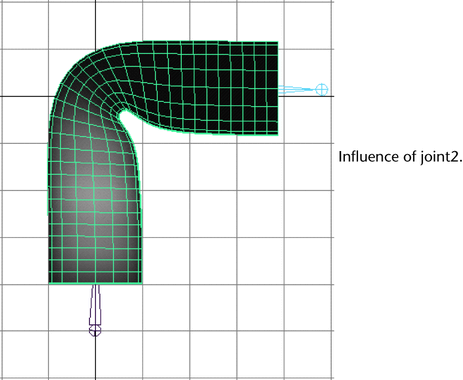
- Check the influence of one more of the
joints. For example, check the influence of joint2.
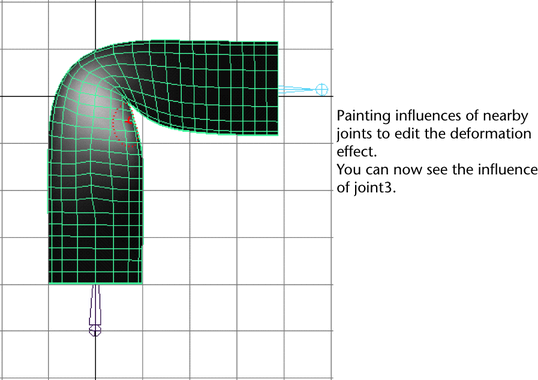
- Use the Paint Skin Weights Tool’s
brush to paint how the joints influence creasing.
Skinning a hand
WarningIf you want to paint
smooth skin weights on a polygon mesh, then the mesh’s UV maps must
be clean and free of overlapping UVs. Otherwise, undesired results
will occur.
To create the polygonal sphere to simulate
a muscle bulge
- Create a polygonal sphere, adjusting
the scale attributes to approximate the muscle shape (for example,
set Scale X to 1.5, Scale
Y to 0.7, and Scale Z to
0.7).
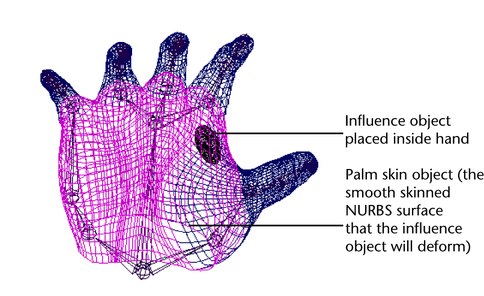
- Position the sphere inside hand, between
thumb and index finger.
To make the polygonal surface an influence
object
- Select palm skin object. (This is the
smooth skinned NURBS surface that the sphere will deform.)
- Select the sphere.
- Select
Skin > Edit Smooth Skin > Add Influence.
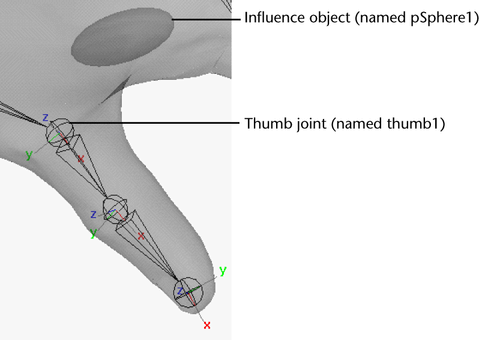
To link the bulge to fist formation
- Now you will link the rotation of the
thumb joint to the scaling of the influence object (the polygonal
sphere).
- Open the Set Driven Key window
(
Animate > Set Driven Key > Set ).
- Load thumb1 (the thumb joint) as driver,
select rotate Z attribute, and set the
attribute to 0.
- Load pSphere1 (the influence object)
as driven, select the scale Y and scale Z attributes.
(Keep scale Y and scale
Z at 0.7.)
- Click Key.
- Set thumb1’s rotate Z attribute
to -40.
- Set pSphere1’s scale Y attribute
to 0.8.
- Set pSphere1’s scale Z attribute
to 1.
- Click Key.
- Click Close to
close the editor.
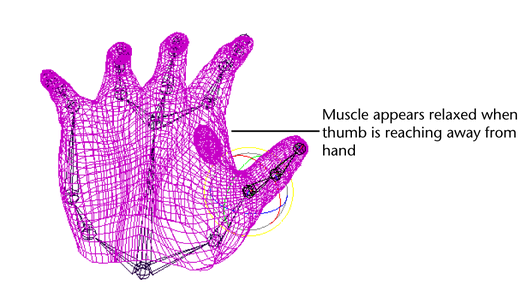
Testing the deformation
Now when the thumb is
away from the palm, the muscle will appear to be relaxed.
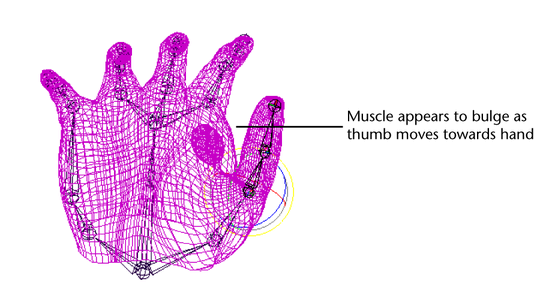
But as you rotate the
thumb towards the palm, the surface bulges to indicate muscle action.