Edit with joint cluster flexor manipulators


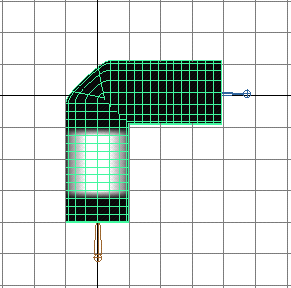
Cluster flexors include manipulators you can use to edit their deformation effects. A cluster flexor’s manipulators include a pair of rings. Each ring includes two manipulators: a diamond manipulator and a radial manipulator. Located at the center of the ring and along the center of a bone, the diamond manipulator controls the extent of the smoothing provided by the cluster flexor. Located on the ring, the radial manipulator controls the magnitude of the smoothing.

To edit with the cluster flexor manipulators

  1. Select the cluster flexor handle (the J icon).
  2. Select the Show Manipulator Tool.
  3. To edit the extent of smoothing, select one of the diamond manipulators.
  4. Drag the diamond manipulator towards or away from the joint.
  5. To edit the magnitude of smoothing, select one of the radial manipulators.
  6. Drag the radial manipulator towards or away from the diamond manipulator.

Example

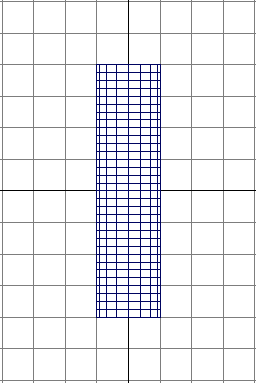
Skinning a cylinder by rigid skinning

This example is similar to Skinning a cylinder by smooth skinning, so that you can compare rigid skinning with smooth skinning.

To create the cylinder

  1. Create a NURBS cylinder with the default options, except set Height to 8, Number of Sections to 16, and Number of Spans to 32.

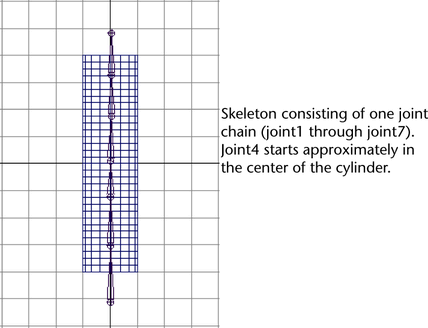
To create the skeleton for the cylinder

  1. Build a skeleton for the cylinder. Have the skeleton consist of a single joint chain with about seven joints.

To bind by rigid skinning

  1. Select skeleton’s root joint (default name: joint1).
  2. Select Skin > Bind Skin > Rigid Bind.

To exercise skeleton

  1. Select the joint approximately at the center of the cylinder (for instance, joint4), and rotate it about 90 degrees.

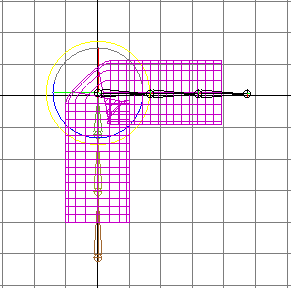
Rigid skinning provides a sharp deformation effect around the rotated joint. You can adjust the deformation effect with the Paint Weights Tool.

To paint creasing effects

  1. Select smooth shaded display mode (hotkey: press 5).
  2. Select the cylinder.
  3. Select Edit Deformers > Paint Cluster Weights Tool > .
  4. In the Tool Settings window, the paintWeights box should be displayed.
  5. Note the cluster box.
  6. Click on a rigid skin point set. For example, joint3Set1.

  7. In the Clusters box, click on another rigid skin point set. For example, click joint4Set1.

  8. Check the other rigid skin point sets. For example, check joint2Set1.

  9. Use the Paint Cluster Weights Tool’s brush to smooth the deformation effect.

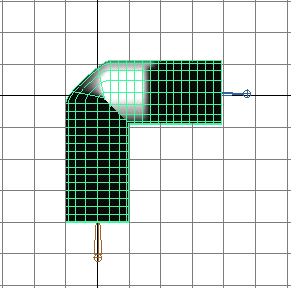
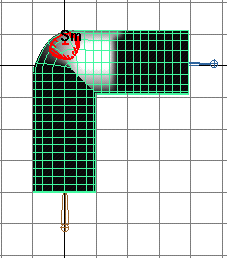
To further smooth and deform rigid skinning, you can use flexors. For more information, see Create all types of flexors.