Adding fur shadowing attributes
to lights
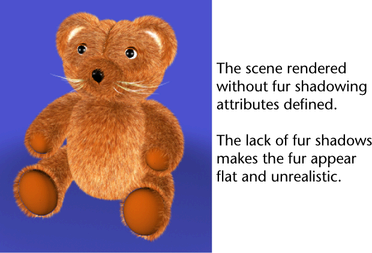
If the scene were rendered at this point, the fur would not appear realistic because it would not contain shadows. To correct this you must turn on fur shadowing attributes for the spotlights.
To add fur shadowing attributes to spotlights
This adds adjustable fur shadowing attributes to all three spotlights in the scene that were not included with the default spotlights. These extra attributes let you refine how the lights affect the fur on the model when rendering.
As your scene gets increasingly complex the Outliner becomes useful for selecting specific objects in the scene, especially when you want to select objects that are hidden by other objects, or are outside the camera’s field of view. Selecting items in the Outliner is much easier when you have named the objects and lights in your scene.
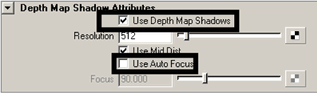
Depth Map Shadows are one technique for producing shadows in a scene by determining which objects in the scene are in the path of a shadow casting light.
Fur Shadows can be incorrectly placed when Auto Focus is turned on. To avoid this, turn off Auto Focus for all spotlights that have Fur Shadow Maps turned on and instead set the Focus value to Cone Angle + (Penumbra * 2).
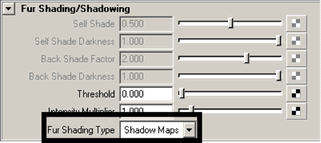
The Autoshade attribute provides a quick simulation of shading that occurs at the root and back of the fur strands without the added complexity of a shadow map.