Learning Resources > Tutorials > Getting Started with Maya > Subdivision Surfaces > Lesson 1: Modeling a subdivision
surface >
Refining surface components
By default, a subdivision surface displays up to three levels of detail (0, 1, and possibly 2). The 0 level is the least refined. You can increase the level of detail for a selected region to at most 13 levels. Though increasing the number of levels allows more precision, it also slows Maya processing. You’ll accomplish most of your modeling needs at levels 0, 1, and 2.
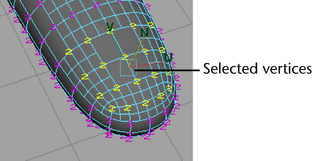
If you display level 2 vertices on the hand, you’ll notice that there are no level 2 vertices near the fingertips. To create the indentation of a finger nail, you need more vertices than levels 0 and 1 provide. In the next steps, you’ll add level 2 vertices at a fingertip so you can create a fingernail.
To create more precision in the fingernail region


 . In
the Tool Settings window, turn
on Normal, then close the window.
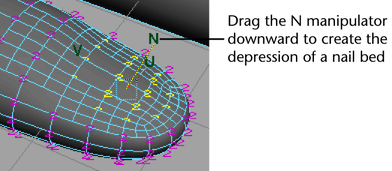
You can thereafter use the Move Tool manipulator
to move vertices in a direction normal (perpendicular) to the surface.
. In
the Tool Settings window, turn
on Normal, then close the window.
You can thereafter use the Move Tool manipulator
to move vertices in a direction normal (perpendicular) to the surface.