


Change fur curve attractor
set attributes
After you attach hair curves to a fur description, a fur curve attractor set is created. You can edit the attributes of the fur curve attractor set at any time. The attributes define how the fur relates to the hair curves. You can do this in the following ways:
When you edit a fur curve attractor set, any changes you make apply to all the fur descriptions assigned to that attractor set. The attributes are applied to each hair curve in the set.
To edit fur curve attractor sets
Randomly vary fur curve attractor set attribute values
You can randomly vary fur curve attractor set attribute values for a more natural effect using noise amplitude and noise frequency. Noise amplitude refers to the variance of an attribute, and noise frequency refers to the amount of variance over a distance or area.
To set noise amplitude and noise frequency
Paint attractor set attribute values
Just as you can paint fur attribute values (see Paint fur attribute values), you can paint fur curve attractor set attribute values on an area without changing the fur curve attractor set attributes for the entire surface.
When you paint values on a surface, Maya creates a map of the values for each of the fur curve attractor set attributes that you change.
You can paint the following fur curve attractor set attributes: Radius, Power, Influence, Start Length, End Length, and Threshold Length. For information about these attributes, see FurCurveAttractors node. You can also paint Attraction per fur description. For more information, see Attraction.
You will find these commands increase your efficiency as you work with the Paint Fur Attributes Tool.
 . The Paint
Fur Attributes Tool Settings window opens, followed by
the Paint Scripts Tool editor.
. The Paint
Fur Attributes Tool Settings window opens, followed by
the Paint Scripts Tool editor.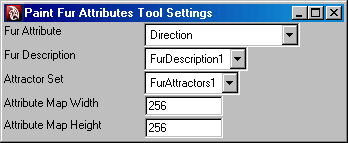
To paint attribute values greater than 1
Map attractor set attribute values
Just as you can map fur attribute values, you can map values for each fur curve attractor set attribute by importing file textures. To map fur curve attractor set attributes, follow the procedures for mapping fur attribute values, but edit the attributes for the fur curve attractor set instead of the fur description. For details, see Map fur attribute values.
Remember that because Fur can use only simple file texture maps, every texture you import must be “baked” to convert it to a file texture.
Change attribute map value ranges
Changing the attribute map value ranges will only have an effect if the attribute has been painted or texture mapped. By default, attribute map value ranges are defined to be between 0 and 1. You only need to change value ranges when you want to paint or map values other than those defined in this range. For example, you could change the range from 0.2 to 0.5, 2.0 to 3.0, or commonly, from 0 to 5. For information on painting values, see Paint attractor set attribute values. For information on mapping values, see Map attractor set attribute values.
You can set value ranges for all attractor set attribute values.
To change attribute map value ranges