Show in Contents

Add to Favorites

Home: Autodesk Maya Online Help

Paint fur attribute values

Creating and modifying fur

Update fur maps

Map fur attribute values
Attribute maps are represented by
grayscales, with black representing a value of 0 and white representing
a value of 1. When you paint a fur attribute on a surface using
the Artisan Paint Fur Attributes Tool,
Maya creates a map for the painted attribute and associates it with
the fur description and the surface the fur description is assigned
to. These maps ensure that the attribute values you paint are applied
to the surface every time you open the scene.
You can also import value
maps for each attribute. Since you cannot paint color attributes
on fur, mapping is a particularly useful technique for applying
multiple colors to fur, for example, leopard skin. You can create
a color attribute map using the 3D Paint Tool and
map it to the Base Color and Tip Color attributes
by dragging and dropping the switch nodes generated by the 3D
Paint Tool. For details, see
To apply multiple textures to attributes on multi-surface objects (using the 3D Paint Tool).
Because Fur can use only simple file texture maps, every texture
you import must be “baked” to convert it to a file texture.
You can import and export
maps in file formats supported by Maya.
NoteIf a file texture
is mapped to a fur description attribute and baked, Maya just reads
from the image file and does not write out anything. Only when procedural
textures are mapped and baked, Maya writes an image file in the
furAttrMap folder.
Find out how to:
Apply a single texture
to objects
If you
are mapping a single texture to a single surface or to a multi-surface object,
use the following procedure.
To
map a single texture to an attribute
- In the Rendering menu
set select
Fur > Edit Fur Description > FurDescriptionName,
where FurDescriptionName is the name
of the fur description you want to edit.
- Do one of the following:
- If you are mapping a texture to a color
attribute, click the Map button beside the attribute
in the Attribute Editor. The Create
Render Node dialog appears. Click the Textures tab,
click the texture you want to map (for example, Ramp)
and adjust the settings in the Attribute Editor.
(To map an existing file, click File and
select the file.)
- Right-click the attribute field and select Create
New Texture. The Create Render Node dialog
appears. Click the Textures tab, click the texture
you want to map (for example, Ramp) and
adjust the settings in the Attribute Editor.
(To map an existing file, click File and
select the file.)
- Create a texture in Hypershade.
Drag and drop the texture node onto the fur attribute you want to
apply the texture to.
NoteThe
Connection Editor may
open when you drag and drop a texture.
- If you are mapping to a color attribute,
select Out Color as the Output and select
the color attribute(s) you are mapping to as the Inputs.
- If you are mapping any other attribute,
select Out Alpha as the Output and select
the attribute(s) you are mapping to as the Inputs.
- In the Attribute Editor,
set Bake Attribute to the attribute
you are mapping to, or set it to All to bake
all mapped attributes.
TipIf you have many
surfaces, baking All attributes may take longer.
To save time, select the individual attribute you want to bake.
- Click the Bake button.
The fur feedback will not reflect the mapped attributes until you
bake.
- If you edit the texture after baking,
bake the texture again, or your changes will not take effect. The
old texture will be overwritten.
Apply multiple textures
to multi-surface objects
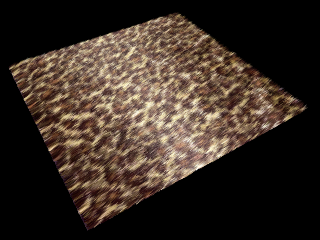
Suppose you create a spotted
color texture for a model of a leopard with a the 3D
Paint Tool and want to map it to the Base
Color and Tip Color attribute of the
fur description attached to the leopard. Each surface making up
the model has a separate file texture. To map each file texture
to the Base Color and Tip
Color you need a way to select the appropriate surfaces
for the texture.
The following procedures
describe the recommended methods of applying file textures to multi-surface
objects.
For another method, see
Use an alternate mapping method.
To apply multiple textures to attributes
on multi-surface objects (in general)
- Create a material in Hypershade.
(For details, see the Shading guide.)
- Select all the surfaces and assign the
material to them.
- Open the Attribute Editor for
the material.
- Click the Map button
for the Color attribute. The Create
Render Node dialog box opens.
- Click the Utilities tab.
- Under Switch Utilities,
click Triple Switch. The attributes
for the triple shading switch display in the Attribute
Editor.
- Under the Switch Attributes section
of the Attribute Editor, click Add
Surfaces to add the surfaces assigned to the material
to the shading switch.
- Map each surface to the appropriate texture,
as follows:
- Under inShape,
click the surface name to select it.
- Click the Map Item button.
The Create Render Node dialog box
appears.
- Click the texture you want to map (for
example, Ramp) and adjust the settings
in the Attribute Editor. (To map an
existing file, click File and select the file.)
- Select the tripleShadingSwitch node in Hypershade to
see it in the Attribute Editor.
- Repeat step 8 for each surface.
- Select
Fur > Edit Fur Description and
then select the desired fur description to see its attributes in
the Attribute Editor.
- Drag and drop the triple switch node
from Hypershade onto the fur attribute
in the Attribute Editor you want to
apply the texture to.
NoteThe
Connection Editor may
open when you drag and drop a texture.
- If you are mapping to a color attribute,
select Out Color as the Output and select
the color attribute(s) you are mapping to as the Inputs.
- If you are mapping any other attribute,
select Out Alpha as the Output and select
the attribute(s) you are mapping to as the Inputs.
- In the Attribute Editor,
set Bake Attribute to the attribute
you are mapping to, or set it to All to bake
all mapped attributes.
If you have many surfaces,
baking All attributes may take longer.
To save time, select the individual attribute you want to bake.
- Click the Bake button.
The fur feedback will not reflect the mapped attributes until you
bake.
If you edit the texture
after baking, bake the texture again, or your changes will not take
effect. The old texture will be overwritten.
To
apply multiple textures to attributes on multi-surface objects (using
the 3D Paint Tool)
- Paint the Maya model using the 3D
Paint Tool. For information on using the 3D
Paint Tool, see
Paint textures on 3D objects in
the Paint Effects and 3D Paint guide.
- Exit the 3D Paint Tool.
- Drag and drop the switch node from Hypershade onto
the fur attribute you want to apply the texture to.
NoteThe
Connection Editor may
open when you drag and drop a texture.
- If you are mapping to a color attribute,
select Out Color as the Output and select
the color attribute(s) you are mapping to as the Inputs.
- If you are mapping any other non-color
attribute, select Out Alpha as the Output and
select the attribute(s) you are mapping to as the Inputs.
- In the Attribute Editor,
set Bake Attribute to the attribute
you are mapping to, or set it to All to bake
all mapped attributes.
If you have many surfaces,
baking All attributes may take longer.
To save time, select the individual attribute you want to bake.
- Click the Bake button.
The fur feedback will not reflect the mapped attributes until you
bake.
If you edit the texture
after baking, bake the texture again, or your changes will not take
effect. The old texture will be overwritten.
Use an alternate mapping
method
When you paint attributes
using the Artisan Paint Fur Attributes Tool or
map file textures to attributes, the maps are listed under Maps in
the Details section of the Attribute
Editor. You can also map attributes from here (file textures
only), although you are more likely to use the method described
under
Apply a single texture to objects or
Apply multiple textures to multi-surface objects.
To map fur value attributes to a surface
- In the Rendering menu
set select
Fur > Edit Fur Description > FurDescriptionName,
where FurDescriptionName is the name
of the fur description you want to edit.
- In the Assigned Surfaces field,
select the surface(s) you want to map values to.
- In the Details section,
go to the attribute you want to map values to (for example, Base
Color).
- Go to the Maps section.
- Click Add Item.
The Import dialog box opens.
- Select the value map you want to map
to the selected surface and click Import. The
Surface name and assigned map appear in the map list.
- Repeat steps 2 to 6 for each assigned
surface you want to map values to.
To assign a different map to a mapped
surface
- In the Rendering menu
set select
Fur > Edit Fur Description > FurDescriptionName,
where FurDescriptionName is the name
of the fur description you want to edit.
- In the Details section,
go to the attribute you want to assign the maps for.
- Go to Maps.
- Select the map you want to change.
- Click Map Item.
The File dialog box opens.
- Select the value map you want to map
to the selected surface and click OK. The Surface
name and assigned map appear in the map list.
Apply animated file textures
to objects
Fur attributes can be
mapped to animated file textures. Map the attribute in the normal
way, animate the filename numbers and then click Bake.
You can apply a series
of animated file textures to furry objects to make the fur appear
animated. This is useful if you want to animate a character starting with
no fur and growing full fur, such as a person turning into a werewolf. For
an example, see
Make fur spread using animated file textures.
For information on creating
a series of animated file textures, see
Make fur spread using animated file textures.
To apply animated file textures to an
object
- Map the texture to the desired fur attribute.
- Right-click the attribute in the Fur
Description node and select Create New Texture.
- Select the File texture
and specify the first texture in your sequence, for example, growFur.1.iff.
- To animate the texture filename numbers
automatically, turn on Use Image Sequence in
the file node. This automatically sets keys for the file textures
on a 1 to 1 basis. For more information about this option, see
Create an animated image file background in
the Rendering guide
- In the Fur Description node,
select the mapped attribute from the Bake Attribute drop-down
list and then click the Bake button.
- Play the animation to see the animated
fur.