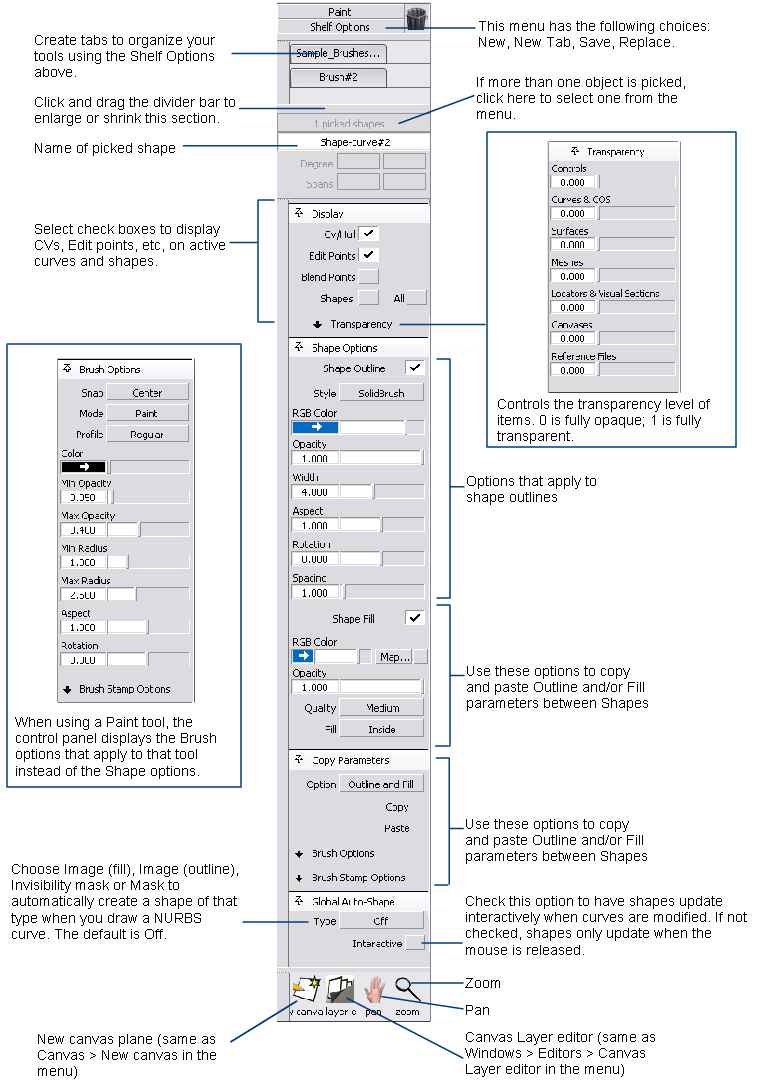
The shelf area contains shelf sets, which are sets of tools you can customize to help with your workflow. You can change the contents and number of shelf sets in this area, and compress them or expand them by clicking the tabs.
This area also lets you have more window real estate by offering a compact alternative to the main shelf window. For example, you can put all the symmetry tools in the shelf set area and then close the main shelf window for a larger view of your model.
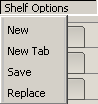
Click the Shelf Options tab for a drop-down menu that lets you add, save, clear, and replace shelf sets in the shelf area.
Click the Shelf Options tab for a drop-down menu that lets you add, save, clear, and replace shelf sets in the shelf area.
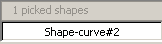
The Pick list isolates a single shape from a collection of shapes. The white text field displays the name of the picked shape.
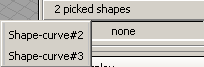
You can pick more than one shape in Alias. The gray text box tallies all picked (and active) shapes in the modeling space. To view a drop-down list of all selections, and to switch between shapes, click the gray text box.
To rename a picked shape, type the new name into the white text field.
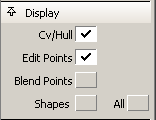
For a better view of your design, the Display options let you display or hide the following items on the picked geometry:
To display or hide all shapes, put a check mark in the All check box, to the right of Shapes.
This set of options lets you control the level of transparency of geometry and other items such as locators and canvases.
Transparency is achieved by blending the object color into the background color.
These sliders are also available from WindowDisplay > Transparency ❒.
❒.
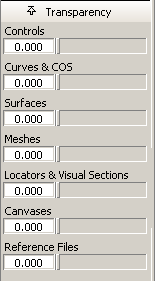
A value of 0.0 means the item is completely opaque. A value of 1.0 means the item is completely transparent and invisible.
The Shape options define shape properties. You can also set them through the Shape Editor. The values are kept synchronized between the two.
See Windows > Editors > Shape Editor.
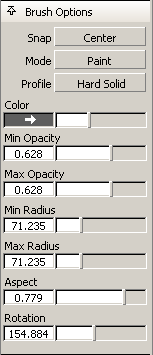
Slide to control the opacity of the outline. Opacity is a way of representing how “see-through” the brush paint is. (Opacity is the opposite of transparency.) You cannot see anything underneath paint that has an opacity of 1. The lower the opacity, the more you can see through the paint. Paint that has an opacity of 0 is invisible.
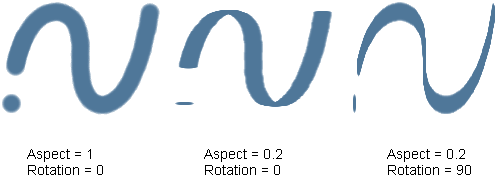
Aspect controls how flat or circular the brush stamp is. An aspect ratio of 1 means the brush stamp is circular. The lower the aspect ratio, the flatter the brush stamp. The angle of a flat stamp is based on the brush Rotation.
Rotation is the angle (measured in degrees) of the brush stamp. If Aspect is less than 1, changing Rotation makes the brush stamp more horizontal (0) or more vertical (90). The range is 0 - 360.
Brushes apply paint to a canvas plane in strokes. A stroke consists of a series of closely spaced stamps. If you click a brush onto a canvas plane, instead of dragging the stylus, you apply a single stamp of paint. You can control how strokes are generated from stamps.
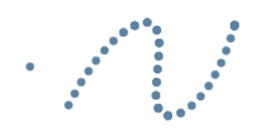
The Spacing slider controls the space between stamps in a stroke. Low values produce smooth strokes with no spaces between stamps. Higher values produce strokes that appear as a series of dots. The valid range is 0 - 255.
Slide to control the opacity of the outline. Opacity is a way of representing how “see-through” the brush paint is. (Opacity is the opposite of transparency.) You cannot see anything underneath paint that has an opacity of 1. The lower the opacity, the more you can see through the paint. Paint that has an opacity of 0 is invisible.
You can automatically create a shape, invisibility mask, or mask as you create a curve using the Type drop-down list in the Global Auto-Shape section in the Paint Panel.
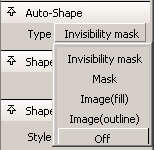
Creates a mask from curves that hides the paint on that image layer.
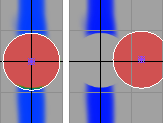
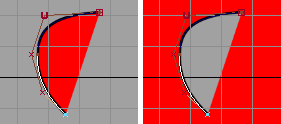
Invisibility masks hide portions of the image layer, and paint applied on top of an invisibility mask becomes invisible. However, Invisibility masks do not block paint like a mask. When the Invisibility mask is removed, the revealed image layer is painted. More frequently, you use invisibility masks to hide portions of a layer that you do not want to erase.
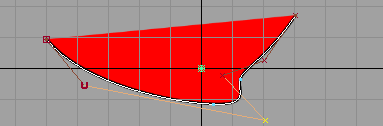
As shown above, the invisibility mask hides paint, but does not block brush tools.
Creates a mask from curves.
A mask is way of protecting areas of an image layer from brushes, erasers, and from certain image layer operations (for example, clearing an image layer, blurring an image layer, and so on).
Like invisibility masks, masks hide a portion of the image layer. Unlike invisibility masks, masks block brush tools.
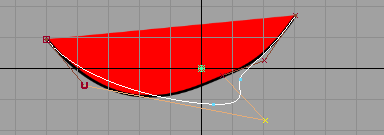
Creates a shape from a curve or set of curves.
You cannot create a shape in the perspective view. If the curves of a shape do not form a closed region, then the end points of the curve ends connect by a straight line segment that does not have any outline properties. Different properties can be assigned to the fill area and the outline curve.
The Interactive check box controls how your shape shows changes when you modify the curve(s).
The Brush Options are visible on the Paint Panel when you have a tool from the Paint palette selected, or a tool from the Sketch#2 shelf selected.
This section displays frequently modified attributes of a brush.
When a brush tool is active, the cursor becomes a crosshair with the letter P (for paint) or E (for eraser).
When you hold the cursor over the canvas, the cursor also displays a preview image of how the brush will apply paint to the sketch.
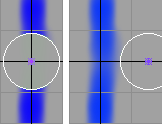
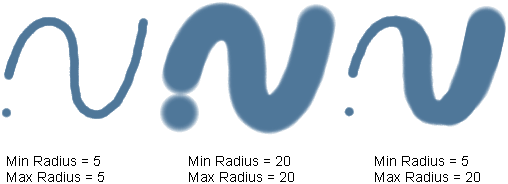
In the Paint Panel or Brush Options box, adjust the Min Radius and Max Radius sliders or enter values in the Min Radius and Max Radius fields. These values are measured in pixels (of the sketch image plane). The maximum brush size is 255. Max Radius is displayed in a solid line and Min Radius is displayed in a dotted line.
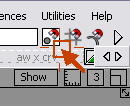
The  button in the right-hand side of the Alias main menu bar must be clicked (white) for this feature to work.
Click Mode to select a brush function.
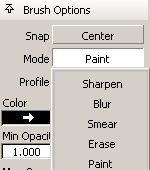
These options control whether the brush will:
Controls the softness or hardness of the brush stamp edges. Select one of Regular, Solid, Hard Solid, or Buzz from the pop-up menu to obtain the following brush profiles.
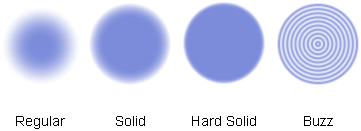
To use a brush profile you have customized, select the Custom menu item. Double-click any brush icon in the Sketch#2 shelf to open the brush editor for customization.
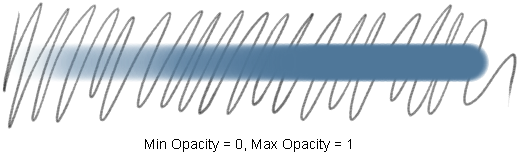
You can make the brush opacity change based on how hard you press the stylus on your tablet. The Min Opacity is the minimum opacity for the brush (when you press lightly with the stylus) and the Max Opacity is the maximum opacity for the brush (when you press hard with the stylus). If you do not want the opacity to vary with stylus pressure on the tablet, set the Min Opacity and the Max Opacity to the same value.
The size of a brush is based on its Min Radius (when you press lightly with the stylus) and its Max Radius (when you press hard with the stylus). If you do not want the size to vary with stylus pressure on the tablet, set the Min Radius and the Max Radius to the same value. Small brushes are more responsive than large brushes.
Aspect controls how flat or circular the brush stamp is. An aspect ratio of 1 means the brush stamp is circular. The lower the aspect ratio, the flatter the brush stamp. The angle of a flat stamp is based on the brush Rotation.
Rotation is the angle (measured in degrees) of the brush stamp. If Aspect is less than 1, changing Rotation makes the brush stamp more horizontal (0) or more vertical (90). The range is 0 - 360.
The Brush Options are visible on the Paint Panel when you have a tool from the Paint palette selected, or a tool from the Sketch#2 shelf selected.
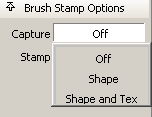
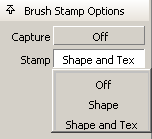
The Brush Stamp Options let you capture a snapshot of an image to use as a brush. You can capture just the shape, or the shape and its texture (color) as well. The capture drop-down takes the snapshot, and immediately reverts to Off. The Stamp drop-down menu then controls the brush. The Stamp menu lets you choose whether to paint with only shape, or both shape and texture.
When the capture tool is active, the cursor becomes a small camera with the letter S if shape is selected, or S,T if shape and texture is selected.
When a brush tool is active, the cursor becomes a crosshair with the letter P (for paint) or E (for eraser)
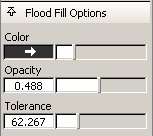
These options appear only when the Flood Fill tool is selected. Flood a consistently colored area of an image layer with paint.
Slide to control the opacity of the outline. Opacity is a way of representing how "see-through" the brush paint is. (Opacity is the opposite of transparency.) You cannot see anything underneath paint that has an opacity of 1. The lower the opacity, the more you can see through the paint. Paint that has an opacity of 0 is invisible.
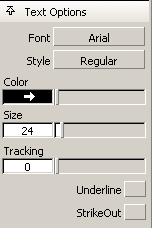
These options appear only when the Text Image tool is selected. Use to add text to your image. When you create text, it is created on its own layer of the canvas, which allows greater leeway for moving and manipulating the text.
Multi-byte languages, like Japanese, Korean, or Chinese, are not supported with the text tool.
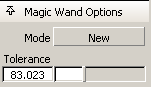
These options appear only when the Magic Wand icon is chosen. Selects a consistently colored area of an image layer.
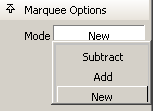
The Marquee options appear only when one of the four marquee icons are selected: Marquee (polyline), Marquee (lasso), Marquee (rectangle), and Marquee (ellipse).


 +
+ +
+