The Linear Wave Parameters control the appearance of linear water waves. The Linear Wave Parameters do not affect the concentric ripple component of the texture.
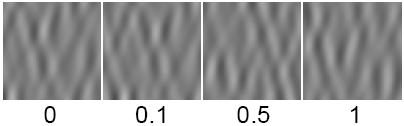
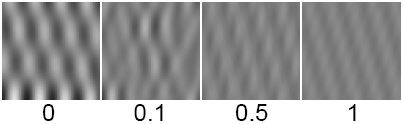
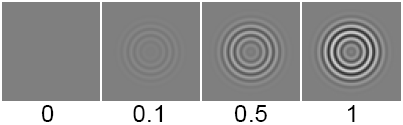
Controls the appearance of the waves over time. If you relate the wave effect to the wake from a boat, the waves start off at some point with a certain velocity and amplitude. This is time zero. As time increases, the waves travel to shore and their appearance changes (their velocity and amplitude decrease). The slider range is 0 to 1. The default value is 0.
To simulate moving water waves, animate the Wave_time value. The waves will move as this value increases. The actual speed of the waves is determined by the Wave_velocity value and the rate at which you animate the Wave_time value.
The Concentric Ripple Parameters control the appearance of concentric water ripples. The Concentric Ripple Parameters do not affect the linear wave component of the texture.
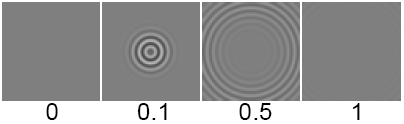
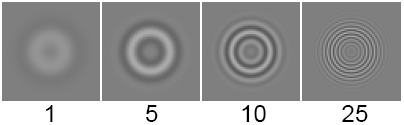
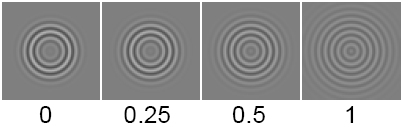
Controls the appearance of ripples over time. For example, if you relate the ripple effect to that of a water droplet falling into a glass of still water, at time 0 there is no ripple; the droplet has not touched the surface of the water yet. As the time parameter increases to a value greater than 0, the droplet has fallen onto the water surface and the ripple wave effect simulates the effect on the water in the glass at that point in time. When time has reached a value of 1, the effect of the droplet on the water surface is nearly complete and the water in the glass becomes still again.
The slider range is 0 to 1. The default value is 0.
To simulate moving water ripples, animate the Ripple_time value. The ripples will move as this value increases. The actual speed of the ripples is determined by the Group_velocity value and the rate at which you animate the Ripple_time value.
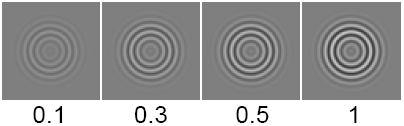
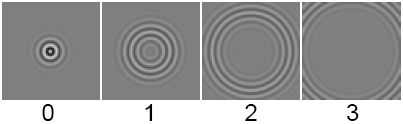
The mass of the droplet that starts the water ripples. (Imagine a water droplet falling into a glass of still water.) A Drop_size value of 0, produces no ripple effect because the droplet has no mass. As the Drop_size value increases, the mass of the drop increases, causing a greater ripple effect on the water surface. The valid range is 0 to infinity. The slider range is 0 to 1. The default value is 0.3.

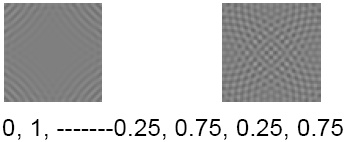
Determines the degree of effect that a droplet will have on a still water surface at time 0. A concentric ripple starts as a point of disturbance in parameter space (defined by the U_origin and V_origin values) when the Ripple_time value is 0. The size of the disturbance at time 0 is determined by the Spread_start value. The greater the Spread_start value, the greater the effect of the disturbance at time 0. The valid range is 0 to infinity. The slider range is 0 to 1. The default value is 0.005.
The Ripple Reflections parameters define an imaginary bounding box that ripples can reflect off. This effect, however, is nine times slower than if there is no reflecting bounding box.
The Color Balance, Intensity, Blur, Effects, Recursion Depth, Solid Noise Frequencies, and 3D Placement parameters are common to most solid textures.
The 3D Placement parameters control the orientation of the solid texture relative to the surface it is mapped to.
The name of the Texture Placement Object. Texture Placement Objects

Gradually blends the texture into the (unmapped) value of the shader parameter being mapped. The blend region is defined by the boundaries of the Texture Placement Object. For example, if a Leather texture is bump mapped onto a surface, and Blend is greater than zero, the bump will gradually diminish as it reaches the boundaries of the Texture Placement Object. If Blend is set to 0, the texture ends abruptly at the boundaries defined by the Texture Placement Object. The slider range is 0 (no blend) to 1 (very gradual blend). The default setting is 0.
Links the texture to the active object it is mapped to so that the texture undergoes the same transformations (except cluster and CV deformations) as the object. To link the texture to an object, pick the object and click the LINK button. The name of the object is displayed in the Current Link field.
The name of any object that you have linked to the texture using Link with Obj.
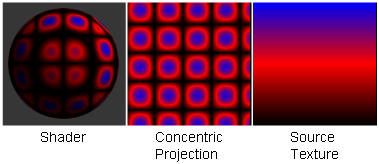
The projection method used to create a three-dimensional texture from a two-dimensional texture.
The projection types described above represent the defaults. You can customize the projection effect by transforming the Texture Placement Object (for example, non-proportional scaling or rotating) or by varying the Noise Parameters or the Solid Noise Frequencies parameters.
The Projection texture creates a three dimensional texture by projecting a two dimensional texture. The Noise Parameters control the randomization (using fractal noise) of the texture in the direction the texture is projected.
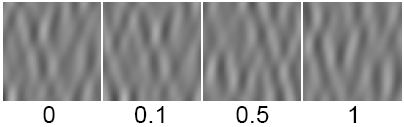
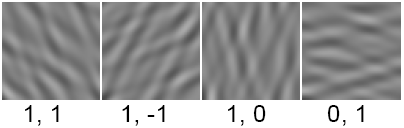
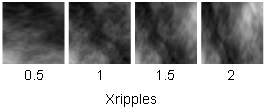
A scaling factor applied to all values in the fractal noise about the average value, in the texture’s X and Y directions. The Projection texture is rendered more quickly if the Xamplitude and Yamplitude values are both 0.
The valid range is 0 to infinity. The slider range is 0 (no noise) to 1 (strong noise). The default value is 0.
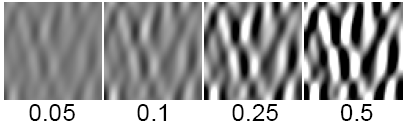
Controls the frequency of the fractal noise. The valid/slider range is 0 (low frequency) to 1 (high frequency). The default value is 0.3.
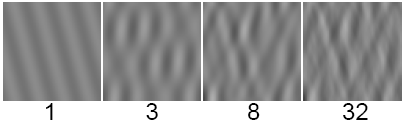
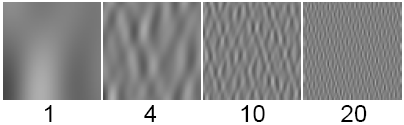
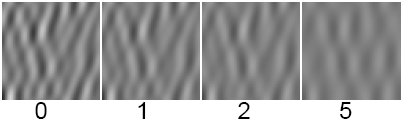
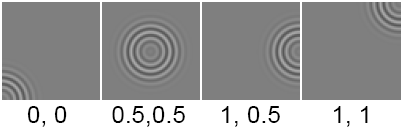
Determines how wavy the texture is in the X, Y, and Z directions. These parameters represent the scale of the fundamental frequency of the fractal used to generate the texture. The valid range is 0 to infinity. The slider range is 0 to 20. The default value is 1.
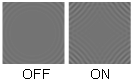
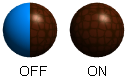
Offsets repeated patterns of the texture (when the two-dimensional texture’s Urepeat value or Vrepeat value is greater than 1) so that alternate rows are offset exactly half, like bricks in a brick wall. When Stagger is OFF, the repeated patterns line up horizontally and vertically. The default setting is OFF.
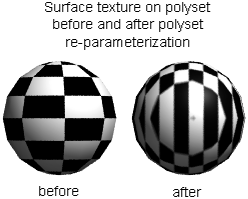
The Mesh Surface (U,V) Definition parameters have no effect on the Projection texture itself. Instead, you use them to re-parameterize a mesh so that a surface texture mapped to the mesh will resemble a Projection texture.
If you animate a mesh that uses a Projection texture, the mesh will appear to flow through the texture. You can solve this problem by re-parameterizing the mesh and then replacing the Projection texture with a surface texture. You may also need to re-parameterize a mesh that originated in another application and was imported with inadequate texture coordinate information.
When you map a surface with a Projection texture that uses a cylindrical, spherical, or ball projection type, the texture has a seam or pole. A seam exists when the texture wraps around a surface and its two opposite edges touch (where the surface’s UV parameters jump from 1 to 0). A pole exists when the texture becomes pinched together (where the surface’s UV parameters become crowded together).

If you re-parameterize a mesh using a Projection texture that uses a cylindrical, spherical, or ball projection type, and then map a surface texture to the mesh, the texture may appear distorted at the seam or pole. For example, the entire texture may be repeated along the seam. To remove this distortion, set Clean SeamsON before you re-parameterize the mesh. When Clean Seams is ON, however, UV parameters may no longer be within the 0 to 1 range. This is not a problem for meshes within Alias, but it may be a problem for other applications to which you intend to export your data. To scale UV parameter values back to within the 0 to 1 range, set Normalize SeamsON before you re-parameterize the mesh.
Re-parameterizes the selected meshes by mapping the vertices of the polygons to the Projection texture. A surface texture mapped to the re-parameterized mesh resembles a Projection texture.
Removes texture distortion at seams and poles when a mesh is re-parameterized using a Projection texture that uses a cylindrical, spherical, or ball projection type. If Cleans Seams is ON, UV parameters may no longer be within the 0 to 1 range. The default setting is ON.
Scales UV parameters to within the 0 to 1 range when a mesh is re-parameterized. The default setting is OFF.
The Projection texture has an additional Effects parameter: Convert to Smear. See Effectsfor a description of the other Effects parameters.
Replaces the Projection texture with the Source Texture, and applies a Smear Map so that the texture has the same visual effect on the surface as the original Projection texture.
Often times a texture is best applied to a surface using a 3D projection, however this can create problems when the surface is morphing. The convert to smear feature allows surfaces to be reparameterized to match a projection by using a smear map. This freezes the texture onto the surface. The effect is similar to convert solid texture, but allows for more freedom after the convert is done, and does not degrade texture resolution. One can get away with much lower resolution maps (smear maps) and animated textures are easily handled. Convert solid texture may still be preferred for some cases, however, particularly when the texture may be touched up in 3D paint.