Resize the headlight on an image of a car.
This “How-To” uses the file bmw.tifas an example. The file is located in the pix sub-directory in the Courseware project.
Open it by choosing File > Import > Canvas Image .
.

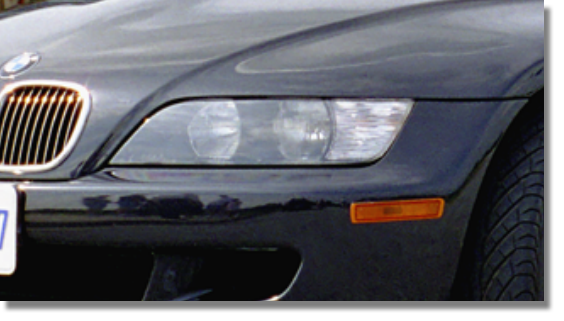
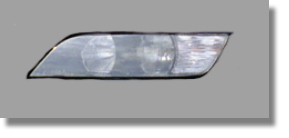
First, copy the detail you want to resize; in this case, copy the headlight.
 (rectangle).
If you make a mistake, drag a new rectangle around the headlight.
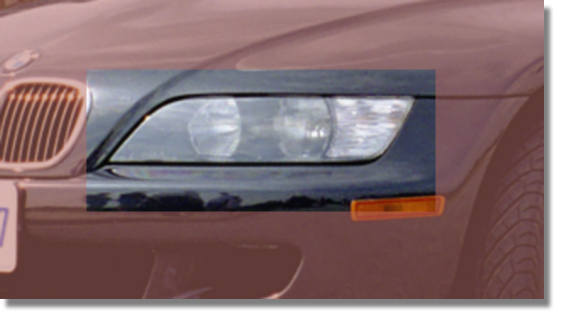
The pink color indicates regions of the active layer that are not selected. (Regions that are not selected are also referred to as masked regions.)
Regions that are not pink are selected regions (or unmasked regions).
Now you can only modify the selected regions (for example, painting, erasing, copying, and so on).
You cannot modify the pink (masked) regions.
 to copy the selected regions to the clipboard.
 to open the Canvas Layer Editor.
 to paste the contents of the clipboard into a new image layer.
Notice in the Canvas Layer Editor window that there is now a new layer named ALIAS_PIX_CL.
 (Windows) or
  (Mac) to rename the layer.
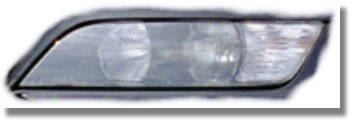
Next you’ll resize the headlight.
A manipulator appears on the image layer.
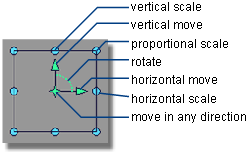
Release the proportional scale handle to preview the transformation.
If you do not like the headlight’s new size, drag the proportional scale handle again.
 to clear the selection.
 icon for the headlight layer to hide the image layer so you can see the original image.
 icon for the headlight layer to show it again.
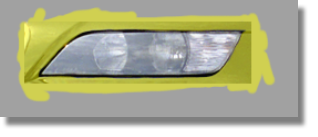
To remove paint around the headlight
Next you’ll remove the parts of the car body that surround the headlight.
icon for the bmw layer to hide the image layer. Now you can clearly see the contents of the headlight layer.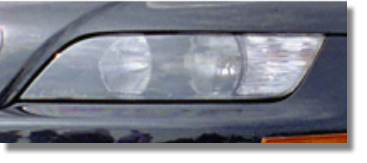
Make sure the headlight layer is active. It should be highlighted in purple. If it is not, click it.
 button.
 icon to the right of the invisibility mask layer name so that it becomes a
  icon.
icon.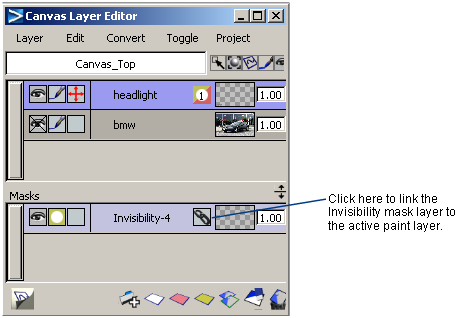
 > Brush Felt.
Adjust the size of the brush to give you control, and paint the car areas. Notice that where you paint, a mustard-yellow color is laid down. This will hide the parts of the car that you don’t want visible.
If some of the headlight is covered by the yellow invisibility mask, use the eraser tool to remove the mask in those areas.
 icon for the bmw layer to show it again.
icon for the headlight layer to hide the image layer so you can see the original image.
icon for the headlight layer to show it again.
icon for the bmw layer to show it again.
icon for the headlight layer to hide the image layer so you can see the original image.
icon for the headlight layer to show it again.
To merge and export the final image
Finally you’ll merge the image layers together and export the final image.
Notice that there is once again only one image layer named bmw.
 to open the File Browser and save the final image.


