Fill holes in a mesh


Fill small or simple holes

Use the Mesh Hole Fill tool to fill small holes, or holes located in an area of the mesh which is relatively flat and has no features.

  1. Choose Mesh > Mesh Cleanup > Mesh Hole Fill.
  2. Select a mesh.

    All the mesh boundaries are highlighted in green.

  3. Select the boundary of the hole you wish to fill.

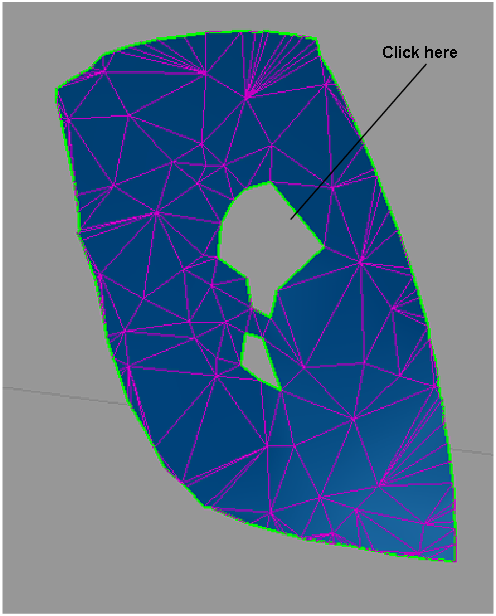
    The hole is filled with a mesh that attempts to maintain the curvature properties across all of the triangles that fill the hole (when Quality option is set to Faired).

  4. Continue selecting hole boundaries to fill up additional holes. Or press the Fill All button in the option box to fill up all the holes at once.
    Note

    Use Edit > Undo to undo any number of hole fillings.

Fill holes that cut across features or abruptly changing curvature

Use the Mesh Patch tool to fill large holes, or holes located in an area of the mesh with features or abrupt changes in curvature.

This tool fills holes in meshes while recognizing the curvature characteristics of the surrounding area. As with the Mesh Hole Fill tool, the boundary of a hole must be a closed region.

To patch a hole while maintaining curvature characteristics

  1. Choose Mesh > Mesh Patch.
  2. Select a mesh.
  3. Set the view so that you clearly see both sides of the hole as well as any features running through it.
  4. Define two lines on each side of the hole (by putting down four points) that will act as profiles.

    A flowline is created between the two profiles.The profiles and flowline are view based, and will disappear if you change the view. If this happens, you can click Patch View to reset the view

  5. Modify the shape of the flowline by moving its control points, so that it follows the shape of any feature going through the hole. You can also modify the position of the corner points.
  6. Click Build to build a mesh patch.

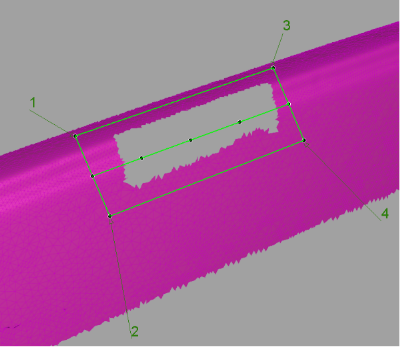
    A mesh patch is built between the green lines. Shading the mesh will help evaluate the result.

  7. Repeat steps 5-6 until satisfied with the result. You may need to hit Patch View if the view was changed.
  8. Click Stitch to substitute the patch to the mesh area it covers and stitch it to the surrounding region, forming a single mesh.