How to create mesh objects
Unlike curves or surfaces, meshes cannot be built directly in Alias. They are typically obtained by opening an existing file that contains them, or by converting a NURBS or cloud object.
 or File > Import > File
 to open a file containing polygonal data. The following file types can import mesh objects into Alias:
For Wire and STL files, a progress bar is displayed while the file loads. Identical vertices are merged automatically, leading to improved performance during subsequent operations.
Those file types can store large meshes of about 3 million polygons. Wire files are the most efficient format. However, as an interchange format, binary STL is much faster than OBJ.
Create meshes from NURBS surfaces or shells
 .
.
New mesh objects are created by tessellating the surfaces and shells you selected.
 ).
).
 .
.
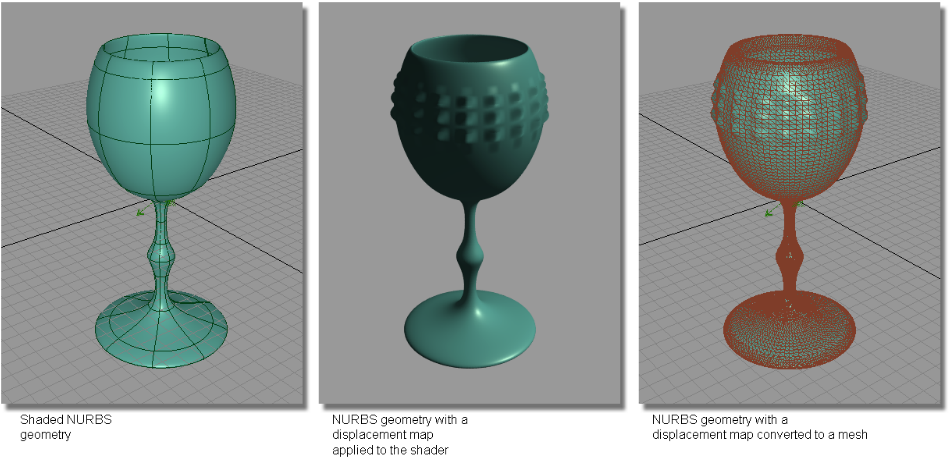
Create meshes from displacement maps
 .
.
A mesh is calculated from the displacement map, and made active. The original object is made inactive, but remains in its original location. It may be obscured until it, or the mesh, is moved.
The example below shows NURBS geometry with a procedural displacement map applied to create a “hob-nail” pattern on the outside of the plastic waterglass. Using the Displacement Map to mesh tool, the displacement tessellation is used to develop a mesh.
In order to create a good, workable mesh from the displacement process, you can control the quality of the tessellation by
adjusting the Mesh Tolerance and Displacement Detail parameters either from Render > Globals , or from the option box of Mesh > Mesh Tessellation > Displacement Map to Mesh.


