Provides a direct way of positioning a curve so that it intersects two rail curves.
Positioning and intersecting a curve can be done in two ways:
Method 1: Tanslating and Rotating a curve (rocking)
 .
.
Two control handles (circles) appear at the start and end points of the selected curve.
The selected handle turns white.
 and
and  (Windows) or
  and
and  (Mac) keys (or Magnet mode by holding down (Windows) or (Mac) only).
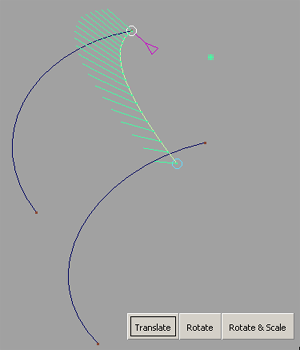
The input curve is translated so that the first control handle intersects the first rail.
The second control handle turns white. A manipulator appears at the location of the first control handle. Use the manipulator to specify the plane of rotation: XY, YZ, XZ. By default, the curve rotates in its own plane.
and (Windows) or and (Mac) keys.
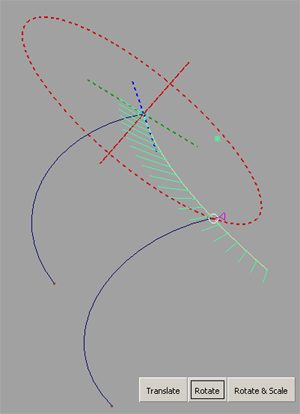
The input curve rotates in the specified plane of rotation, using the first intersection as its rotation pivot, so that it now intersects the second rail.
The shape of the curve does not change.
Method 2: Rotating and Scaling a curve (dilating)
Two control handles (circles) appear at the start and end points of the selected curve.
You can move the control handles along the curve by clicking them and dragging the small purple arrow along the curve.

The selected handle turns white.
and (Windows) or and (Mac) keys (or Magnet mode by holding down (Windows) or (Mac) only).
The input curve is scaled so that both control handles make contact with the target points on the rail curves.
The curve is modified, but the general shape characteristics are maintained, as can be verified by using a curvature comb
on the curve (Locators > Curve Curvature ).
).
The distance between the control handles on the input curve and the target points on the rail curves is within the Maximum Gap Distance (in Construction Options).
How do I use the rotation manipulator?
The rotation manipulator appears when you are in Rotate mode (Rotate button depressed). It has three axes (X, Y and Z), and a circle along which the selected handle on the curve rotates. By default, this circle is drawn in the plane of the curve.
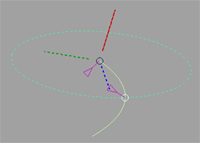
The circle is redrawn in that plane.


