
The Viewing Panel appears when you enter camera move mode in the Perspective window.The ViewCube tool and NavBar appear by default, but you changed this setting in the previous section. This window lets you quickly switch the Perspective window to a default or user-defined view of the model.
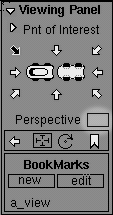
As you work on the model, you will probably find yourself changing the camera view back and forth between two or more areas of interest. The Viewing Panel lets you “bookmark” views of the model and return to those views by clicking the name of the bookmark.
To use the Viewing Panel to move between different views

The Perspective view window enlarges to full screen.
 and
and  keys (also and
  on the Mac) to enter camera move
mode. Keep the keys held down for the rest of this procedure.
on the Mac) to enter camera move
mode. Keep the keys held down for the rest of this procedure.
The Viewing Panel appears in the upper left corner of the Perspective window.
The images at the center of the panel (small icons of the top and bottom of a car) represent the model.
The horizontal and vertical arrows represent front, side, and back views. The diagonal arrows represent three-quarter views.


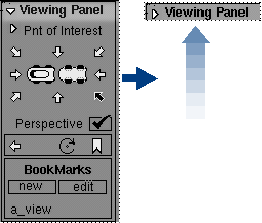
Use this technique to get the Viewing Panel out of the way when you want as much viewing area as possible.
To use the Point of Interest manipulator
and keys (also and on the Mac), then press
the  to open the Viewing Panel.
Keep the keys held down for the rest of this procedure.
and (also and on the Mac).
to open the Viewing Panel.
Keep the keys held down for the rest of this procedure.
and (also and on the Mac).
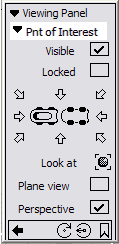
Turn the Visible check box on to show the manipulator again.
The manipulator does not move when you click at another point or drag its center handle. Use this option if you find you are moving the manipulator unintentionally.
Turn the Locked check box off to free the manipulator.
The perspective view changes to an isographic projection.

Many people find an isographic view easier for technical modeling, since parallel lines in the model remain parallel in the view window.
For the remainder of the tutorials, the screen shots will show isographic views. However, feel free to turn the Perspective checkbox back on if you prefer a perspective view.
and keys (also and on the Mac), keeping them
held down, to enter camera move mode.
and (also and on the Mac) still held down,
find the Bookmarks section at the bottom
of the Viewing Panel.
If it is not visible, click the tag in the bottom right corner of the Viewing Panel. It turns white and the bookmarks section appears.

A new bookmark appears at the bottom of the section.
A second bookmark appears in the bookmark list.
The view switches back and forth between the two bookmarked views.
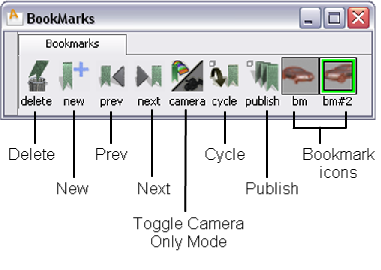
The BookMarks Lister window appears.
and (or and on the Mac) keys.
 (Windows) or
  (Mac) key and double-click
the first bookmark icon in the Bookmark Lister.
(Mac) key and double-click
the first bookmark icon in the Bookmark Lister.
A dialog box appears.
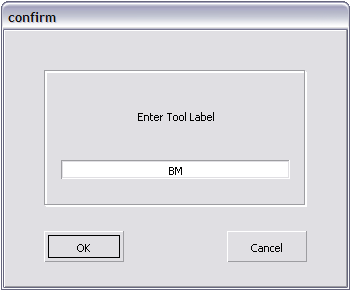
For production work, you should use meaningful names, such as “back panel” or “door handle”.
(Windows) or (Mac) double-click and rename
the other bookmark.
 in an empty part of the Bookmark
Lister, and choosing New shelf from
the drop down menu creates a new shelf.
and keys (also and on the Mac) in the Perspective
window to show the Viewing Panel.
in an empty part of the Bookmark
Lister, and choosing New shelf from
the drop down menu creates a new shelf.
and keys (also and on the Mac) in the Perspective
window to show the Viewing Panel.
Notice your new names in the BookMarks section.
See also Windows > Bookmark Lister.
Use the following overview illustration as a reminder of the different controls on the Viewing Panel.


