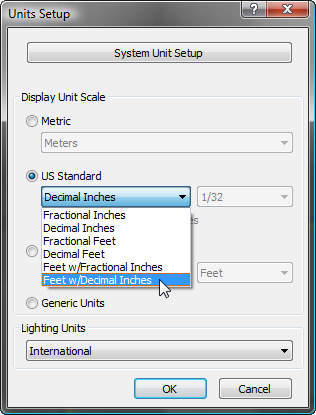
Before you start to build your revolving door, you will set the display unit scale to feet and inches. You'll also make some changes to the snap options before you create the geometry.
Set up the display unit scale:
 Application menu, choose
Reset to reset 3ds Max Design.
This tutorial does not require you to load any particular file to begin. As you work through it, if you get lost you can open a “snapshot” scene, so you can complete the tutorial.
 Units Setup.
Set the scale to Feet w/Decimal inches, if necessary.

Now, when you make something, its measurements are displayed in the command panels in familiar real-world terms.
Next you'll make some additions to the grid and snap settings.
 (3D Snaps Toggle).

 Close the dialog.
Now, when Snap is on, you'll be able to snap to vertices, grid points, and edges.
You're ready to create a cylinder to serve as the central pole that rotates the revolving door.