Controls on the Link Settings rollout let you adjust the behavior of the selected link.

When on, activates the selected link. Default=on.
Turning off Active makes the link unavailable for vertex assignment, meaning that the link has no influence on any vertices. Vertices within range of this link are not influenced by it, and can be “picked up” by other nearby envelopes, or can be manually assigned (without blending) to any other link. Turning off Active makes Physique ignore the link as if it were never part of the skeleton.
Maintains a smooth transition across the joint from the parent link to the current link. Default=on.
When Continuity is on, the effect of the link parameters passes smoothly across the joint to the connected link. When Continuity is off, Bend, Twist, and Radial Scale settings are limited to the current link, which produces an abrupt transition across the joint. This is analogous to breaking the spline handles on a spline shape.
 Bulge Editor
Displays the Bulge Editor. The Bulge Editor displays bulge cross sections schematically, letting you create and edit bulge controls.
 Reinitialize Selected Links
Reinitializes the link and its vertex parameters based on the current link parameter settings. Clicking Reinitialize Selected Links does not change vertex assignments or manual reassignments.
For example, increasing the tension of a link can cause the spacing to change for the link’s cross sections. Reinitialize Selected Links smoothes the spline, and makes cross section spacing even again.
Think of the skin being snugly stuck to the link. As the link parameters change, the vertices can bunch up or stretch out. Clicking Reinitialize lets the skin “slip” to its original shape, establishing a new relationship to the deformation spline.

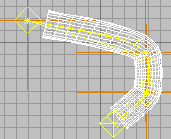
Sets the smoothness of a joint. Tension affects the curvature of the deformation spline through the joint. A low value, near 0.0, makes the spline linear and creates a sharp angle at the joint, like bending a hinge. High values, near 2.0, make the spline smooth through the joint, creating a rounded joint, like bending a firm hose. Range=0.0 to 2.0. Default=0.5.
Displaces the pivot point about which vertices are bent. Bias pushes the effect along the spline toward one side of the joint or the other. The default value of 0.5 centers the bend at the joint. Values lower than 0.5 move the pivot onto the child link. At 0.0, the bend effect is limited to the selected link. Range=0.0 to 1.0. Default=0.5.

Twist parameters control the way the skin deforms when a joint rotates along its length, as in turning a doorknob.

Skin sliding parameters control the amount of skin sliding that occurs when a joint rotates. Without skin sliding, vertices closest to the joint tend to compress on the inside and stretch apart on the outside, generally revealing the segments of the mesh. Outside sliding causes the vertices around the joint to move toward the joint, preventing localized stretching on the side that is greater than 180 degrees. Inside sliding causes the vertices to relax and slip away from the joint, preventing bunching of vertices on the side having an angle less than 180 degrees.

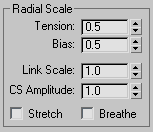
Radial Scale parameters expand or contract the skin by scaling the radial distance perpendicular to the link. They apply to any combination of user-definable scale, bulge settings, or link length.
Shifts the effect of radial scaling. At the default value of 0.5, scaling affects both the selected link and the child link. Values lower than 0.5 shift the scaling effect onto the selected link, and values greater than 0.5 shift scaling onto the child link. At 0.0, expansion and contraction are limited to the selected link. At 1.0, expansion and contraction are limited to the child link. Range=0.0 to 1.0. Default=0.5.
When on, preserves the volume of the link’s skin when the length of the link changes. The effect is similar to stretching or squeezing a material that is only partly elastic, such as a tough rubber hose. Default=off.


Above: Stretch is turned on.
Below: Stretch is turned off.
As the bones change in length, the mesh expands and contracts when Stretch is on.
When on, scaling a skeleton node changes the radial scale of the link’s skin. When off, scaling a node has no effect on the scale of the skin. Default=off.


Above: Breathe is turned on: the mesh is scaled as the object is scaled.
Below Breathe is turned off: object scaling doesn't effect the mesh.
The linked objects are shown in white. The lowest, largest object is the one that has been scaled. These linked objects were used as the hierarchy for Physique.