If your computer supports SM3.0 hardware shading, you can use the Pseudo Color exposure control to preview lighting levels in viewports. This can give you quick, interactive information about the lighting in a model.
 General panel Help Diagnose Video Hardware.
For the Pseudo Color results to be meaningful, your scene needs to be set up as it would be for full-scale lighting analysis: real-world units, photometric lights, valid mental ray materials, and so on. See Lighting Analysis Assistant (3ds Max Design) for the details.
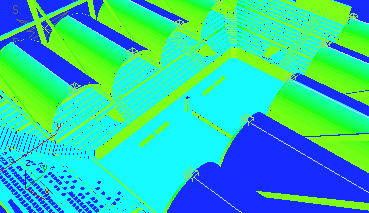
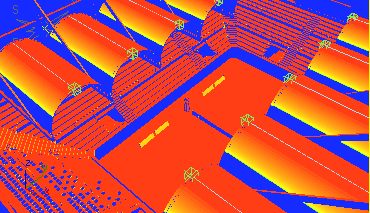
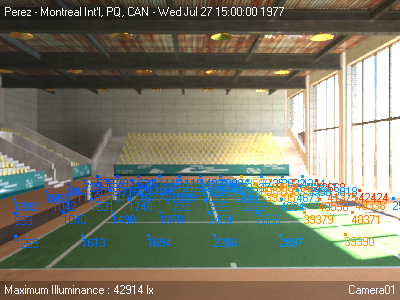
Pseudo Color preview of an indoor tennis court at 3 P.M. shows adequate lighting.
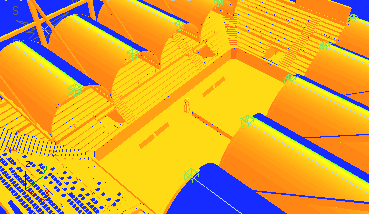
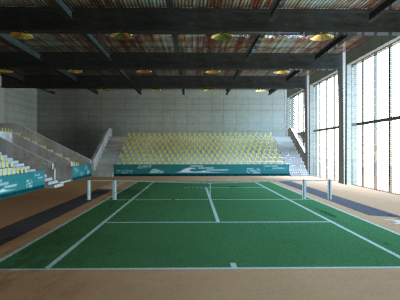
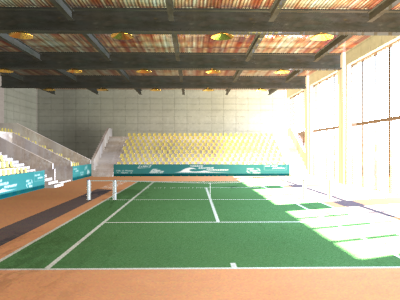 For comparison, here is a rendering of the same scene. |
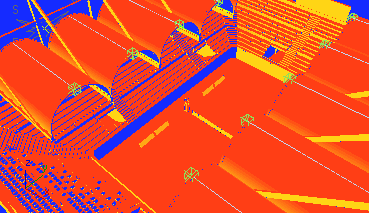
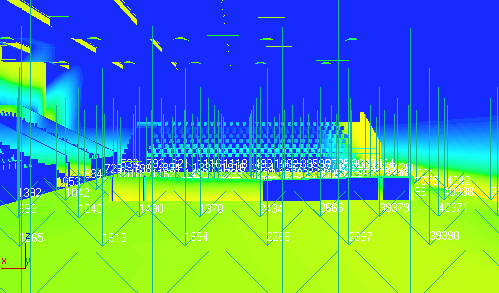
 And the same scene with an overlay of lighting analysis data |
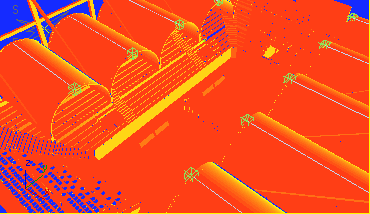
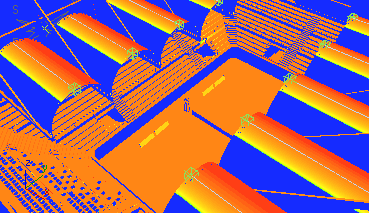
The Pseudo Color preview of the same scene at noon shows that probably artifical lights are needed.
 The tennis court rendered at noon with no indoor lighting |
 The tennis court rendered at noon with indoor lights turned on |
To preview lighting levels in a viewport:
Exposure Control.
For example, if the lighting is primarily daylight, set Max to 65000 lux. (The default of Max=50 is not an adequate range for checking lighting levels.)
If you already have Light Meter objects in the scene, you can fine-tune this value. For example, you might know that the daylight levels are lower than the maximum of 65,000 lux. If the scene is indoors and artificially lit, the levels will be much lower than that: usually not more than 1,000 lux. (250 lux is generally considered the minimum lighting needed for everyday use.)
Configure.
Lighting And Shadows panel, make sure you set the following options Illuminate Scene With group Turn on Enable Hardware Shading.
Quality / Hardware Support group Choose Best (SM3.0 Option).
Illuminate Scene With group Choose Scene Lights.
Shadow Options group turn on Enable Shadows.
Turn on Enable Exposure Control In Viewport.
Now that you have set up the viewport, you can adjust lighting interactively, and see the lighting level results in real-time, or close to it. For example, you might drag the Hours spinner for a Daylight system and see how lighting levels change over the course of a day.
In the following illustrations, a Daylight system illuminates an outdoor stadium.
A viewport preview of lighting levels is not a substitute for a full-scale, rendered lighting analysis that uses Light Meters. There are a few limitations.
Direct illumination is your main concern when you preview lighting, but indirect illumination can provide a good deal of light in interiors.