The Track Selection rollout give you specialized tools for manipulating the biped center of mass (COM).
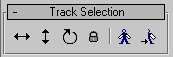
The center of mass object is the root of the biped hierarchy, and controls the entire biped structure. Changing its position and orientation affects the biped as a whole, which is an important part of posing and animating the biped. Also available on this rollout are tools for selecting symmetrical and opposite biped body parts.
You can select the COM in various ways:
 You can turn on Move All Mode on the Biped rollout, which enlarges the COM in your viewport. This is useful in shaded viewports where the biped pelvis covers the center of
mass.
You can turn on Move All Mode on the Biped rollout, which enlarges the COM in your viewport. This is useful in shaded viewports where the biped pelvis covers the center of
mass.
Once the biped's center of mass is selected, you can move or rotate it using the Transform gizmo. Controlling the COM using the Track Selection rollout tools is sometimes quicker because selecting the center of mass in your viewports can be difficult if your biped resides inside a bigger rigged model. As long as you select your biped by any limb, activating a COM tool on the Track Selection rollout automatically selects the center of mass with the proper Transform gizmo:
When you key the COM's position or orientation using Set Key or Auto Key, the animation data is stored within the respective biped transform tracks.
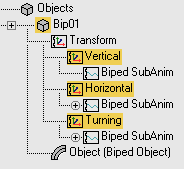
The biped Transform tracks contain the COM keyed data.
To Edit the COM's position and orientation:
 Motion panel, expand the Track Selection rollout and turn on
  (Body Horizontal).
The Move Transform gizmo appears at the COM's location, highlighting the X and Y axes because they are referring to the biped Horizontal Transform track.
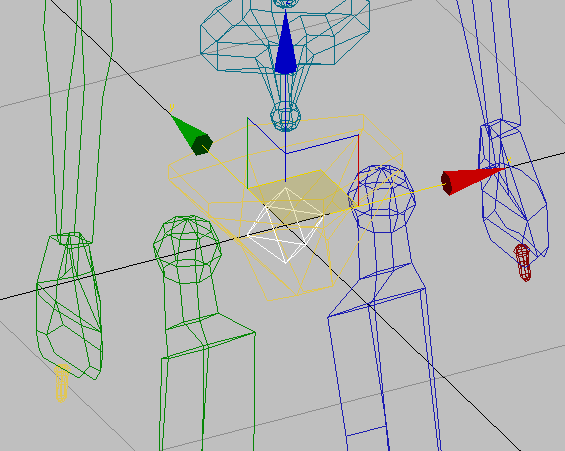
The Transform gizmo centered on the biped's COM.
 (Body Rotation).
3ds Max replaces the Move Transform gizmo with the Rotate Transform gizmo. You can now change the biped's orientation.
This procedure follows the concept from the previous procedure, and centers on selecting multiple COM tracks at the same time, as well as locking them.
(Body Horizontal).
 (Lock COM Keying).
Lock COM Keying allows you to activate all center of mass tracks at the same time.
 (Body Horizontal) and (Body Rotation).
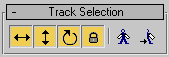
 Select any other part of your biped.
The COM track controls become inactive. Note that Lock COM Keying is storing the selected controls.

To rotate the biped about a pivot that is not the COM:
This is an example that shows the biped falling over by rotating about its feet.
(Move All Mode) is active, because this mode always uses World coordinates.
Select both of the biped’s feet, and  set Planted keys for them.
Select the biped’s COM.
set Planted keys for them.
Select the biped’s COM.
 (Select And Rotate) to activate it, and then from the Use Center flyout, choose
  (Use Transform Coordinate Center).
(Lock COM Keying) to turn it on, then turn on all three tracks: (Body Horizontal), (Body Vertical), and (Body Rotation).
(Use Transform Coordinate Center).
(Lock COM Keying) to turn it on, then turn on all three tracks: (Body Horizontal), (Body Vertical), and (Body Rotation).
 (Set Key).
(Set Key) again.
(Set Key).
(Set Key) again.

Body Track Tools (Center of Mass Tracks)
Body Horizontal and Body Vertical refer to the center of mass's translation axes while Body Rotation focuses on its rotation axes. Once you turn them on, you can move or rotate the COM with transform tools or by entering values in the Coordinate Display area.
When you activate Body Horizontal or Body Vertical, you have access to advanced Biped Dynamics parameters, such as Balance Factor and Ballistic Tension, which you can control from the Key Info rollout and Dynamics & Adaptation rollout.
Animation keys for COM tracks are color coded as follows:

A key's color reflects its keyed COM tracks.
Body HorizontalSelects the center of mass to edit horizontal biped motion.
The Body Horizontal track has a Balance Factor parameter that automatically orients the biped to maintain balance. This saves the animator from having to reposition the pelvis when the biped leans forward, backwards, or sideways.
Body VerticalSelects the center of mass to edit vertical biped motion.
The Body Vertical track uses the Dynamics Blend parameter to control gravity in a footstep animation. A Dynamics Blend value of 1.0 uses the value of GravAccel (global gravity value) to calculate an airborne trajectory for the biped. No keyframes are required to position the biped in the air, a trajectory is calculated automatically. A value of 0.0 uses Spline Dynamics for the vertical position of the biped; you must create keyframes to position the biped vertically.
The Body Vertical track also has a Ballistic Tension parameter that controls how much the biped knees bend when the biped lands from an airborne period. This means that keys do not need to be created at the lowest position of the biped after landing; a trajectory is calculated automatically.
Body Rotation Lock COM Keying Symmetrical
 Opposite


