 Command entry:
Select an object that has the Skin modifier applied to it.


Modify panel

Skin modifier

Parameters rollout

Weight Properties group

Weight Tool button
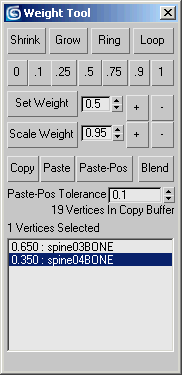
This dialog is launched from the Skin modifier and provides tools to select vertices and assign them weights. You can also copy, paste, and blend weights between vertices.
Each vertex you select displays the objects contributing to its weighting in the dialog list.
To use these tools, Parameters rollout  Edit Envelopes must be on, Parameters rollout
  Select group
  Vertices must be on, and at least one vertex must be selected.
ImportantThe controls on this dialog adjust vertex weighting with respect to the active bone; that is, the object highlighted in the
Bones list on the Parameters rollout. When you select a vertex and then change its weighting, if the active bone does not
already influence the vertex, the bone is added to the list of bones influencing the vertex. You can ensure that bone assignments
don't change by highlighting the bone in the Weight Tool dialog list after selecting the vertex and before changing weighting.
Also, the total weighting for all bones influencing a vertex is always 1.0, so if multiple bones influence a vertex and you
change the weight value for one bone, the weight values for the others change as well.
Procedures
Example: To Set and Blend Weights on Selected Vertices:
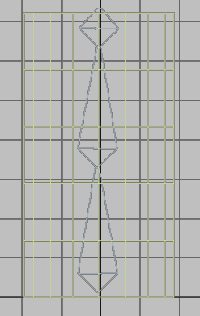
- Prepare a cylinder skinned to a bone chain.
- On the
 Modify panel
  Parameters rollout, turn on Edit Envelopes.
- In the Select group, turn on Vertices.
- In the Weight Properties group, click
 (Weight Tool).
3ds Max opens the Weight Tool dialog.
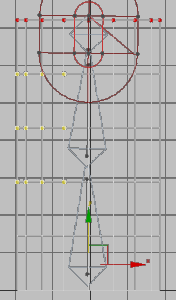
- Select a few vertices and then click
 (the .25 weight button).
The selected vertices are weighted at 0.250 for the active bone (highlighted in the Parameters rollout list), coloring them
yellow.
NoteThe active bone is added to the list of bones influencing each of the selected vertices, if necessary.
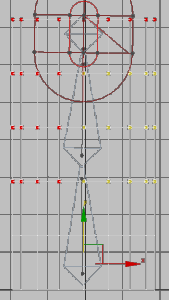
- Click
 (directly under the .9 weight button) repeatedly until the vertices are red (that is, their weight is 1.0).
As you increase the vertices' weight, they gradually change color.
- Select a few other vertices, and assign them a weight of
 (0.250).
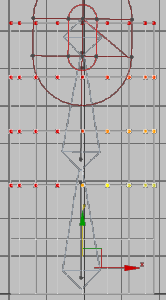
- Select all weighted vertices, then repeatedly click Blend.
Every time you click Blend, each vertex's weight is adjusted to blend with other selected neighborhood weights. This creates
a smooth weighting transition among all selected vertices.
Interface
- Shrink
-
Modifies the current vertex selection by progressively subtracting the outermost vertices from the selection. Has no effect
if all vertices in an object are selected.
- Grow
-
Modifies the current vertex selection by progressively adding neighborhood vertices of the selected object. You must start
with at least one vertex to be able to grow your selection.
- Ring
-
Expands the current vertex selection to include all vertices in parallel edges.
NoteYou must select at least two vertices to use the Ring selection.
- Loop
-
Expands the current vertex selection to include all vertices in continuing edges.
NoteYou must select at least two vertices to use the Loop selection.
-
 [specific weight values]
-
Assigns an absolute weight value between 0 and 1 for the active bone to the selected vertices.
NoteWhen you click one of these buttons, the active bone is added to the list of bones influencing each of the selected vertices,
if necessary.
- Set Weight
-
Sets an absolute weight based on the field value. Default=0.5.
NoteThe spinner increments the field value by steps of 0.05.
- +/-
-
Increases/decreases each selected vertex's weight by 0.05.
- Scale Weight
-
Multiplies each selected vertex's weight value by the field value, resulting in a relative weight change. Default=0.95.
NoteThe spinner increments the field value in steps of 0.05.
- +/-
-
Increases/decreases each selected vertex's weight by five percent.
- Copy
-
Stores the current weight value(s) in the copy buffer.
- Paste
-
Retrieves the weight values from the copy buffer and assigns them to the selected vertices.
- Paste-Pos
-
Assigns the weight values currently in the copy buffer to the selected vertices based on the distance between them and the
copied vertices, which is determined by the Paste-Pos Tolerance value.
This is useful when you need to match weights between two juxtaposed skinned meshes sharing the a common bone.
- Blend
-
Modifies the selected weight values to smooth out the transition between them and their surrounding vertices.
- Paste-Pos Tolerance
-
Determines the radius influence of the Paste-Pos. Default=0.1.
Vertex information
Below the Paste-Pos Tolerance field is a text display displaying information on the amount of copied and selected vertices.
- [First Vertex Weight list]
-
Displays the selected vertex weight along with the bone envelopes contributing to its weighting. You can select individual
envelopes in the current viewport by highlighting the respective bone in the list.
NoteIf you select multiple vertices, the list only displays the weighting of the first selected vertex.
 Edit Envelopes must be on, Parameters rollout
  Select group
  Vertices must be on, and at least one vertex must be selected.
 Modify panel
  Parameters rollout, turn on Edit Envelopes.
 (Weight Tool).
 (the .25 weight button).
 (directly under the .9 weight button) repeatedly until the vertices are red (that is, their weight is 1.0).
 (0.250).
 [specific weight values]