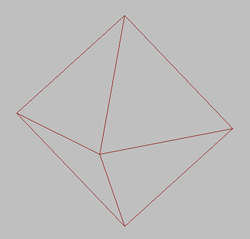
The crowd system in character studio uses two different helper objects: Crowd and Delegate. The first step in building a crowd simulation is the creation of these helpers. The Crowd helper serves as the command center for setting up and solving crowd simulations, while the Delegate provides a stand-in for each animated object in the crowd. You use the Crowd helper controls to animate the delegates, and then later you link objects to delegates to create the finished animation.
A Crowd helper object appears in viewports as blue tetrahedron. The location and size of the Crowd helper does not affect the simulation. For the easiest workflow, create the helper with a relatively large size, and place it where you can easily select it. You'll rarely need more than one Crowd helper object per scene.

After you create delegates, you use the Crowd helper to clone delegates and distribute the clones, add behaviors, apply behaviors to delegates, link delegates to animated objects, and much more.

The Crowd system in character studio uses Delegate helper objects as intermediaries between the crowd simulation and the influenced objects. A delegate is a non-rendering pyramid-shaped object. Its apex points in the direction the Crowd system uses as “forward” when it moves the delegate around.
Use one delegate per object to be animated by the Crowd system. You can add delegates one by one, or use any of the standard 3ds Max methods for cloning objects, including Shift+clone and the Array function. However, the Crowd object offers a convenient Scatter Objects function that lets you clone delegates and distribute the clones over a surface or within a volume, with options for orientation and scaling.
To create a Crowd helper object:
 Create panel, click
  (Helpers).
To create a Delegate helper object:
 Create panel, click
  (Helpers).
To clone and scatter delegates:
 Select the Crowd object and go to the
  Modify panel.
 (Scatter Objects) to open the Scatter Objects dialog.
This produces the specified number of clones in the same location. To vary positions, orientations, and/or sizes, proceed with the following steps.
 Placement Relative To Object group, choose a distribution option. Click the None button, and then select the distribution
object you created earlier.
Alternatively, to distribute delegates in a circular area, choose Placement In Area group  In Radial Area and set a center and radius.
At this point, you're basically finished. However, to create a series of randomized positions, orientations, and/or sizes for clones, follow the next two steps and repeat as necessary.
You can combine the cloning, position, rotation, and scale functions in one operation by setting the options on their respective
tabs without clicking the Generate buttons, and then using the All Ops tab to apply any or all scatter operations simultaneously.
Also, you can use the All Ops tab  Select Objects To Transform to specify any objects to scatter; not just clones.