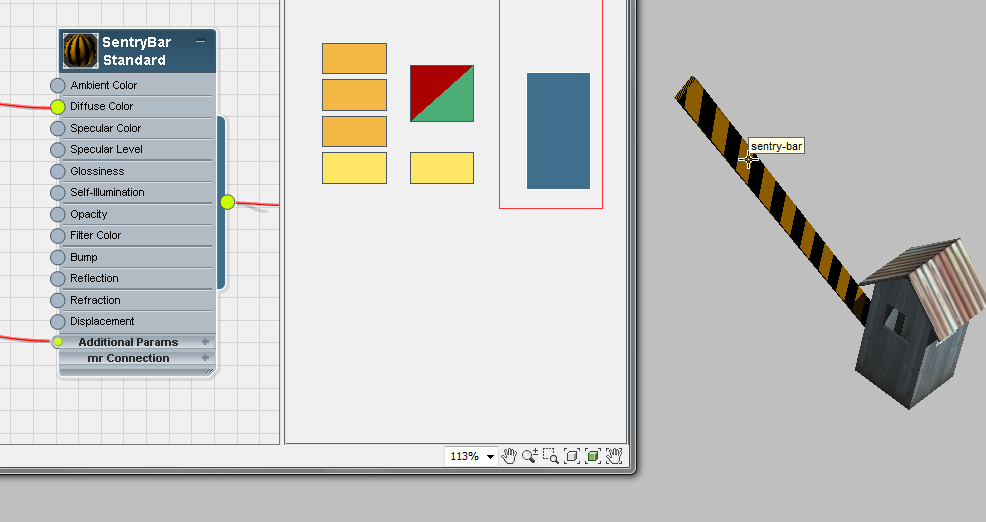
When you edit materials and maps, these appear in the active View as “nodes” that you can wire together.
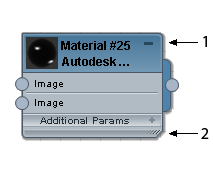
Example of a material node
A node has several components:
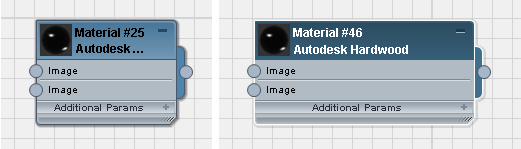
By default, the Slate Material Editor displays only slots that you can map.
You can collapse a node to hide its slots, or expand it to show the slots. You can also resize a node horizontally, so the slot names are easier to read.
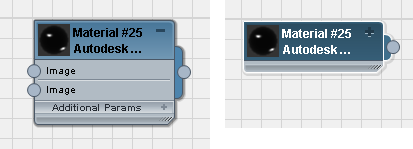
Left: An expanded node (the expand/collapse icon is a minus sign)
Right: The same node after collapsing it (the expand/collapse icon changes to a plus sign)
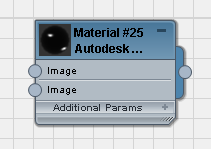
You can enlarge the preview in a node’s title bar by double-clicking the preview. To reduce the preview, double-click the preview again.
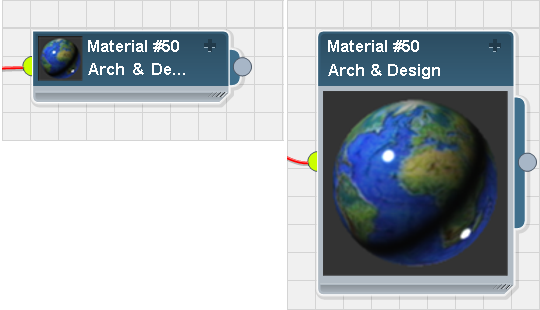
Left: A node with the default preview size
Right: The preview has been enlarged by double-clicking it. (A second double-click returns to the small size.)
Indicators for Show Map In Viewport
If you turn on Show Shaded Map In Viewport or Show Realistic Map In Viewport for a material or a map, a red diagonal shape appears in the title bar of the material or map node, to show that this option is active. For more information about this option, see Viewport Display of Materials .
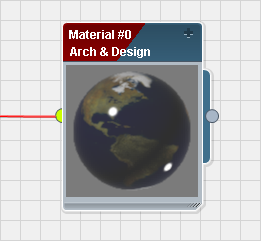
Red flag in title bar shows that Show Map In Viewport has been turned on.
When Show Map is on, the Navigator also uses a diagonal red shape to indicate this, and so does the material or map entry in the Material/Map Browser.
Navigator display of a material with Show Map In Viewport turned on
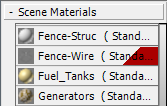
Material/Map Browser entry for a material with Show Map In Viewport turned on
Selecting, Moving, and Laying Out Nodes
When a node is selected in the View, it shows a white border and the background, including the title bar, is darker. When it is not selected, the border is gray and the background is lighter.
 To select a node, make sure the Select tool is active, then click the node. To select multiple nodes, use Ctrl+click (Alt+click removes a node from the current selection), or drag a selection rectangle around the nodes. The Select menu has options for modifying the current selection.
To deselect nodes, make sure the Select tool is active, then click a blank area of the View.
Dragging a selected node moves it in the View.
Shift+dragging a node clones that node. Ctrl+Shift+dragging a node clones the node and all the node’s children. These cloning methods also work for multiple selections.
You can use these options to move nodes and lay them out:
 Move Children (Options menu
  Move Children) When this is on, moving a node moves its child nodes along with it. When it is off, moving a node moves only that node.
Temporary shortcut: Ctrl+Alt+drag moves a node with its children, but doesn’t turn on the Move Children toggle.

 Layout All - Vertical and Layout All - Horizontal (View menu Lay Out All) Arrange all nodes in an automatic layout, along either a vertical or a horizontal axis.
 Layout Children (View menu Lay Out Children) Automatically lays out the children of the selected node.
A material node is "hot" when the material in the node is assigned to one or more surfaces in the scene. When you use the Slate Material Editor to adjust a hot material node, the material in the scene changes at the same time.
In the title bar of the node, the corners of the material preview indicate whether the material is a hot material:
 No triangles: The material is not used in the scene.
 Outlined white triangles: The material is hot. In other words, it is instanced in the scene. Changes you make to the material
in the Slate Material Editor will change the material displayed in the scene.
Outlined white triangles: The material is hot. In other words, it is instanced in the scene. Changes you make to the material
in the Slate Material Editor will change the material displayed in the scene.
 Solid white triangles: The material is not only hot, but is applied to the currently selected object.
A material is "cool" if it is not applied to any object in the scene.
To make a hot material node cool, clone it by using Shift+drag or Ctrl+Shift+drag. This makes a copy of the material (or of the material plus its maps) that is not used in the scene.
To place a material or map node in the active View:
To give a material or map a different name, do one of the following:
Scene Materials group, or any library, right-click the name of the material and choose Rename.
3ds Max opens a Rename dialog, which lets you enter a new name for the material.
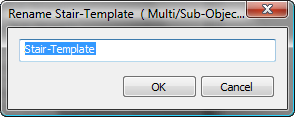
The name of a material can contain spaces, numbers, and special characters.
Scene Materials group (or any library) to the active View.
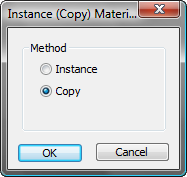
3ds Max opens an Instance (Copy) dialog. Choose Instance, and then click OK.

To edit the settings of a material or map:
The rollouts for the material or map appear in the Parameter Editor, where you can change settings.
Material group to the active View, or double-click the Browser entry.
Scene Materials group (or any library) to the active View.
3ds Max opens an Instance (Copy) dialog. Choose Copy, and then click OK.
To get a material from the scene:
 click (Pick Material From Object).
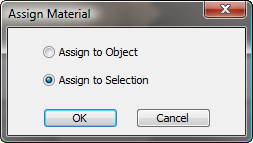
To apply a material to objects in a scene:
As you drag in the viewport, a tooltip appears over each object beneath the mouse, showing the object's name. You can apply the material whether the object is selected or not. Release the mouse to apply the material.
Dragging from a material node’s output socket to an object in the scene
If the object isn't selected, or if it's the only object selected in the scene, the material is applied immediately. If the object is one of several selected objects in the scene, 3ds Max prompts you to choose whether to apply the material to the single object only or to the whole selection (the latter is the default choice).
You can also apply a material to a selection by making a selection of scene objects, selecting the material node in the active
View, then clicking  ( Assign Material to Selection) on the Slate Material Editor toolbar.
To remove a material from an object:
 Select the object.
To select objects that have the same material applied:
When a material in the Slate Material Editor is applied to objects in the scene, you can use the Slate Material Editor to select the objects.
Select By Material.
3ds Max opens a Select Objects dialog. In the list of objects, all objects with this material assigned are highlighted.
The Preview window for materials and maps helps you visualize how the material or map will appear in the scene.
To map a material component, you wire a map node to the input socket for that component’s slot. Drag from the map socket to the material socket or from the material socket to the map socket.
Right-clicking a material or map node displays a menu that has a variety of options for displaying and managing the material or map.
Right-clicking a wire between nodes displays a menu with options for changing the child type, or managing its instances.