 Command entry:
Queue Monitor

Highlight a Server and right-click.

Week Schedule
 Command entry:
Queue Monitor

Highlight a Server.

Servers menu

Week Schedule
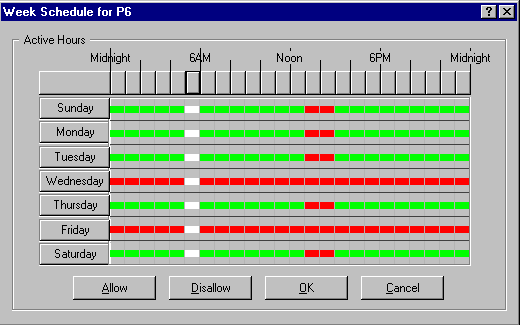
By default, all servers are available at all times. Using the Queue Monitor's Week Schedule feature, you can arrange the hours
during which each server is available for network rendering.
You can specify certain hours for any day of the week. This is useful, for example, if the server is used as a modeling workstation
during normal business hours and you do not want it being used as a network render server during this time.
Procedures
To schedule a set of active hours for a server or servers:
- In Queue Monitor's Server list, right-click a Server and choose Week Schedule, or select one or more Servers and choose Servers
menu
 Week Schedule.
- In the dialog that appears, select a time using one of the following methods:
- Click the Allow button. The selection is shown in green. (By default, all hours are allowed).
- To apply the time selection to the selected Server, click OK.
To schedule hours when servers are unavailable:
- In Queue Monitor's Server list, right-click a Server and choose Week Schedule, or select a Server and choose Servers menu
 Week Schedule.
- In the dialog that appears, select a time using one of the following methods:
- Click the Disallow button. The selection is shown in red.
- To apply the time selection to the selected Server, click OK.

 Week Schedule.
 Week Schedule.