Special Purpose Maps Rollout


Command entry: Material Editor Arch & Design Material Special Purpose Maps rollout

Lets you apply bump, displacement, and other maps.

Each left-justified setting has a check box for enabling and disabling the map, and a button for defining the map.

Interface

Bump

Click the map button to assign a Bump map. Use the multiplier value to adjust the strength of the bump effect.
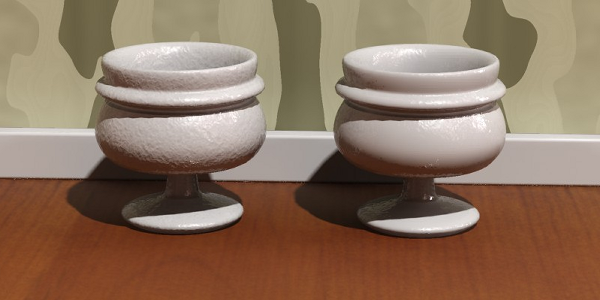
  • Do not apply bumps to the diffuse shadingWhen off, the bumps apply to all shading components: diffuse, highlights, reflections, refractions, and so on. When on, bumps are applied to all components except the diffuse. This means bumps are seen in reflections, highlights, and so on, but the diffuse shading shows no bumps. It is as if the material's diffuse surface is smooth, but is covered by a bumpy lacquer coating.

    Left: Do Not Apply Bumps ...=off

    Right: Do Not Apply Bumps ...=on

Displacement

Click the map button to assign a Displacement map.

The numeric setting is a multiplier value for adjusting the strength of the displacement effect.

Cutout

Click the map button to assign a Cutout map. For example, you could use this feature to map an image of a tree to a flat plane and use opacity to cut away the parts of the tree that are not there.
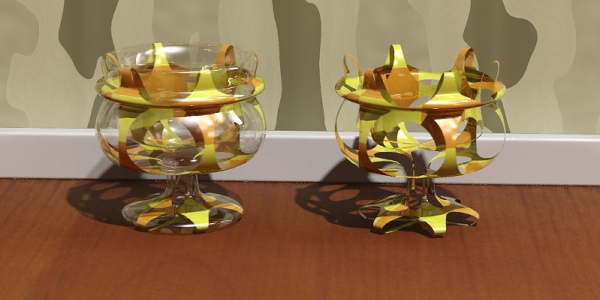
Left: Mapped transparency

Right: Using Cutout

Environment

Click the map button to assign a local Environment map to the material.

Additional Color

Click the map button to apply an additional map or shader whose output is added on top of the shading performed by the Arch & Design material.

Self Illumination Color

Click the map button to assign a Self-Illumination map.

See Also