


The Lens Effects Highlight properties enable you to determine which parts of your scene will have highlights applied to them, as well as how the highlights are to be applied.
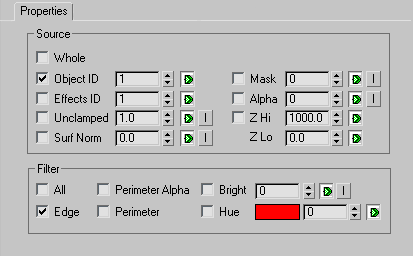
The Properties panel is broken down into two sections: Source and Filter.
The Source section lets you select any G-Buffer data in the scene that will have a highlight applied to it. Lens Effects Highlight will begin the process by finding the source pixels from your scene that you want to glow.
The Object ID Lets you apply highlights to particular objects in your scene that have a corresponding G-Buffer (or Object) ID. The G-Buffer is a geometry buffer and can be defined when you right-click any 3ds Max object and select Propertiesfrom the menu. Then, set the Object Channel ID under the G-Buffer ID controls. This parameter can be animated.
The Effects ID lets you apply the highlight to an object or part of an object with a specific Material ID assigned to it. Material IDs are applied in the Material Editor. See G-Buffer. This parameter can be animated.
The highlights are then only applied to areas of the geometry where that particular ID is present.
An unclamped color is brighter than pure white (255,255,255). 3ds Max keeps track of these "hot" areas which tend to show up when your scene contains bright metallic highlights or explosions. This spinner lets you determine the lowest pixel value that is highlighted. Pure white has a pixel value of 1. When this spinner is set to 1, any pixels with a value above 255 will be glowed. You can invert this value by clicking the I button to the right of the spinner. This parameter can be animated.
Highlights part of an object, based on the angle of the surface normal to the camera. A value of 0 is coplanar, or parallel to the screen. A value of 90 is normal, or perpendicular to the screen. If you set Surf Norm to 45, only surfaces with normal angles greater than 45 degrees will be glowed. You can invert this value by clicking the I button to the right of the spinner. This parameter can be animated.
Highlights the mask channel of an image. The spinner value represents the level of grayscale present in a Mask. When this is set, any part of the Mask images larger than the set value will be glowed in the final image. You can invert this value by clicking the I button to the right of the spinner. This parameter can be animated. Range = 0 to 255.
Filters the Source selections to let you control how the highlight is applied. For example, you can have ten spheres in your scene, each with the same Object ID, but different colors. If you set the Source as the Object ID of the spheres, which selects all of the spheres, that is the only place in your scene that Highlight will apply an effect.
However, now that Highlight knows where the pixels are that can be highlighted, it needs to know which ones to actually apply the highlights to. Highlight uses the filter controls to find out which source pixels to apply the highlight to.
Applies a highlight only to the perimeter of an object based on its alpha channel. Selecting this option highlights only the outside of an object without any spill on the interior. Whereas highlighting by Edge produces a spill onto the object, Perimeter Alpha keeps all of the edges clean because it relies on the scene alpha channel to derive it's effect.
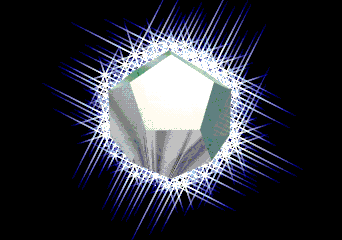
Perimeter alpha highlights
Filters the source objects by their hue. Select the hue by clicking the color swatch next to the spinner. You can choose hue values from 0 to 255. The spinner beside the Hue color swatch lets you enter a variance level so that the glow can find several different hues in the same range as the chosen color This parameter can be animated.


 (Add Image Filter Event)
