


IES Sun is a physically-based light object that simulates sunlight. When used in conjunction with a daylight system, its values are set automatically based on geographic location, time, and date. (IES stands for Illuminating Engineering Society; see IES Standard File Format.)
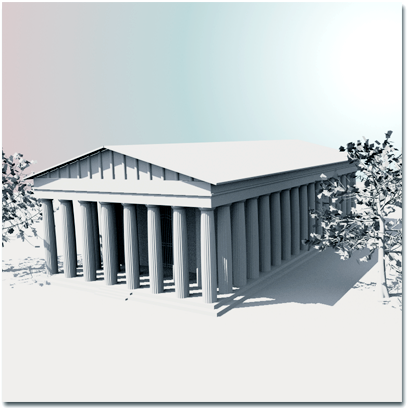
Outdoor scene illuminated by the IES Sun light
The mental ray renderer gives physically accurate results for IES Sun, and renderings that use it will appear similar to renderings done with the default scanline renderer. You do not need to turn on Final Gather for light from IES Sun to render.
The Daylight system combines the two daylight components of sun and sky in a unified interface.
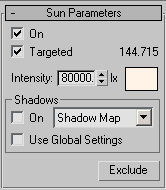
Applicable only when you add the IES Sun light directly, rather than as part of a Daylight system. When on, the light is targeted and you can change the target distance by moving the target. The distance between the light and its target is displayed to the right of the check box. When off, you can set this value directly.
The intensity of the sunlight. The color swatch to the right of the spinner opens the Color Selector to set the color of the light. Typical intensities in a clear sky are around 90,000 lux.
Determines whether the renderer uses shadow maps, ray-traced shadows, advanced ray-traced shadows, mental ray shadow maps, or area shadows to generate shadows for this light.
Each shadow type has a rollout with its associated controls.
Turn on to use global settings for shadows cast by this light. Turn off to enable individual control of the shadows. If you choose not to use the global settings, you must choose which method the renderer will use to generate shadows for this particular light.
When Use Global Settings is on, the shadow parameters switch over to show you what the current global setting is. This data is shared by every other light of this class. When Use Global Settings is off, the shadow parameters are specific to that particular light.
Excludes selected objects from the effects of the light. Click this button to display the Exclude/Include dialog.
Excluded objects still appear lit in shaded viewports. Exclusion takes effect only when you render the scene.

When on, the light affects the specular properties of an object's surface. When off, the light has no effect on the specular properties. Default=on.
For example, by using the Diffuse and Specular check boxes you can have one light color the specular highlights of an object, while not coloring its diffuse component, and then have a second light color the diffuse component of the surface while not creating specular highlights.
This rollout is identical to the Optimizations rollout for advanced ray-traced and area shadows.

 Create panel
 (Systems)
  Modify panel