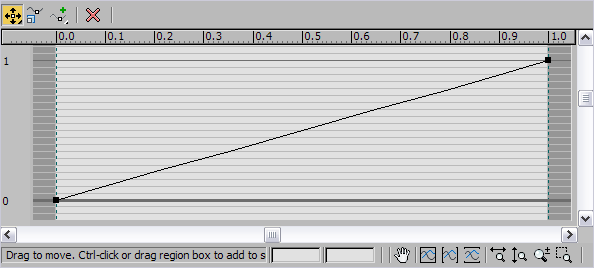
The Radial Size dialog gives you the ability to determine the size of your Lens Effect. The Radial Size dialog displays a curve with a point on each end which represents the Radial Size of your Lens Effect. The default position of the curve is one which means the Lens Effect will have the same radius around the center of the effect.

Objects with different Radial Sizes settings applied to Glow
By adding and moving points along the curve you can make areas of the effect extend further by moving a point above a value of one on the graph. You can also diminish areas of the effect by moving a point between one and zero on the graph. Finally, you can eliminate areas of the effect by moving a point below zero on the graph.
Buttons are available at the bottom of the dialog that allow you to change the display of the dialog. You can also manually enter a horizontal or vertical position by entering a value in the two entry boxes.


 Move
MoveMoves selected points in any direction. Click and hold the Move button to display the flyout where you can select a button to move in any direction, move only in the horizontal direction, or move only in the vertical direction. The Move function remains active until you click another button. The button is yellow while it is active.
 Scale Point
 Add Point
Allows you to add points anywhere along the Radial Size curve. Click and hold the Add Point button to display the flyout where you can select a button to add either a Corner Point or a Bezier Point. Click once to enable Add Point. The Add Point function remains active until you click another button. The button is yellow while it is active.
 Delete Point