In this lesson, you'll
create two primitive objects, then modify their parameters so they
take on the appearance of a rock and a tree.
Set up the scene:
- Continue from the previous lesson.
Create a rock:
- On the
 Create panel, click
  (Geometry), then in the
Object Type rollout, click Sphere.
(Geometry), then in the
Object Type rollout, click Sphere.
The button highlights to show that it is active
and ready to use.
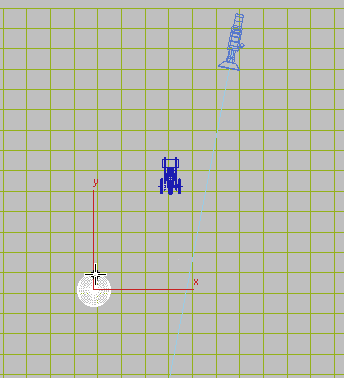
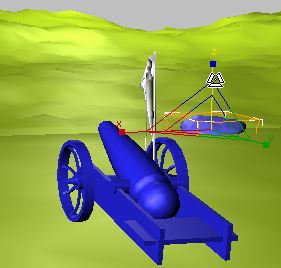
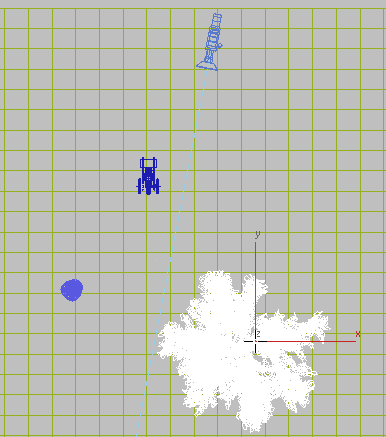
- Create a sphere in the Top viewport by
holding down the left mouse button anywhere to the front and left
of the cannon (see the next illustration) and dragging away from
where you started. As long as you hold the mouse button down, you
can adjust the size of the sphere. When you release the mouse button,
the sphere is complete.
TipYour sphere might be a different color from
the one in the illustration.
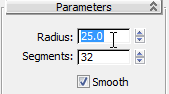
- On the
 Modify panel
  Parameters rollout,
change the Radius setting to 25 and press Enter.
Parameters rollout,
change the Radius setting to 25 and press Enter.
The sphere changes size in the viewport. In 3ds Max,
it’s typical practice to rough out an object with the mouse, then
refine it on a rollout.
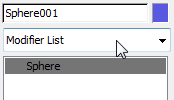
- Click the Modifier List drop-down menu
and choose the Noise modifier.
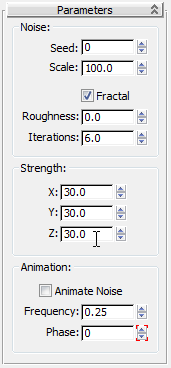
- In the Noise group, turn on Fractal,
and in the Strength group, set X, Y, and Z to 30.0.
The rock is taking shape,
but it could be flatter.
- On the main toolbar, click
 (Select and Uniform Scale).
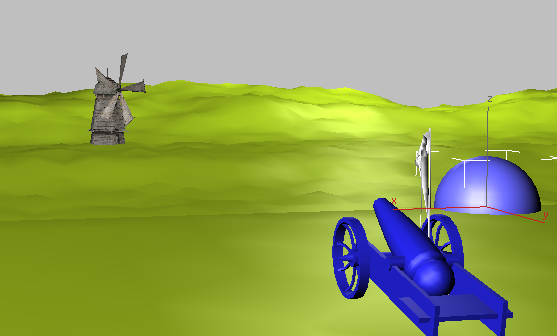
- In the Camera001 view, drag the gizmo
Z axis downward until the rock object is about two-thirds its original
height.
Change the name of the sphere:
- In the Modify panel object name field,
double-click the name Sphere001 to highlight it.
- Type in rock to change
the name of the sphere. Press Enter to
set the new name.
NotePressing Enter is
an explicit way to change a parameter. 3ds Max also accepts a
parameter change as soon as you click anywhere else in the 3ds Max window.
Create a tree:
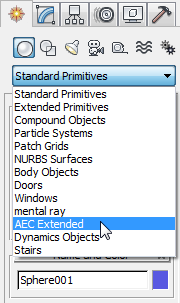
- On the Create panel, click (Geometry), then from the
drop-down list (at present, it shows “Standard Primitives”), choose
AEC Extended.
AEC Extended objects
are pre-built geometry, including railings, fences, and plants.
They are a fast way to add realistic details to a scene.
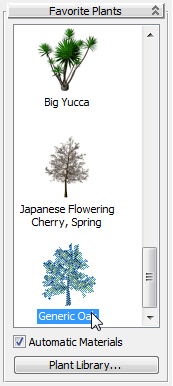
- On the Object Type rollout, click Foliage.
- On the Favorite Plants rollout, choose
Generic Oak as the species of tree.
- Right-click the Top viewport to activate
it, and add the tree to the scene by clicking a point slightly below
and to the right of the rock.
To give the scene some
atmosphere, we’ll make the tree appear stunted and battle-scarred.
- With the tree still selected, on the
Modify panel Parameters
rollout, set Height to 150.
- In the Show group, turn off Leaves, and
in the Level-Of-Detail group, turn on Low to reduce the number of
branches.
- If you are not yet satisfied with the
appearance of the tree, on the Parameters rollout click New.
Each time you click this
button, the Seed value is changed, causing the tree to undergo a
random reconfiguration.
- When you are satisfied with the appearance
of the tree, re-name the Foliage001 object in the Name
field using the same procedure you followed for the rock. Call this
object oak_tree.
- If the tree is obscuring your view of
the windmill, feel free to move it aside using
 (Select And Move) on the
main toolbar.
(Select And Move) on the
main toolbar.
Next, you'll apply a
material to your rock using the Material Editor.