


Apply the Smoke to Other
Parts of the Scene
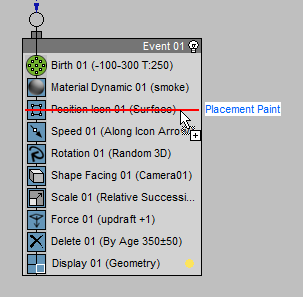
It would be possible to copy the original Particle Flow icon to other locations in the scene; Instead of this, we will use a special operator, Placement Paint, to generate additional sources of smoke from the single Particle Flow system.
Use Particle Paint to emit smoke from other areas of the terrain:
 zoom in once again on the
area near the wrecked jeep.
zoom in once again on the
area near the wrecked jeep.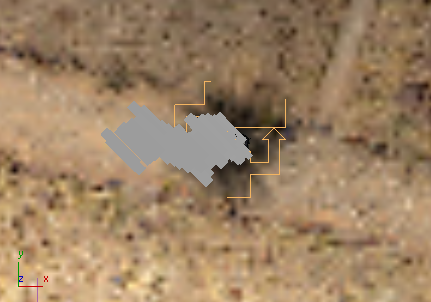
 Create panel, turn on
  (Helpers). Choose Particle
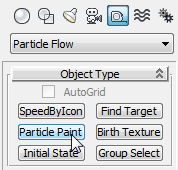
Flow from the drop-down list, then on the Object Type rollout, click
to turn on Particle Paint.
(Helpers). Choose Particle
Flow from the drop-down list, then on the Object Type rollout, click
to turn on Particle Paint.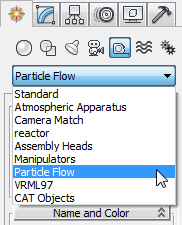
 Select the Plane01 object, choose
  (Zoom Extents Selected),
and then click this navigation button.
(Zoom Extents Selected),
and then click this navigation button.
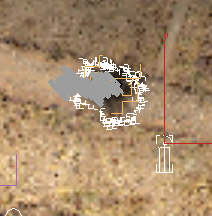
 Zoom in a little more closely
so you have a good view of the scorch marks.
Zoom in a little more closely
so you have a good view of the scorch marks.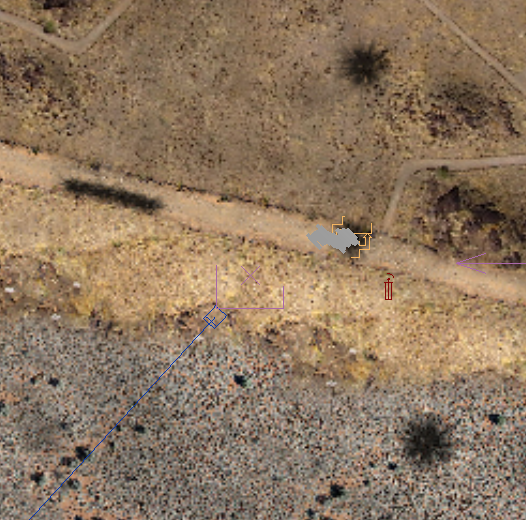
 (Maximize Viewport Toggle)
to maximize the Top viewport.
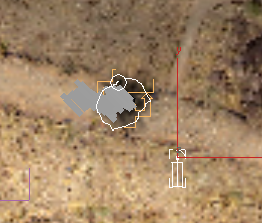
Select the Particle Paint
helper again, then go to the
(Maximize Viewport Toggle)
to maximize the Top viewport.
Select the Particle Paint
helper again, then go to the  Modify panel.

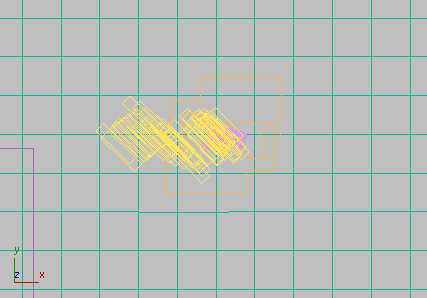
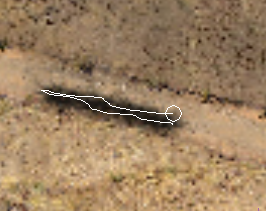
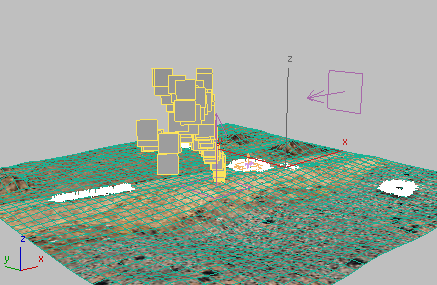
After you release the mouse, 3ds Max displays a number of ticks along the path you painted.
Each tick is a particle seed that eventually will generate particles for the Particle Flow system.
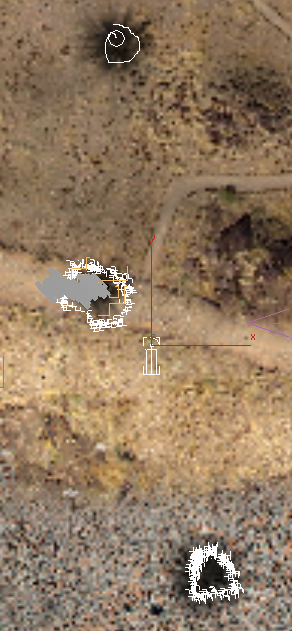
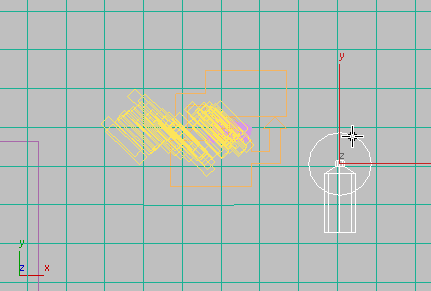
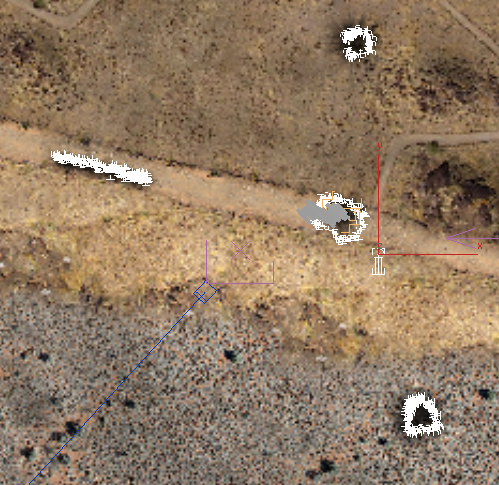
Your scene should now have four areas with particle seeds: the three circular scorched areas on the right (east), and the long scorched area in the road on the left (west).
(Maximize Viewport Toggle)
once again to return to a four-viewport layout.
Now that you have placed the particle seeds, you need to add a Particle Flow operator that allows the Smoke system to use these seeds.
Add a Placement Paint operator:
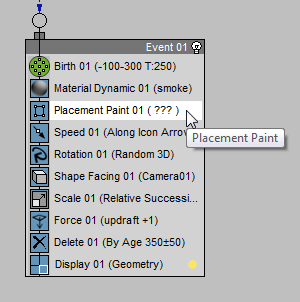
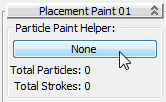
The Placement Paint entry is followed by “( ??? )”. This indicates that you haven’t yet assigned a Particle Paint helper.
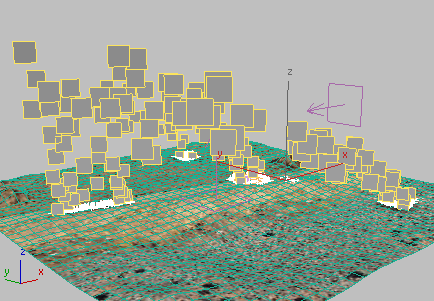
Particle Flow now uses the Particle Paint helper as the geometric source for particle generation.
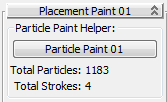
However, at this stage, particles are generated from a point that is the average center of all the paint seeds taken together.
 Acquire Paint Data group,
choose Paint Position To Position.
Acquire Paint Data group,
choose Paint Position To Position.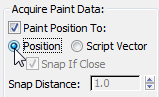
Now Particle Flow generates particles wherever there are seeds in the scene.

This option tells Particle Flow to stop creating particles when the number of particles in the system exceeds the number of seeds you painted. It prevents the particle system from becoming “overcrowded.”
 (Go To End) to go to frame
300, then click
(Go To End) to go to frame
300, then click  (Render Production).
Now smoke issues from all four scorched areas. It looks good, but a bit sparse: The same number of particles is now shared among the four areas.
Add a Spawn operator to increase the number of particles:
One way to increase the number of smoke particles is simply to increase the Amount value in the Birth operator. But in this lesson, we will adjust the number of particles by using a Spawn test. This is a useful alternate technique, and using Spawn will also be a help when you create embers in the lesson that follows.
The actions in the depot that have yellow, diamond-shaped icons, are known as tests.

Test entries in the Particle View depot
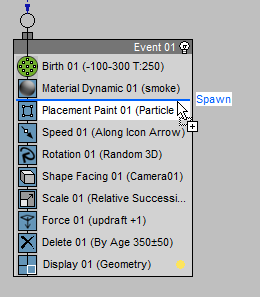
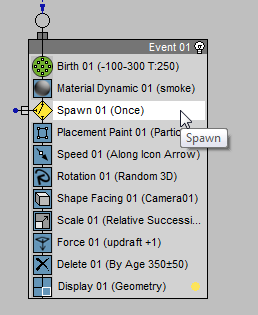
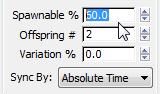
This tells Particle Flow to take 60 percent of the original particles, and spawn two child particles from each of the originals.
Go to frame 300 and render the scene.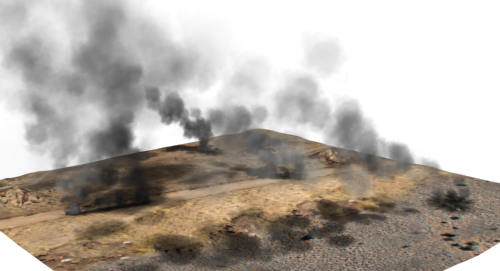
You have now completed the smoke itself. The remaining exercise is to generate embers from the burning jeep.
 open
open  (Go To Start) if the time
slider is still at frame 300 or some other frame.
(Go To Start) if the time
slider is still at frame 300 or some other frame.