You will use a subset
of particles to simulate not smoke, but embers (burning debris)
from the jeep.
Set up the scene:
- Continue from the previous lesson, or
 open pflow_04.max.
Set aside some particles to behave as embers:
- Restore Particle View (6).
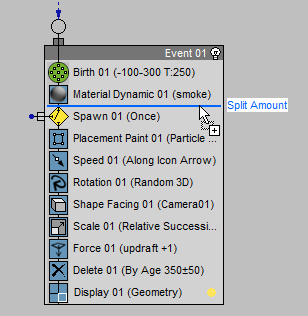
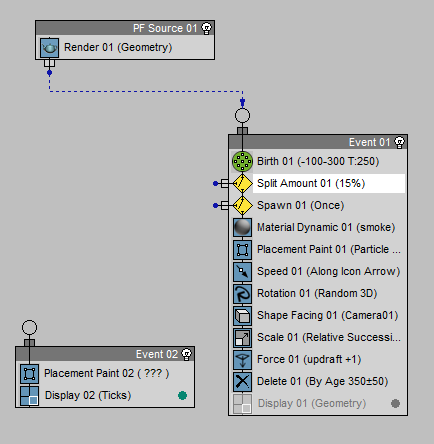
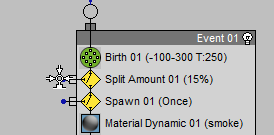
- Drag a Split Amount test from the depot,
and drop it on Event 01 just above the Spawn
test (and below the Material Dynamic operator).
- Click the Split Amount test to highlight
it.
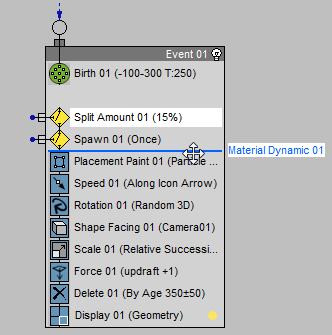
- On the Split Amount rollout, make sure
Test True For
 Fraction
Of Particles is chosen, then change the value of Test True For Fraction Of Particles Ratio % to 15.0.
Fraction
Of Particles is chosen, then change the value of Test True For Fraction Of Particles Ratio % to 15.0.
This “siphons off” 15
percent of the original 250 particles (because the Split Amount
test precedes the Spawn test). These particles will become embers.
- Drag the Material Dynamic operator and
drop it below the Spawn test.
Moving the Material Dynamic
operater enables you to assign the ember particles a different material
from the smoke particles.
Add a new Particle Paint helper:
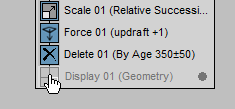
- In Event 01, click
the icon of the Display operator to turn the Display operator off.
This disables particle
display in viewpors (though not in renderings). This is a temporary
measure to make it easier for you to paint new particle seeds.
- Hide Particle View (6).
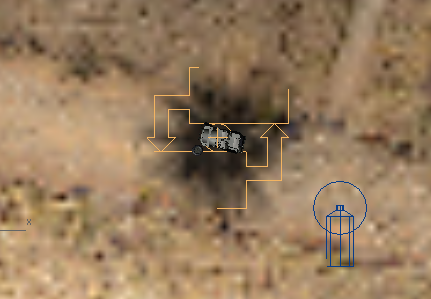
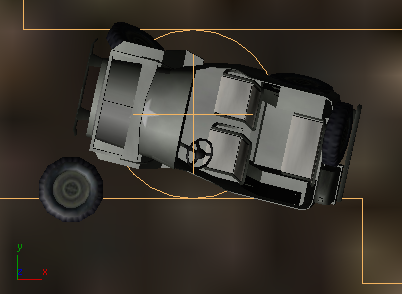
- Activate the Top viewport, and
 zoom in on the jeep.
-
 Go to frame 0.
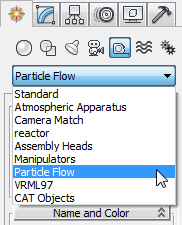
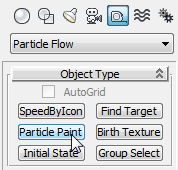
- On the
 Create panel, turn on
  (Helpers). Choose Particle
Flow from the drop-down list, then on the Object Type rollout, click
to turn on Particle Paint.
(Helpers). Choose Particle
Flow from the drop-down list, then on the Object Type rollout, click
to turn on Particle Paint.
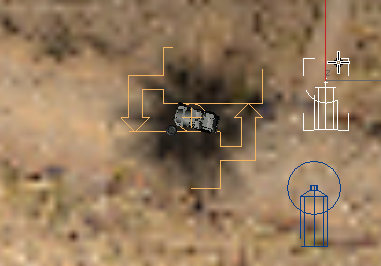
- In the Top viewport, drag near the jeep
to create a second Particle Paint helper.
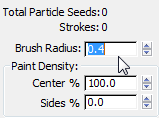
- On the Setup rollout, change the Brush
Radius value to 0.4.
Now you are ready to
paint the seeds for the ember particles.
Paint where and when the embers will appear
For the smoke, you painted
all seed particles at frame 0. For the embers, you will add them
at particular frames, to distribute them in time as well as in space.
- Make sure Particle Paint 002 is
still selected, then go to the
 Modify panel.
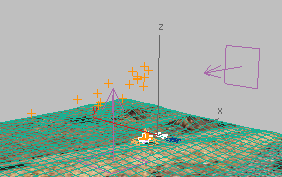
- In the Top viewport, zoom in even more closely,
so you can see the geometry of the jeep.
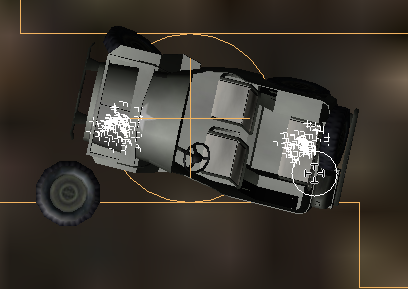
- On the Modify panel Setup rollout, click
to turn on Freehand Paint.
- At frame 0, paint two short strokes on
the body of the jeep.
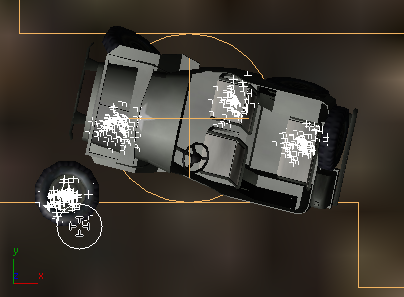
- Drag the time slide to frame 80, and
paint two more strokes.
- Add an additional two short strokes at
the following frames:
- Frame 160
- Frame 240
- Frame 280
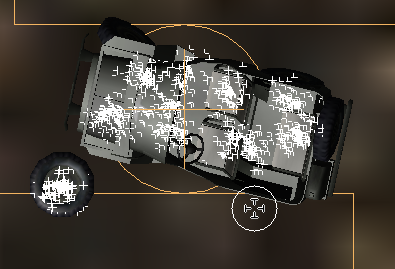
When you are done, the
jeep will be fairly well covered with particle seeds.
- Right-click to turn off Freehand Paint.
Add the embers to the particle system:
- Restore Particle View (6).
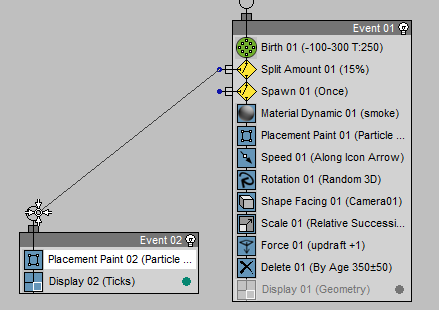
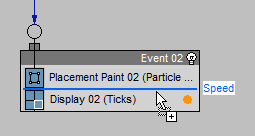
- Drag a Placement Paint operator from
the depot to the gray area of the event display.
When you drop an event
(an operator, test, and so on) the empty part of the event display,
Particle Flow creates a new event. Initially, the new event contains
the operator you dropped, and a Display operator.
TipTo rearrange events
and the root PF Source entry in the event display, simply drag the
entry by its title bar.
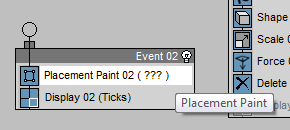
- In Event 02, click
the Placement Paint operator to highlight it.
- Move Particle View so you can see a viewport
that shows the Particle Paint 002 helper icon.
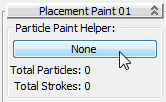
- On the Placement Paint rollout, click
the Particle Paint Helper button (initially, it is labeled “None”).
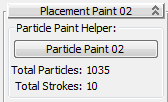
- In a viewport, click the Particle
Paint 002 helper icon.
Event 002 will
use Particle Paint 002 as the source
for generating ember particles.
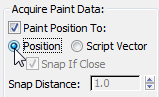
- In the Particle Paint rollout Acquire Paint Data group,
choose Paint Position To Position.
- In the Index Order group, turn on Stop
If Count Overflow.
- In the event display, the round blue
sockets that protrude from test actions are known as test
outputs. When you move the cursor over a test output,
it changes to indicate the test is available for wiring.
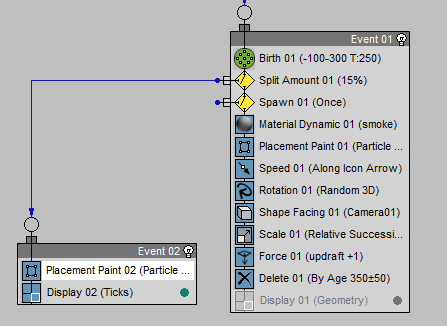
Connect the Split Amount
test to Event 02 by dragging a wire from
the Split Amount test output to the input socket of Event
002.
Particle Flow wires the
test to the new event.
Now Event 002 can
use the particles that Split Amount sends to it.
- Hide Particle View (6).
- Drag the time slider.
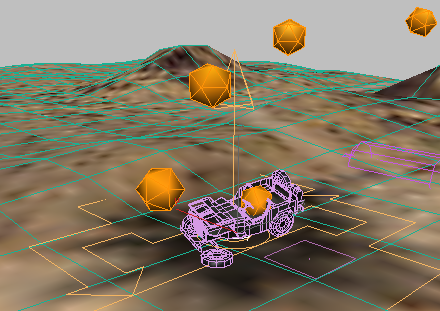
Some embers fly upward
and outward, while others hover near the jeep.
TipIf the ember particles
are hard to see in viewports, click either the color swatch on the
Display rollout, or the color dot on the Display operator entry
in
Event 02.
Clicking either the swatch
or the dot displays a Color Selector that lets you change the display
color.
Adjust the ember particle behavior:
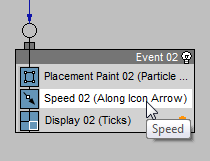
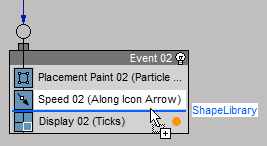
- Drag a Speed operator from the depot,
and drop it on Event 02.
- Click the new Speed operator to highlight
it.
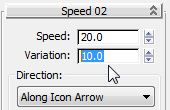
- On the Speed rollout, change the value
of Speed to 20.0, and the value of Variation
to 10.0.
Now the particles move
more slowly, and they all move vertically upward as the smoke particles
initially did.
You will add space warps
so the particles come back down to earth. But first, you will adjust
how the particles appear in viewports and renderings.
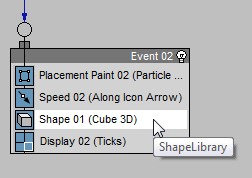
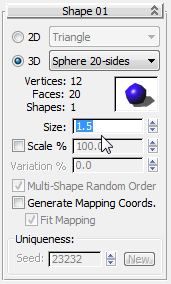
- Drag a Shape operator from the depot,
and drop it on Event 002.
- Click the new Shape operator to highlight
it.
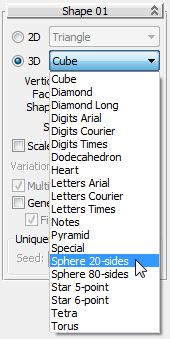
- On the Shape rollout, leave 3D chosen,
and choose Sphere 20-Sides from the 3D drop-down list.
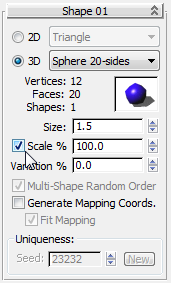
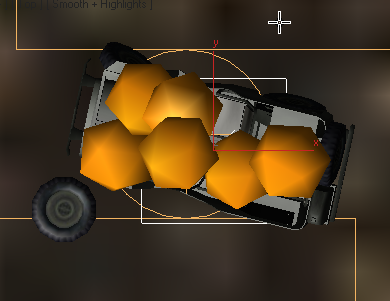
- Change the Size value to 1.5.
- Click to turn on Scale %. Leave its value
at the default of 100.0.
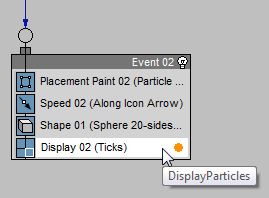
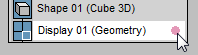
- In Event 002, click
the Display operator to highlight it.
- On the Display rollout, choose Geometry
from the Type drop-down list.
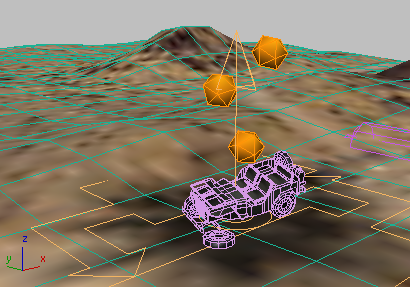
Now the ember particle
geometry is visible in viewports.
Add a Wind space warp to propel the embers:
- Hide Particle View (6).
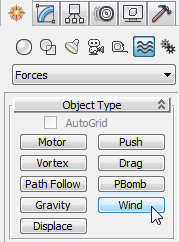
- On the Create panel, click to turn
on
 (Space Warps).
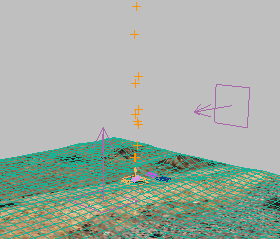
- On the Object Type rollout, turn on Wind.
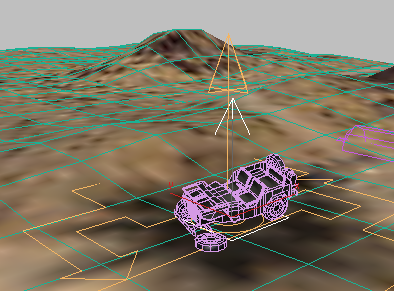
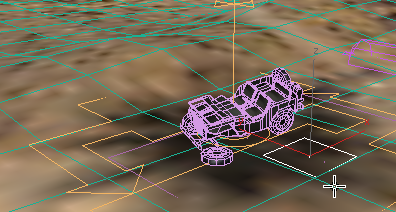
- In the Top viewport, drag to create a
Wind space warp centered on the jeep.
The new space warp is
a little easier to see in the Perspective viewport.
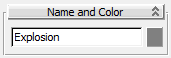
- Name the new Wind space warp Explosion.
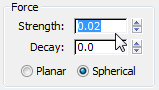
- In the Parameters rollout Force group, change
the wind direction to Spherical.
- Also in the Force group, change the value
of Strength to 0.02.
- In the Parameters rollout Display group, change
the Icon Size value to 0.6.
The Explosion space
warp will propel the embers in circular paths.
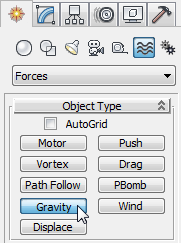
Add a Gravity space warp so the embers
will fall back to earth:
- On the Create panel Object Type rollout, turn on Gravity.
- In the Perspective viewport, drag near
the jeep to create a Gravity space warp.
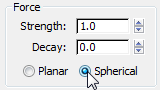
- In the Parameters rollout Display group, change
the Icon Size value to 1.2.
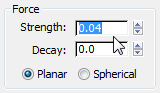
- In the Parameters rollout Force group, change
the Strength value to 0.04.
The force of gravity
is slightly greater than the force of the wind.
Now you can use the space
warps to control the ember particles.
Include the space warps in the particle
system:
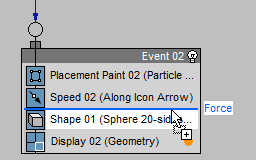
- Restore Particle View (6).
- Drag from the depot to add a Force operator
to Event 02.
- Click the new Force operator to highlight
it.
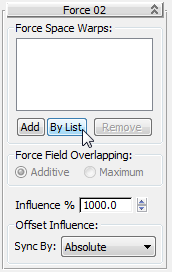
- On the Force rollout, click By List.
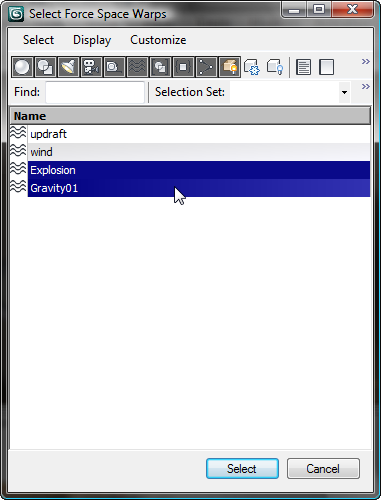
- In the Select Force Space Warps dialog,
click and Ctrl+click to
select the space warps Explosion and Gravity001,
then click Select.
Now the combination of
a (spherical) wind and gravity will control the ember particles.
- Hide Particle View (6).
- Drag the time slider or
 play the animation.
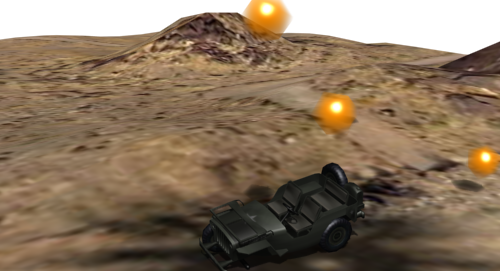
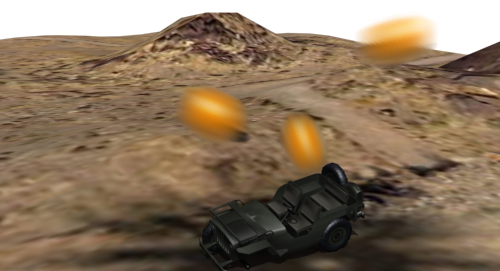
The embers fly out of
the jeep, then fall back to the earth. They are easiest to see in
the Perspective viewport. They look rather large: But as with the
smoke particles, the material you apply will help fix their appearance.
Creating that material is the subject of the next procedure.
NoteIf you were modeling
more solid particles (for example, solid chunks of the jeep), you
might want to add a Collision test that would detect when the particles
fell to the ground (Plane01). For this tutorial, that
isn’t necessary.
Create a material for the glowing embers:
- On the main toolbar, click
 (Material Editor). to display
the Slate Material Editor.
(Material Editor). to display
the Slate Material Editor.
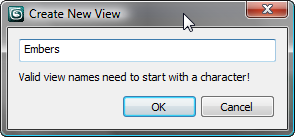
- Right-click the blank area above the
active View, and from the pop-up menu, choose Create New View.
- In the Create New View dialog, name the
new view Embers.
- Drag a Standard material entry from the
Materials Standard
group into the Embers view, and double-click
the new Standard node to display its parameters.
- Name the material Embers.
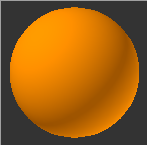
- Click the Diffuse color swatch, and in
the Color Selector, change the Diffuse color to RGB = 255,
156, 0. Click OK to close the Color Selector.
- Click to turn off the
 button that locks the Ambient component
to the Diffuse component.
button that locks the Ambient component
to the Diffuse component.
- Click the Ambient color swatch, and in
the Color Selector, change the Ambient color to RGB = 186,
0, 0. Click OK to close the Color Selector.
- In the Self Illumination group, change
the self-illumination value to 50 (percent).
Increasing the self-illumination
value makes a material appear to glow.
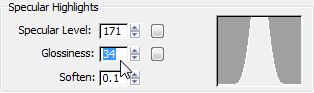
- In the Specular Highlights group, change
the Specular Level value to 171, and the
Glossiness value to 34.
The highlights make the
material appear brighter.
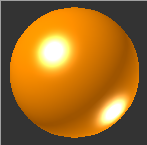
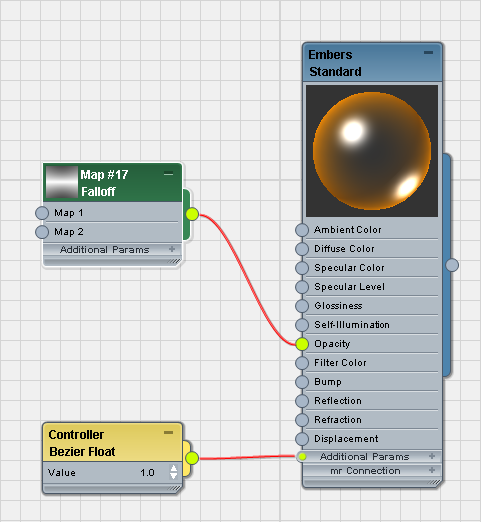
- Drag a Falloff map from the Browser to
the Embers view, and wire it to the
Opacity component of the Embers material.
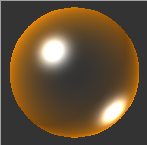
By default, the falloff
map makes the edges opaque and the center transparent: This is the
opposite of the effect we want.
- Double-click the Falloff node so you
can see its parameters.
- On the Falloff Parameters rollout, click
 (Swap Colors/Maps).
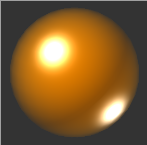
Now the center is opaque,
and the edges are transparent.
TipThe Falloff map is
good alternative for making the edges of particles transparent,
when the particles are three-dimensional.
- Drag the Standard material node’s output
socket to an unused sample slot in the Material/Map Browser Sample Slots group.
Choose Instance, and then click OK.
-
 Close the Slate Material
Editor.
Close the Slate Material
Editor.
Add the embers material to the particle
system:
- Restore Particle View (6).
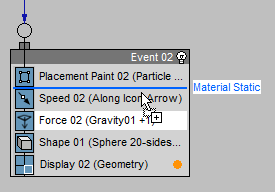
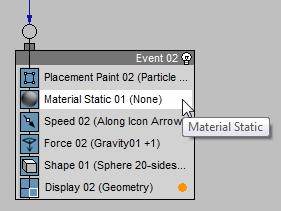
- Drag from the depot to add a Material
Static operator to Event 02.
You can use a Material
Static operator for the embers event, because the material doesn’t
change over time.
- Click the new Material Static operator
to highlight it.
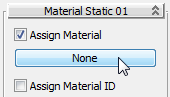
- On the Material Static rollout, click
the Assign Material button (initially it is labeled, “None”).
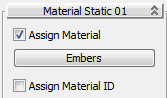
- In the Material/Map Browser Sample Slots group,
double-click the Embers material.
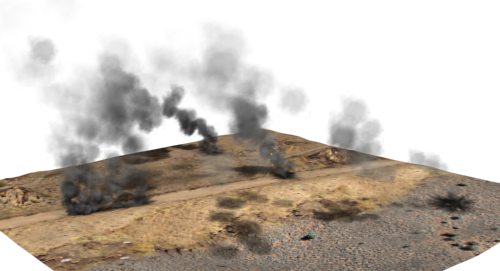
You can see the embers
effect most clearly by renering the Perspective viewport. (For this
illustration, we turned off rendering for the smoke particles.)
Up close, the embers
still don’t look too realistic. But they will look all right when
you render the Camera01 viewport, and you will enhance the effect
by adding motion blur to the embers. That is the subject of the
next procedure.
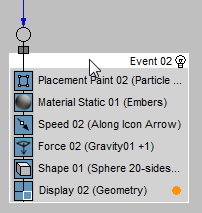
Add motion blur to the embers:
- In Particle View, click the title bar
of Event 02 to select the entire
event.
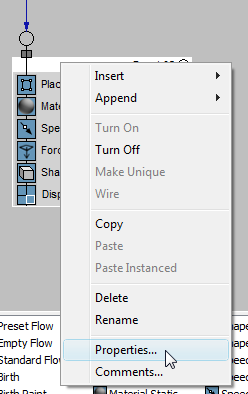
- Right-click, and from the pop-up menu,
choose Properties.
3ds Max opens an Object
Properties dialog for Event 02.
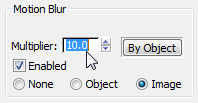
- In the General panel Motion Blur group, make sure Enabled is
turned on, then click to choose Image.
- Also in the Motion Blur group, change
the Multiplier value to 10.0.
- Click OK to close the Object Properties
dialog.
- Activate the Perspective viewport, drag
the time slider until you have a frame with embers in it, then
 render the scene.
3ds Max renders the
frame, and then in a second pass, adds motion blur to the ember
particles. (For this illustration, we turned off rendering for the
smoke particles, once again.)
In the Camera01 viewport,
the effect is subtle because the embers are at a distance. The motion
blur effect is most apparent when you play the animation.
(Optional) Render the animation:
- On the main toolbar, click
 (Render Setup).
3ds Max opens the
Render Setup dialog.
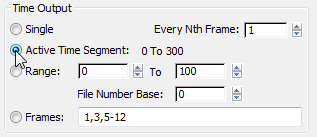
- In the Time Output group, choose Active
Time Segment.
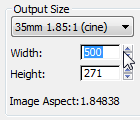
TipRendering at the
full resolution of 1024 x 554 can take a lot of time. Before you
render, you might want to reduce the size of frames in the movie;
for example, to 500 x 271. Smaller frames render more quickly.
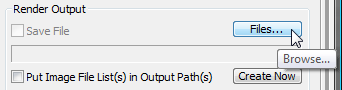
- Scroll down to the Render Output group,
and click Files.
3ds Max opens a file
dialog. Enter a name for the file, choose a movie file type (AVI
or MOV), and then click Save. 3ds Max opens a compression setup
dialog for the movie format you chose. Adjust the settings or accept
the defaults, and then click OK.
- In Render Output group, make sure Save
File is turned on. (By default, it turns on when you specify an
output file.)
- At the bottom of the Render Setup dialog,
make sure Camera01 is chosen in the View drop-down list, and then
click Render.
Save your work:
- Save the scene as smoke_completed.max.
To see a completed version
of the smoking desert, you can open pflow_completed.max. You can also
see a completed movie of the smoke animation by choosing Rendering View Image File. Navigate
to \sceneassets\renderassets\, and
then open either smoke.avi or smoke.mov.
Summary
This tutorial demonstrated
some aspects of particle systems; in particular:
- Particle Flow is a powerful, general-purpose
particle system that you can use to model smoke and explosions,
among other dynamic phenomena (rain, snow, and flowing water are
other possibilities).
- Particle Flow can work with space warps
such as Wind and Gravity, to model real-world behavior.
- The Particle Flow Shape Facing operator
is good for creating particles whose appearance is controlled by
their material. You can design materials (for example, with a Noise
map) to simulate more complex geometry.
- The Particle Age map lets you create
materials that change over time as particles can.
- For flat particles, using a radial Gradient
map for opacity can disguise the edges of the particles. For three-dimensional
particles, using a Falloff map for opacity can accomplish the same
thing.
- The Particle Paint helper in combination
with the Placement Paint operator lets you set particle location
by freehand strokes, and apply the same Particle Flow system to
multiple locations in a scene.
- Particle Paint also lets you set particle
generation at different frames in an animation.
- The Split Amount test is one way to treat
a set of particles differently from the original set.
- Applying Image Motion Blur to fast-moving
particles can improve their appearance in animations.