


Set up Particle Geometry
that Changes over Time
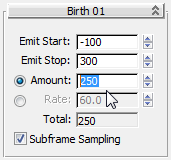
In this lesson, you set up the particle geometry to change over time as the smoke disperses. You also set up the Particle Flow system so it uses fewer particles.
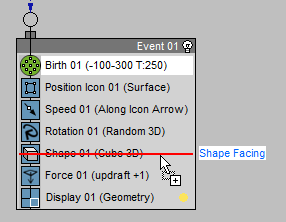
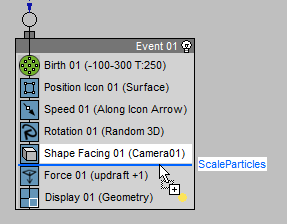
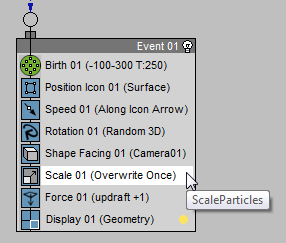
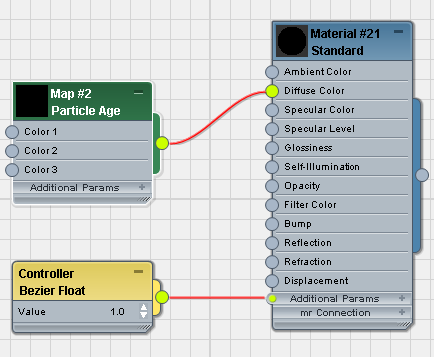
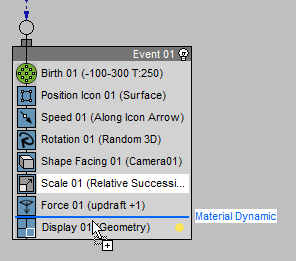
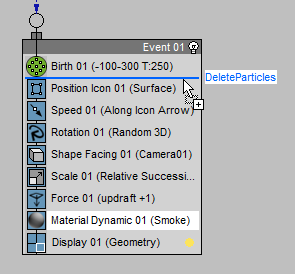
Unlike the blue line that appears when you add an operator by dropping the operator between two others, the line for replacing an operator appears red.
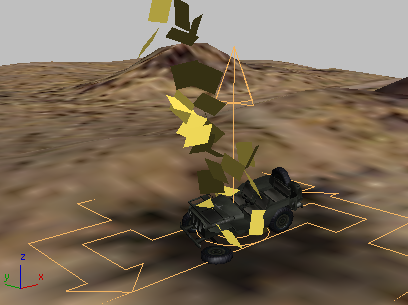
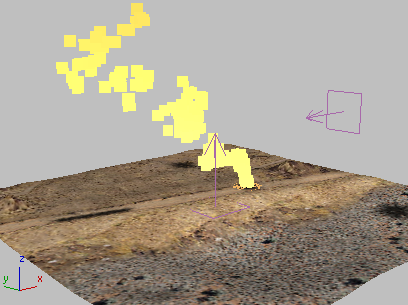
In viewports, the particles change to square shapes that are larger than the small cubes you generated before. However, their orientation is random: This is because the particles aren’t yet oriented to anything.

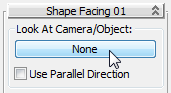
Click the Look At button to turn it on.

Look At button after you pick the camera
Now particles face in a uniform direction, and always face the camera, as you can see most easily in the Perspective viewport.
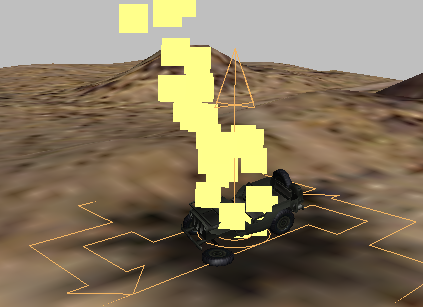
Shape facing particles always face another object. Usually this is a camera: The idea is to assign the particles a material that makes the scene geometry appear to be more complicated than it actually is. (The tutorial Particle Trees is another example of this technique.)
 Size/Width group, make
sure In World Space is chosen, and then change the value of Units
to 5.0.
Size/Width group, make
sure In World Space is chosen, and then change the value of Units
to 5.0.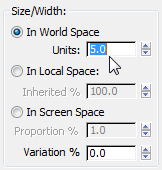
Now when you drag the time slider, smoke particles are easily visible even in the Camera01 viewport.
Set the particles to grow over time:
The smoke particles should grow over time: As the smoke rises, it also disperses. To model this, you use a Scale operator.
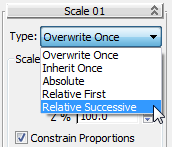
X % to 100.2.
Because Constrain Proportions is on, the Y % and Z % factors update to 100.2 as well.
The factor by which the particles grow doesn’t need to be great. Even two-tenths of a percent increase at each frame adds up quickly.
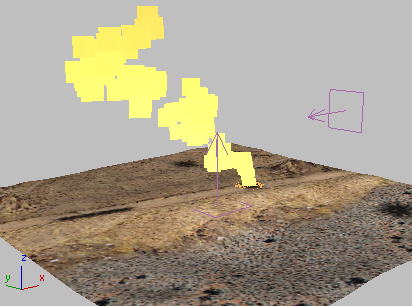
The particles increase in size as they rise.
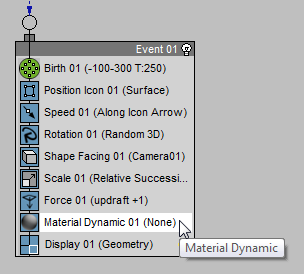
Create a dynamic material for the particles:
The next step is to create a material that changes over time while the particles change in size.
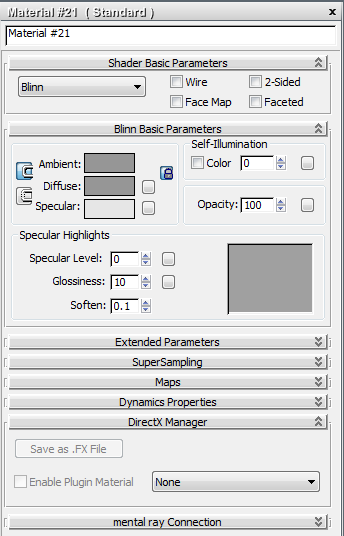
 (Material Editor) to display
the Slate Material Editor.
Standard Standard, and drag the
Standard material entry into the active View.
(Material Editor) to display
the Slate Material Editor.
Standard Standard, and drag the
Standard material entry into the active View.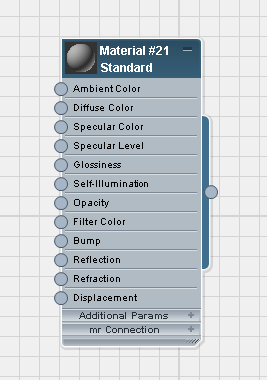
Standard Particle Age, and drag
the Particle Age entry into the active View.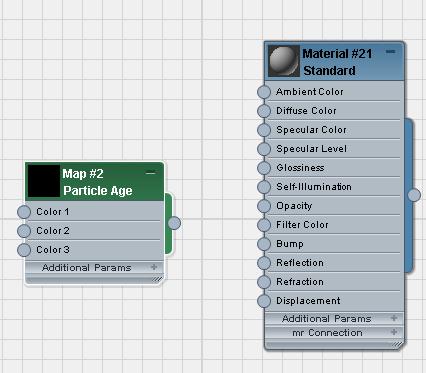
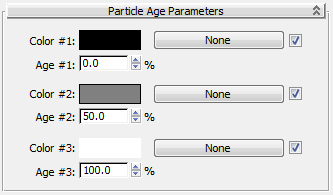
The Particle Age map specifies three colors: By default, Color #1 is the color at a particle’s birth (0 percent), Color #2 is the color when the particle is halfway through its life (50 percent), and Color #3 is the color at the particle’s death (100 percent). You can change the ages, but we won’t do so in this tutorial.
Don’t worry about the precise values: These are just arbitrary colors to test the Particle Age effect. Once Particle Age is working as we want it to, you will replace the colors with more realistic patterns.
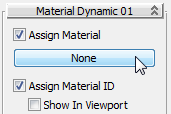
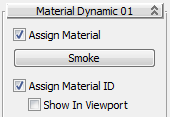
Add the new material to the particle system:
 (Go To End), and then click
  (Render Production).
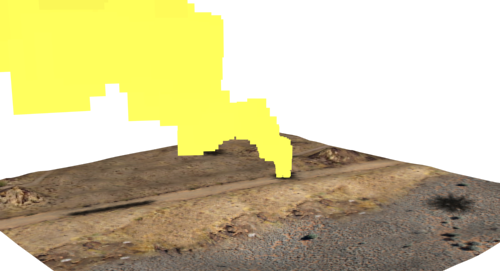
The particles still have a uniform yellow (birth) color.
The reason for this is that the particles don’t yet have a defined life span. The Birth operator controls particle creation, but not particle death.
Define the life span of particles:
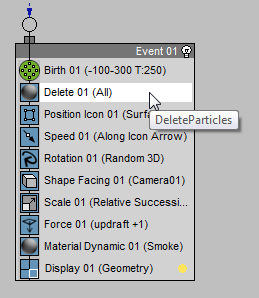
By Particle Age.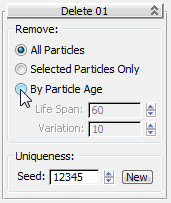
Choosing By Particle Age enables the Life Span and Variation parameters.
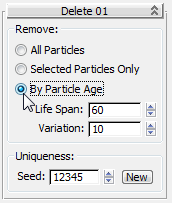
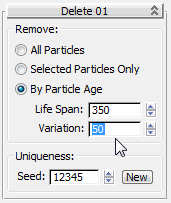
The Variation setting introduces a random variation in the life span of particles, so the system doesn’t appear too uniform.
Render frame 300 once again.
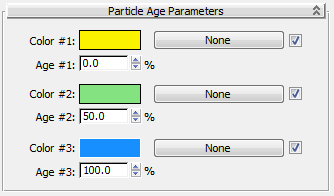
The particles begin with a yellow color, which shades to green at their half-life, and then to blue as they near the end of their existence.
Now you are ready to change the particle colors from the test colors to a pattern that simulates smoke. This is the subject of the next lesson.
 open
open