


Create a Particle Flow
that Behaves like Smoke
The first step is to set up a particle system that behaves like smoke. Once the behavior is established, then you can adjust the appearance of the particles.
 (Open File), navigate to
the \scenes\effects\smoke folder,
and open pflow_start.max.
(Open File), navigate to
the \scenes\effects\smoke folder,
and open pflow_start.max.
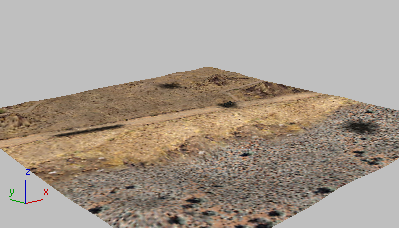
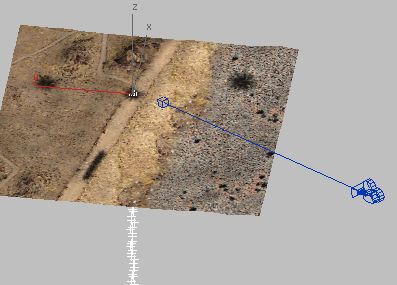
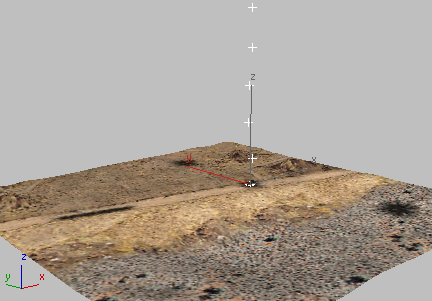
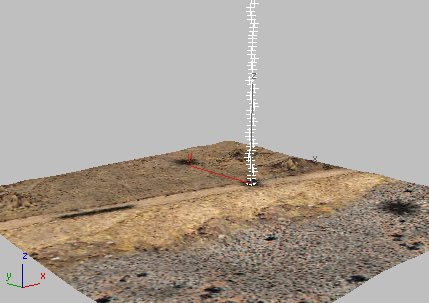
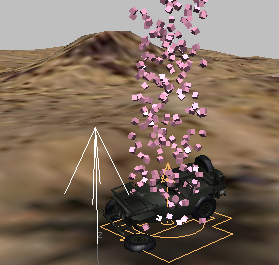
The scene is of a desert landscape. There are scorched areas on the ground, and the wreckage of a jeep®.
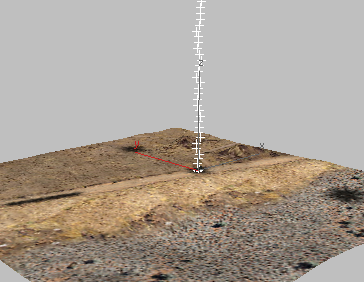
 zoom in on the area around
the wrecked jeep.
zoom in on the area around
the wrecked jeep.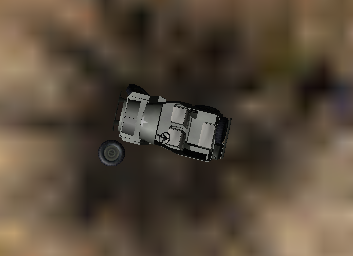
The jeep is in the road, toward the right-hand side of the landscape.
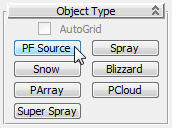
 Create panel. Turn on
  (Geometry) if it is not
already on.
(Geometry) if it is not
already on.

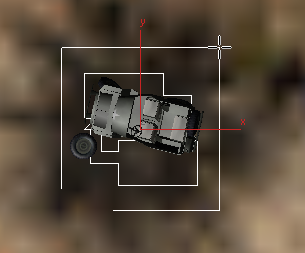
 Modify panel. On the Emission
rollout, change the Icon Type from Rectangle to Circle.
Modify panel. On the Emission
rollout, change the Icon Type from Rectangle to Circle.![]()
![]()
Particles will be emitted from the area of the circle, which is a bit smaller than the size of the jeep itself.
 Quantity Multiplier group, change Viewport
% to 100.0.
Quantity Multiplier group, change Viewport
% to 100.0.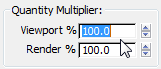
For large particle systems, using a Viewport % value less than 100.0 can improve 3ds Max performance, but displaying 100 percent of the particles gives you a better idea of what the result of your adjustments will be.
 (Select And Rotate) and
  (Angle Snap Toggle), then
rotate the Particle Flow icon 180 degrees about its Y axis, so the
arrow points straight up.
(Angle Snap Toggle), then
rotate the Particle Flow icon 180 degrees about its Y axis, so the
arrow points straight up.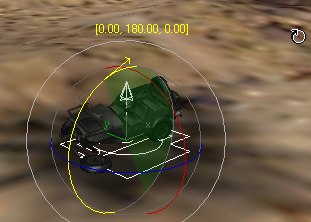
Now the particles move upward instead of downward, and you can see them in all four viewports.
At present, the particles appear in a single burst, between frame 0 and frame 30, then no more particles appear. You will correct this, and also set up some other particle behavior, in the procedure that follows.
Adjust the Particle Flow settings:
Modify panel. On the Setup
rollout, click Particle View.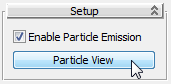
3ds Max opens a Particle View window.
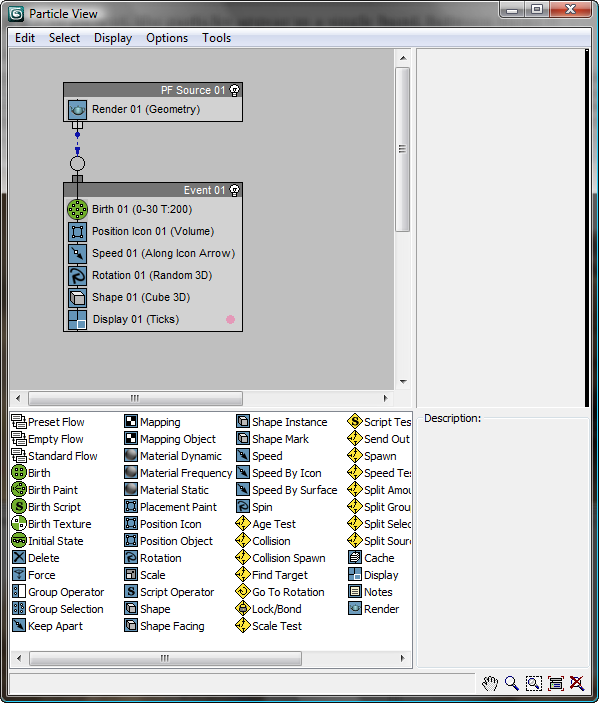
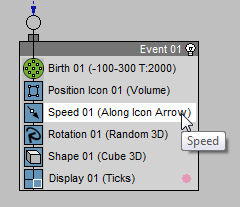
Particle View is the main interface to Particle Flow systems. This is where you add and adjust the particle behavior. In the window, the main areas are the event display at upper left, which shows events you’ve already created, and the “depot” at lower left, which contains operators that you can add to the event display.
At present, the event display shows the PF Source 01 operator you added to the scene, and Event 01, which so far contains default settings.
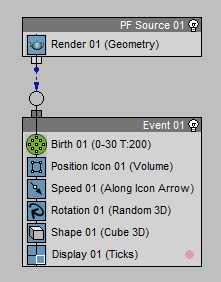
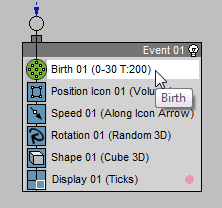
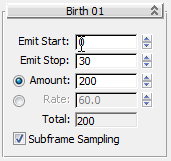
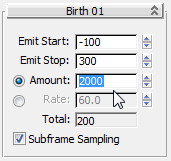
On the right side of Particle View, 3ds Max displays a parameters rollout for the Birth operator. As the fields show, the Birth operator generates 200 particles in all. It starts emitting particles at frame 0, and stops emitting them at frame 30.
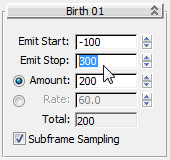
Starting emission at an imaginary frame –100 means tells 3ds Max to generate particles before the animation begins, so there will already be some smoke in the scene at frame 0. Stopping particle emission at frame 300, the last frame of the animation, means that smoke will continue to appear throughout the animation.
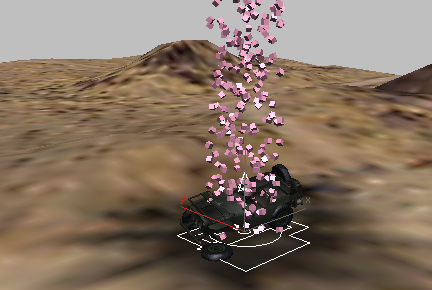
Particles are present at frame 0, and they continue throughout the animation, but so far, they aren’t exactly billowing.
Now the particles are more numerous and beginning to look a little more like smoke, but they are still moving too quickly.
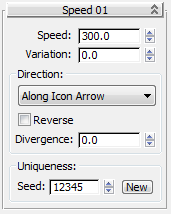
In the parameters panel on the right side of Particle View, 3ds Max replaces the Birth rollout with a Speed operator rollout.
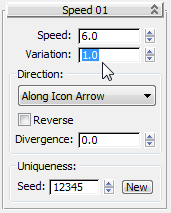
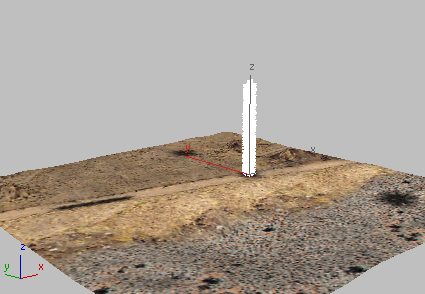
Now the smoke rises more slowly, in a dense column. This is a better effect, but its path is unnaturally straight and vertical.
Before you add effects to make the smoke behave naturally, you will adjust its viewport display to see the effect a little better.
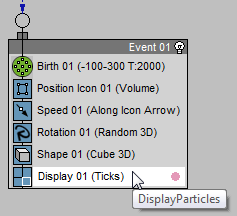
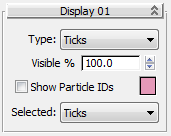
Now the parameters panel shows a Display operator rollout.

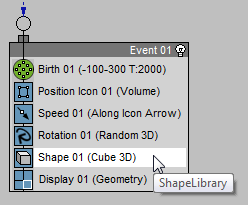
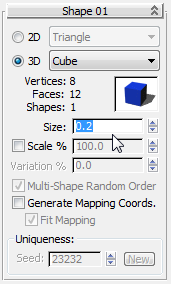
Now the particles appear as a mass of tiny cubes, as you can see in the Perspective viewport.
This is not meant to be the final form of the particles: It is just a temporary setting to help you visualize the effects you are about to add.
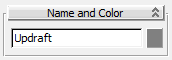
Add a space warp for the updraft:
To give the column of smoke more realistic motion, you will add a couple of Wind space warps to the scene.
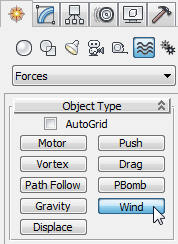
Create panel, turn on  (Space Warps).
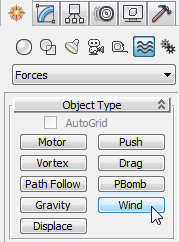
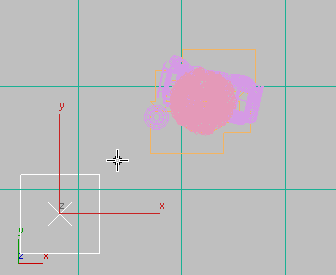
The Wind space warp icon is a square with an arrow coming out of it. In shaded viewports, the square is hidden by terrain, but in the Perspective viewport, it is easier to see the arrow.
This space warp will model the updraft caused by the heat of the fire, itself.
 (Zoom Extents).
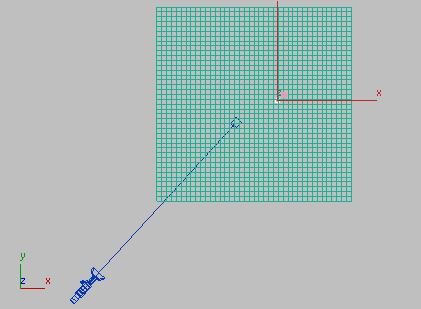

(Select And Rotate), makes
sure (Angle Snap Toggle) is on,
then activate the Camera01 viewport, and rotate the Wind icon –90
degrees on its Y axis, so the arrow is pointing to the left.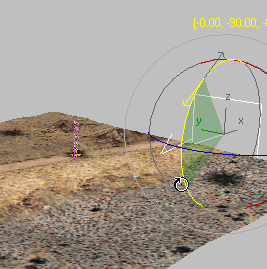

This space warp will model an actual wind coming from the east.
Include the space warps in the particle animation:

Force operator in the depot
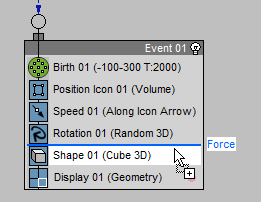
Dropping the Force operator on the event
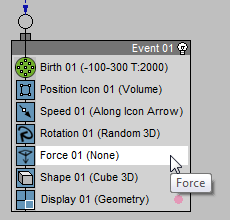
3ds Max displays the Force operator parameters in a rollout on the parameters panel to the right.
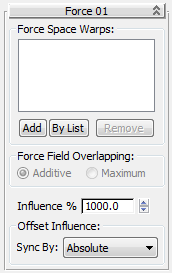
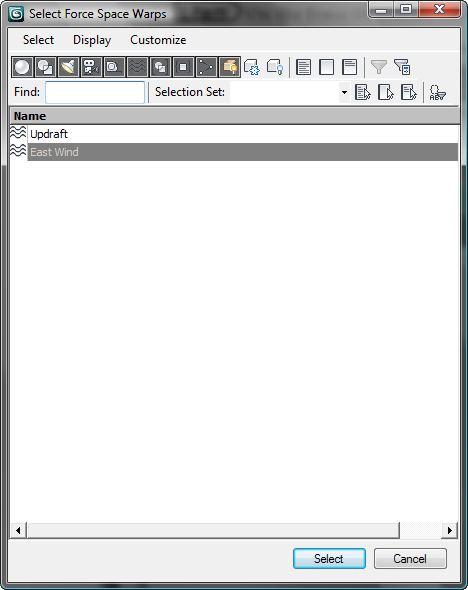
3ds Max opens a Select Force Space Warps dialog.
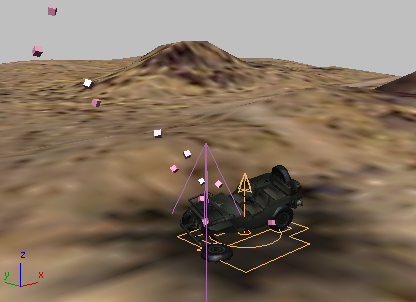
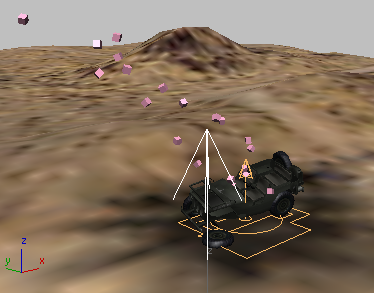
The particles move upward and toward the west, as we want them to, but now they are so widely dispersed that the smoke is hardly visible. This is because the default Wind settings are too strong. You will correct that in the next procedure.
Adjust the space warp settings:
 Select the East
Wind object, and go to the Modify panel.
Force group, set Strength to 0.01 and
Decay to 0.025.
Select the East
Wind object, and go to the Modify panel.
Force group, set Strength to 0.01 and
Decay to 0.025.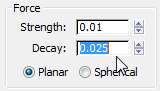
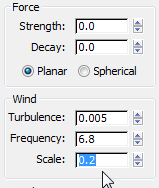
Wind group, change the settings as follows:
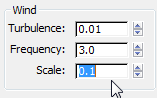
Select the Updraft object.
The particles seem to be a little denser and to move more slowly, but it is still hard to see the system in the Camera01 viewport.
 (Time Configuration), and
in the Time Configuration dialog Playback group, turn off Active Viewport
only, then click OK.
(Time Configuration), and
in the Time Configuration dialog Playback group, turn off Active Viewport
only, then click OK.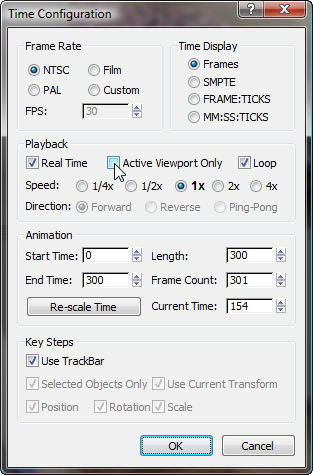
 Play the animation.
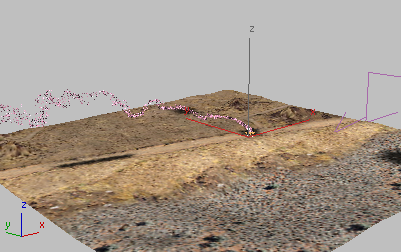
Now the smoke is a thick stream that is visible in the Camera01 viewport. Its motion is controlled by the two Wind space warps, and it shows some turbulence as it rises and drifts to the west.
To render smoke effectively using small particles like this, you would need even more than 10,000 of them. Using this many particles is not a good idea: The large number of particles will slow down 3ds Max, and rendering the animation will take a long time. The next lesson shows a way to display smoke using the Wind settings you just created, but with fewer particles in the system.
 (Keyboard Shortcut Override
Toggle) for this shortcut to work. You don’t have to select the
Particle Flow icon before you press
(Keyboard Shortcut Override
Toggle) for this shortcut to work. You don’t have to select the
Particle Flow icon before you press