


Defining Tree Shadows
In this lesson, you will instruct the particle system to generate a second set of trees, with only its shadows visible. You will then orient the shadows so they continually face the light source in the scene. As a result, the shadows will appear to belong to the first set of visible trees.
Generate a second set of tree particles:
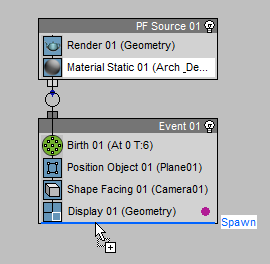
The Spawn operator will generate a new set of particles from the ones you defined in Event 001.
In the Spawn 001 rollout  Spawn Rate And Amount
group, the Once option should be chosen, indicating that only one
set of particles will be created.
Spawn Rate And Amount
group, the Once option should be chosen, indicating that only one
set of particles will be created.
Set the particles to follow the sun:
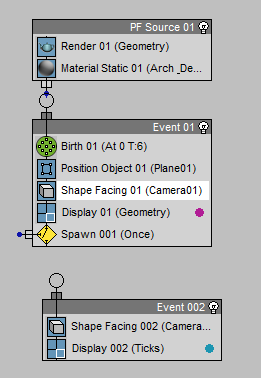
3ds Max creates a new event, called Event 002, with an operator that also instructs the particles to face the camera. Now you will modify this operator so that the particles will face the scene light source instead of the camera.
Look At Camera/Object
group, click the Pick button (which at first is labeled Camera01),
then in any viewport, click the [Daylight01] Sun01 object.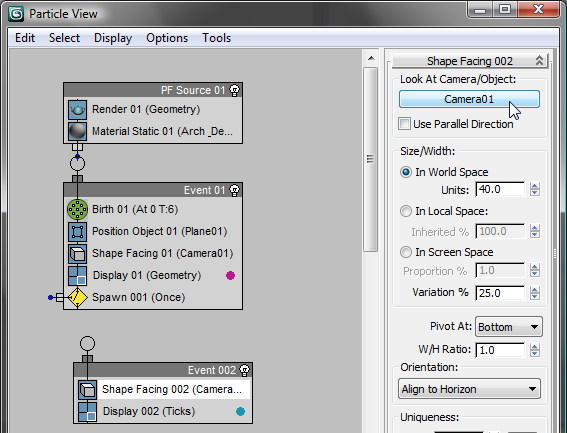
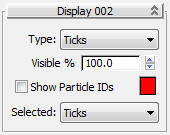
This color is used to display the shapes of the second set of particles in wireframe views. It will not be visible in renderings. The red color will help you better identify the second set of particles.
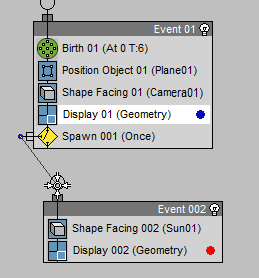
With this connection, Event 001 spawns a set of particles once and sends them to Event 002, where they are instructed to face the sun.
 (Select And Move). In the
Top viewport, move the camera about the scene.
(Select And Move). In the
Top viewport, move the camera about the scene.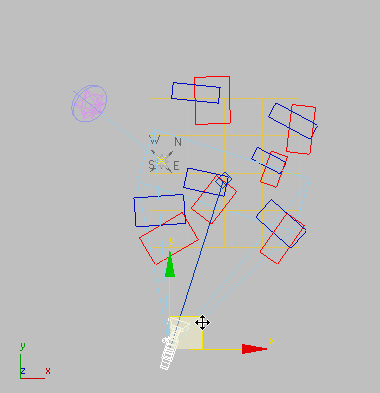

Top: Camera position 1
Bottom: Camera position 2
Billboard trees (shown in blue) follow the camera position, while the shadow particles (shown in red) do not
 Render the Camera01 viewport.
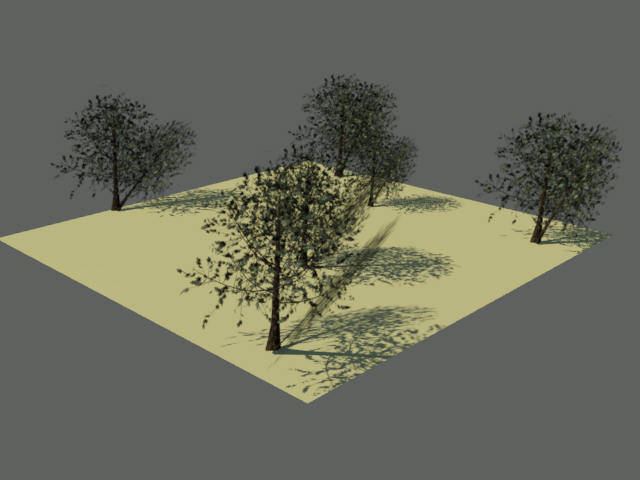
Rendered scene showing two sets of particle tree shadows
There are now two sets of particle trees, each of which cast shadows. You need to hide the shadows of the particle trees that face the camera, then hide the particle trees that face the sun but keep their shadows visible.
Fix the visibility of shadows:
Remember that in Particle View, Event 001 represents the particle trees that face the camera, while Event 002 represents the particle trees that face the sun.
General panel Rendering Control group,
click By Layer (if By Object is not already active) and turn off
Receive Shadows, Cast Shadows and Apply Atmospherics. Click OK.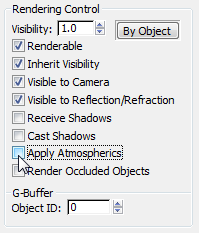
General panel Rendering Control group,
click By Layer (if By Object is not already active) and turn off
Inherit Visibility, Visible to Camera, Visible to Reflection/Refraction,
Receive Shadows and Apply Atmospherics. Click OK.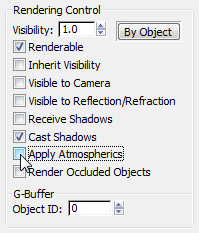
Render the Camera01 viewport
again.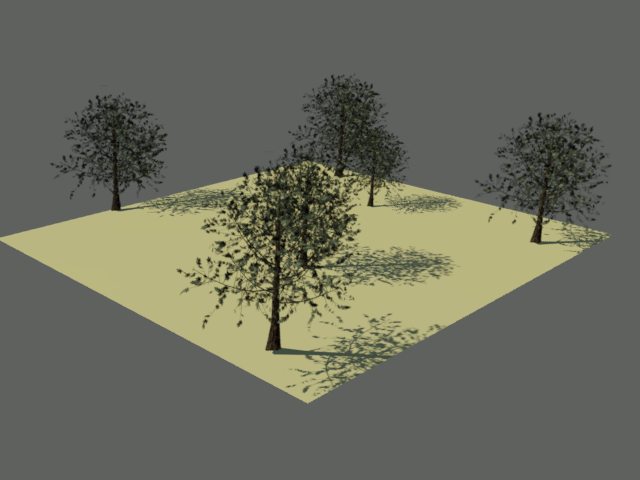
Particle trees with only one set of shadows visible
The rendering shows one visible set of particle trees, and shadows cast by the second set of trees, which are otherwise hidden.
 open
open