Now that you have set
up the images you want to manage using a particle system, it is
time to create the particle system itself.
Set up the lesson:
Create a particle system:
- On the
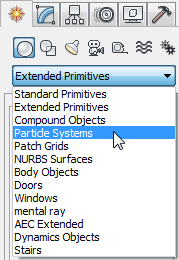
 Create panel, click
  (Geometry). Open the Objects
drop-down list, and choose Particle Systems.
(Geometry). Open the Objects
drop-down list, and choose Particle Systems.
- On the Object Type rollout, click PF
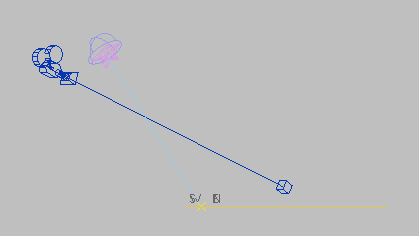
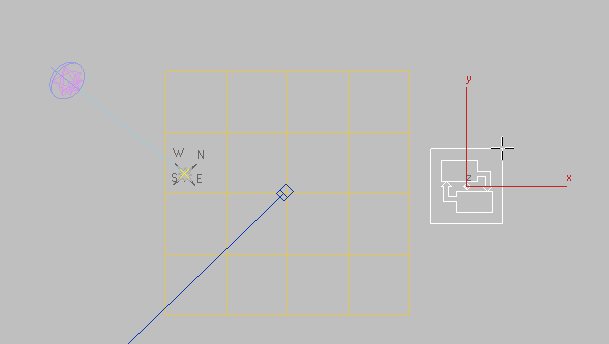
Source to turn it on. In the Top viewport, drag anywhere outside
the plane to place the Particle Flow source icon.
The size and location
of the source icon is not important, since the particles will be
generated from the plane object.
- Right-click to end object creation.
- Go to the
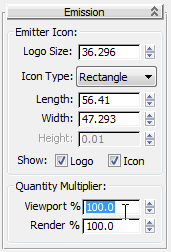
 Modify panel. In the Emission
rollout
Modify panel. In the Emission
rollout  Quantity
Multiplier group set the Viewport % spinner to 100.0.
Quantity
Multiplier group set the Viewport % spinner to 100.0.
When the Viewport Quantity
is 100 percent, the viewports display every particle in the system.
For an effect such as smoke or fluid, this could slow down 3ds Max performance,
but for the particle-tree forest, there are not that many particles,
and you want to be able to see all of them.
- On the Setup rollout, click Particle
View.
TipYou can also display
Particle View by pressing 6 on
your keyboard.
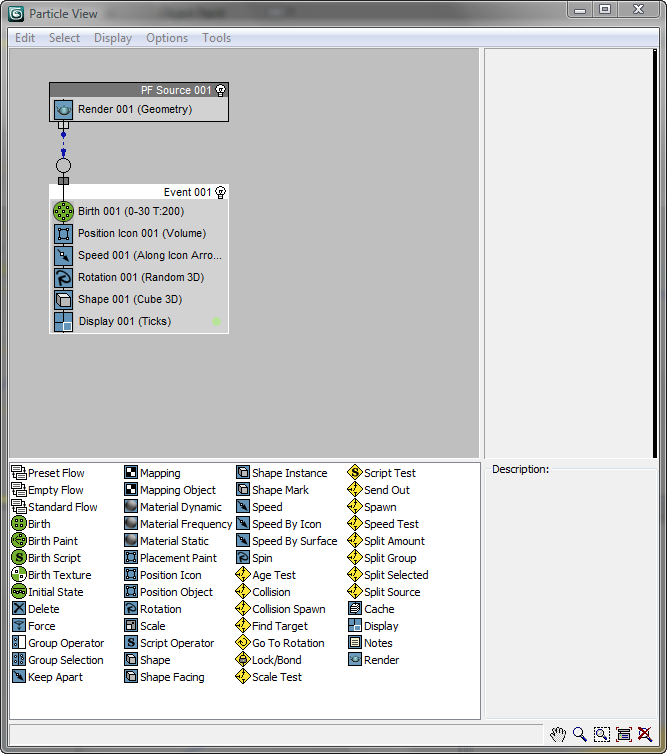
Particle View manages
a particle system and helps you visualize the particle source and
parameters, as well as events that influence a particle’s appearance
and behavior during its life span.
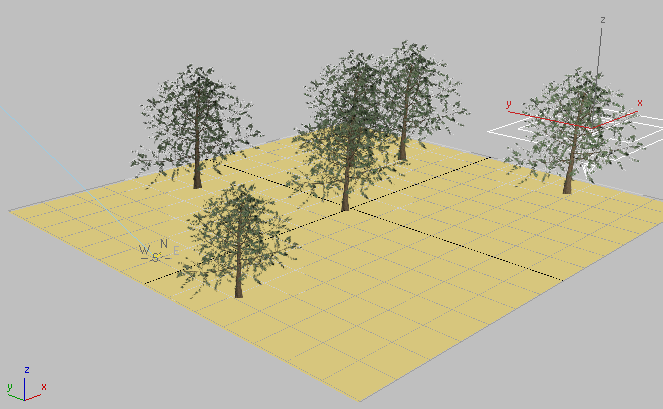
Initially, the system
contains two events: the source that you just created, and a default Event 001.
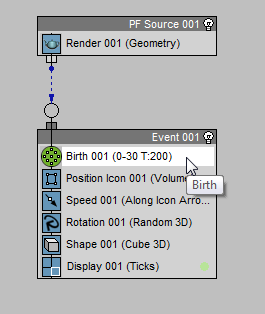
- In Event 001, click
the Birth 001 operator to highlight
it.
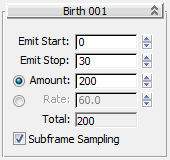
On the right of Particle
View, the Birth 001 rollout displays parameters that relate to particle
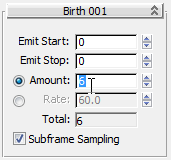
creation. The Emit Start and Emit Stop spinners indicate that particle
generation will start at frame 0 and end at frame 30. The Amount
spinner indicates that 200 particles will be generated by the system.
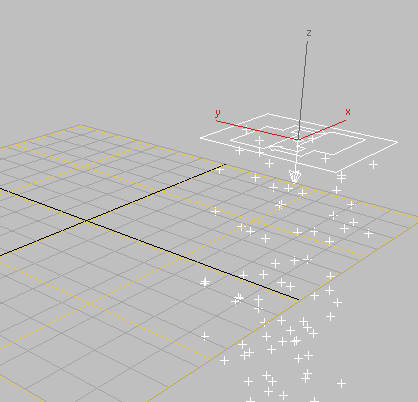
- Drag the time slider to see how the default
particles are generated.
By default, there are
a large number of particles that fall downward from the Particle
Source icon. You need to modify the Birth 001 parameters
so that the system generates only six particles that remain stationary
at all times.
Change the particle settings so particles
are stationary, with visible geometry:
- On the Birth 001 rollout, set Emit Stop
to 0 (this ensures that the particles
do not pop up over time) and set the Amount spinner to 6,
so that only six particle trees are created.
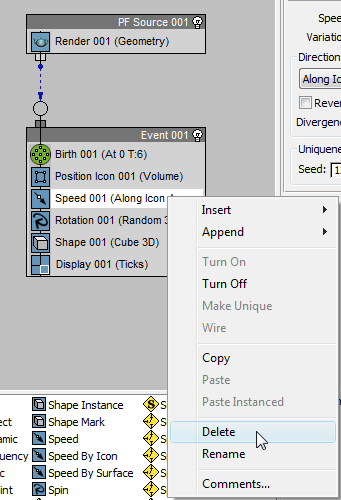
- In Particle View, click the Speed
001 operator to highlight it, then right-click and choose
Delete, since you do not want the particle trees to move.
- Delete the Rotation 001 operator
as well, since the orientation of the particles will be driven by
the camera position.
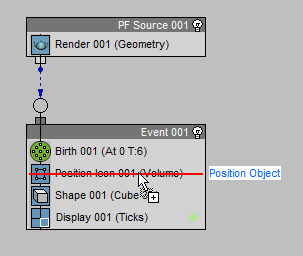
- The “depot” is the list of operators
and tests that appears at the bottom of the Particle View window.
Drag a Position Object operator from the depot and in Event
001, drop it directly over the Position Icon 001 operator.
3ds Max displays a
red line to indicate you are replacing the original operator with
the new one.
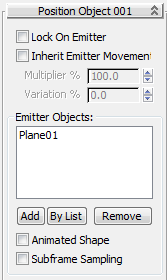
- Click the new Position Object 001 operator
to highlight it. In the Position Object 001 rollout Emitter Objects group,
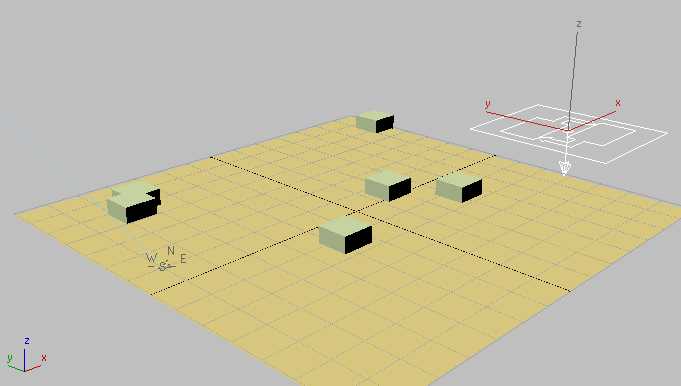
click Add. In any viewport, click the Plane01object.
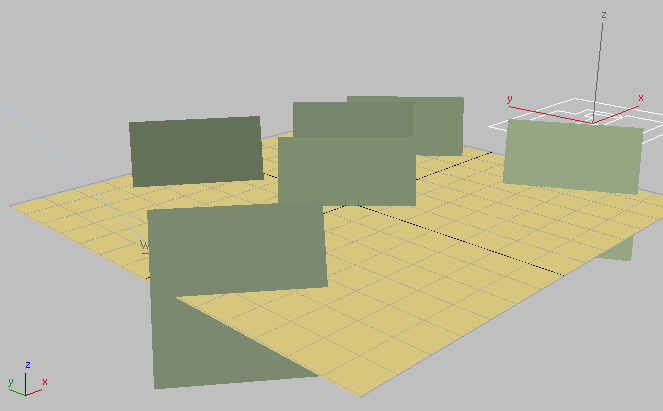
Before, particles were
emitted from the particle source icon. Now, particles are emitted
from the Plane01 object: You can see them
scattered about the plane’s surface.
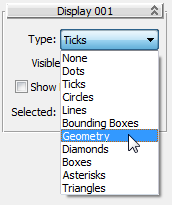
- Click the Display 001 operator
to highlight it. On the Display 001 rollout, open the Type drop-down
list, and choose Geometry.
It is now easier to visualize
the particles, although soon you will be replacing these shapes
with tree images.
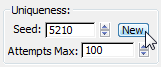
- Click the Position Object 001 operator
again and on the Parameters panel, scroll down to the Uniqueness group.
Click New to change the positioning of the particles. Continue clicking
the button until you get a grouping you like.
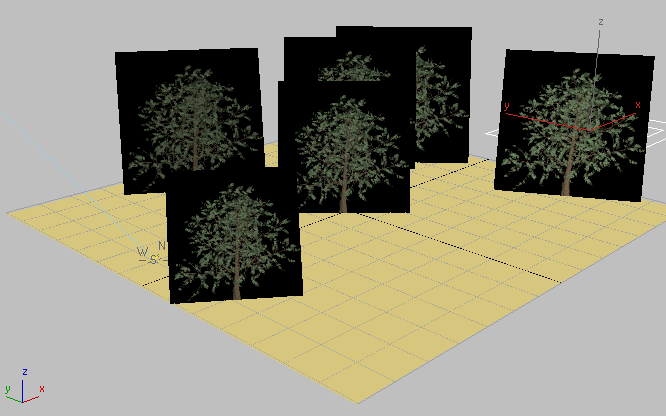
Change the particles to shapes that face
the camera:
- From the depot, drag a Shape Facing operator
directly over the Shape 001 operator to replace
it.
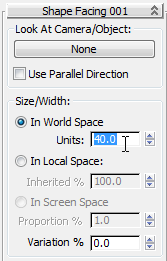
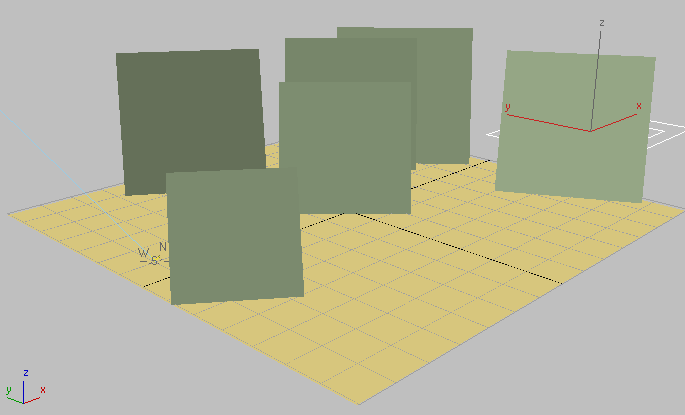
- Click the Shape Facing 001 operator to
highlight it. In the Size/Width group, make sure In World Space
is chosen, then change the value of Units to 40.0, and press Enter.
This value increases
the size of the particles.
- In the Look At Camera/Object group, click
the button labeled “None” and in any viewport, click the Camera01 object.
The particles, which
previously lay flat on the plane emitter, now face the direction
of the Camera01 object.
NoteTo refresh the scene
properly, you might need to adjust your view in the Camera01 viewport,
using any viewport navigation control.
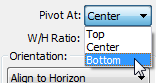
- On the Shape Facing rollout, open the
Pivot At list, and choose Bottom.
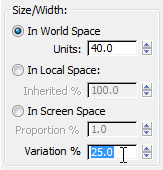
- At the bottom of the Size/Width group,
change the value of Variation % to 25.0.
This creates a range
of particle sizes. The tree images mapped onto each particle will
also vary in size.
Next, you will map the
tree images onto the particles. You will do so using the Material
Static operator, the best choice for a material that is not animated.
Map tree images to the particles:
- From the depot, drag a Material Static
operator to the PF Source 001 event. Drop it just
below the Render 001 operator. A blue line
indicates the point of insertion.
NoteYou are defining
the material at the PF Source 001 level because you
want all the trees to share the same material throughout the particle
life span. If you wanted to assign the trees different materials
based on a specific particle event, you would have dragged the Material
Static operator to the appropriate event box.
- Open the
 Slate Material Editor.
- Drag an Arch & Design entry from
the Material/Map Browser into the active View.
- Double-click the Arch & Design material
node to display its parameters.
- Name the new material Trees.
- On the Templates rollout, open the drop-down
list and choose Matte Finish.
With Matte Finish, the
trees will not pick up any reflection from neighboring objects.
- Drag a Bitmap entry from the Browser
into the active View.
3ds Max opens a file
dialog. Navigate to \sceneassets\images and
choose elm_summer.tif.
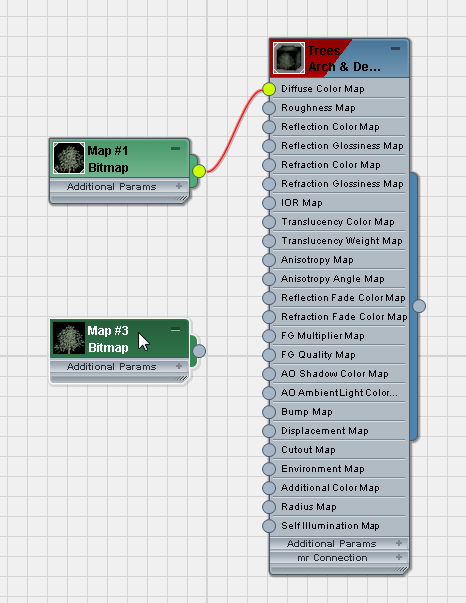
- Wire the new Bitmap node to the Diffuse
Color socket of the Trees material.
- Double-click the Bitmap node so you can
see its parameters.
- On the Coordinates rollout, turn off
Use Real-World Scale if it is on, and make sure Tiling is set to
1.0 for U and V.
This step ensures that
the image area matches the size of the particle.
- Click the Trees material
node to make it active, then on the Slate Material Editor toolbar,
click
 (Show Map In Viewport) to
turn it on.
(Show Map In Viewport) to
turn it on.
- Move Particle View and the Slate Material
Editor so you can see both windows. In Particle View, highlight
the Material Static 001 operator,
then drag from the output socket of the Trees material
node, and in Particle View, drop the material on the Assign Material
button (initially labeled “None”). When 3ds Max asks whether
to use a copy or an instance, make sure Instance is chosen, then
click OK.
TipIf the tree maps
don’t appear in the shaded viewport right away, turn off Assign
Material and then turn it back on.
Now the tree map is now
applied to all particles in the scene. Their background remains
visible: You still need to make them cutouts by using the alpha-channel
information.
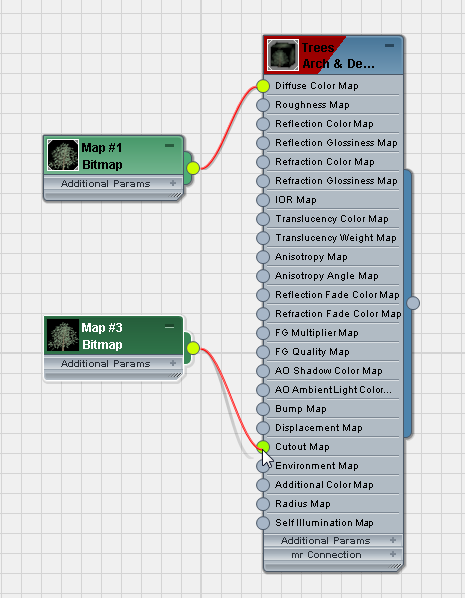
Use cutout mapping for the tree particles:
- In the Slate Material Editor, Shift+drag the Bitmap node to make
a copy of it.
- Wire the new Bitmap copy to the Cutout
Map socket of the Trees material node.
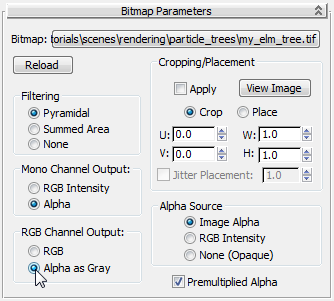
- Double-click the new Bitmap node so you
can see its parameters.
- On the Bitmap Parameters rollout, in
the Mono Channel Output group, choose Alpha, and then in the RGB
Channel Output group, choose Alpha As Gray.
Now the background of
the tree bitmap no longer appears.
Next, you will boost
the amount of self-illumination so that all parts of the tree can
still be visible even when the leaves and branches are not in direct
sunlight.
Set particle tree self-illumination:
- In the Slate Material Editor, wire the
original Bitmap node (the one you are using for colors, not for
the alpha channel) to the Self-Illumination Map socket of the Trees material node.
- Double-click the Trees material node
so you can see its parameters.
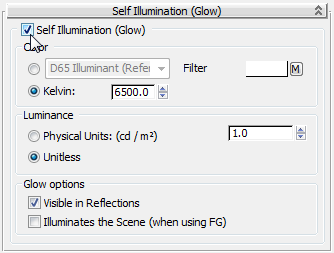
- On the Self Illumination (Glow) rollout,
turn on Self Illumination.
At this point, the self-illumination
has no real effect, because the default Luminance values are overpowered
by the Daylight system exposure value set for your exterior scene.
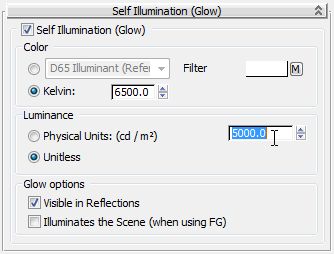
- In the Luminance group, leave Unitless
chosen, and enter a value of 5000.0.
-
 Close the Slate Material
Editor.
Close the Slate Material
Editor.
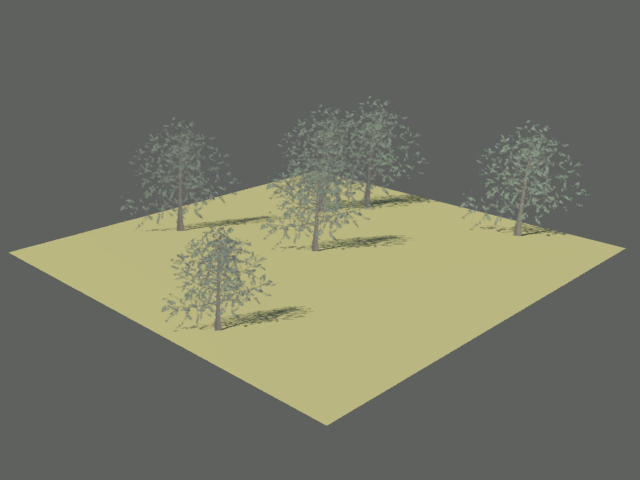
- Render the Camera01 viewport.
Now the self-illumination
of the trees is apparent.
Save your work:
- Save the scene as mytrees.max.


 (Open File), navigate to
the \scenes\rendering\particle_trees folder,
then open ptrees_basics.max.
(Open File), navigate to
the \scenes\rendering\particle_trees folder,
then open ptrees_basics.max.