


Using Opacity Mapping for
the Fences
The fences are a bit of a special case, because the chain-link parts of them should be partially transparent. You accomplish this the way you did bump mapping: by the use of bitmaps.
This step is mainly to show you what and where the fences are. There is the main fence around the compound and the smaller fence that encloses the utility containers.
Use a basic material for the fence supports:
Each fence component, including the gates, actually includes two objects: a “structure” component for the fence’s supportive piping, and a “wire” component for the actual chain link.
 (Assign Material To Selection).
Use a texture map for the chain link:
The chain link itself uses a bitmap with a chain-link pattern.

Chain-link texture for the fence
(Assign Material To Selection)
and then turn on  (Show Map In Viewport).
The fence texture appears in viewports as a gray pattern on a black background. It isn’t yet to scale, so you need to adjust it with UVW Map.
 Modify panel and apply a
UVW Map modifier.
Modify panel and apply a
UVW Map modifier.
Now the mapping and the scale of the chain link are correct; but of course, the fences still appear to be solid objects.
Use the chain-link texture to create transparency and opacity:
Just as in bump mapping, where black areas of a map appear recessed and white areas appear prominent (with gray values having an intermediate effect), in opacity mapping, black areas appear transparent and white areas appear opaque (while gray values create some degree of translucency).
Because the chain-link map is already black-and-white, it should work effectively both as a texture and as an opacity map.
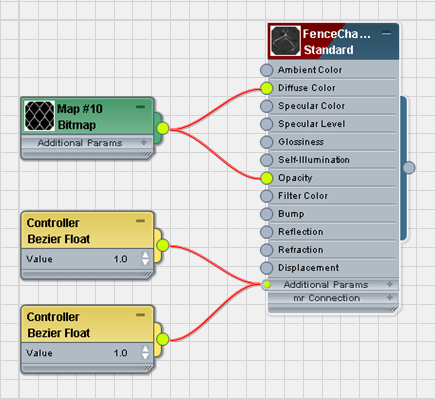
Bitmap controlling both color and opacity
(Show Map In Viewport).
Now, in the viewport, the chain-link portions of the fence appear partially transparent.
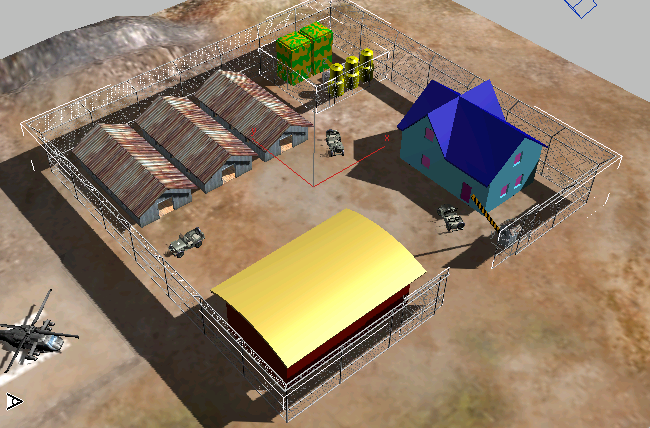
Viewport display of fence with opacity mapping
The one thing missing from this view is transparency in the fence shadows. Depending on your graphics card, viewports might not display opacity mapping just as they don’t display bump mapping. If this is the case, you must render to see the effect of opacity mapping on shadows.
 (Render Production).
In the rendering, the shadows convincingly match the transparency of the fence.
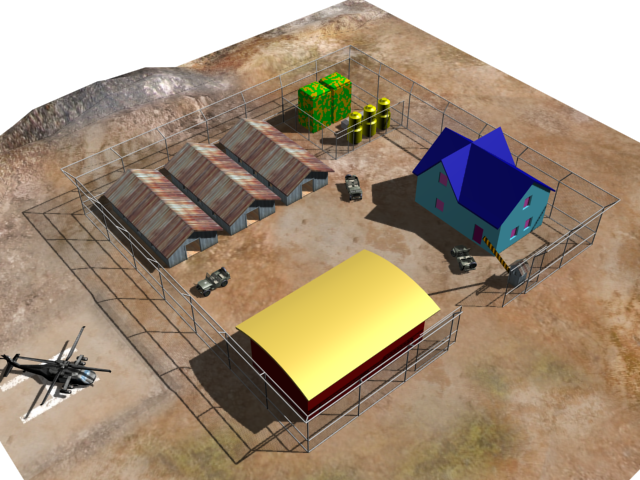
Rendering of opacity-mapped fence
 open army_compound02.max.