The army compound scene is nearly complete. The walls and doors of the barn use the same material you just created for the door, while the floor of the barn is the same as the barracks floors. The only difference is the roof of the barn: This also uses the WoodBoards material, but with a slightly different mapping.
Use the front-door texture for the walls and doors of the barn:
 Camera03.
 Ctrl+drag
its UVW Mapping from the modifier stack to the barn walls and doors.
Ctrl+drag
its UVW Mapping from the modifier stack to the barn walls and doors.
Use the barracks floor material for the floor of the barn:
 Select the barn roof and apply a UVW Map modifier
to it. Leave the map projection set to Planar. In the Alignment
group, change the alignment axis to Y. In the Mapping group, change
Length = Width = 4.0m.
Select the barn roof and apply a UVW Map modifier
to it. Leave the map projection set to Planar. In the Alignment
group, change the alignment axis to Y. In the Mapping group, change
Length = Width = 4.0m.
Now the army compound scene is completely textured.
Camera01.
 (Render Production) to view
the final results.
(Render Production) to view
the final results.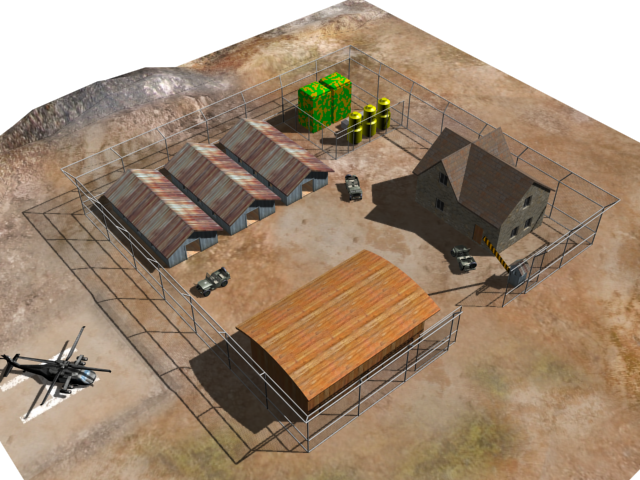
The fully textured field headquarters
You can see a version of the finished scene in army_compound_completed.max.
This tutorial has introduced a variety of methods for applying materials to objects. Among the methods shown were:
We also showed how to copy UVW Map from one object to another when the objects share the same material.
What About the Vehicle Textures?
The jeeps and helicopter were already textured when you began working on the army compound scene. If you look at their texture maps, they appear to be a patchwork of different elements.
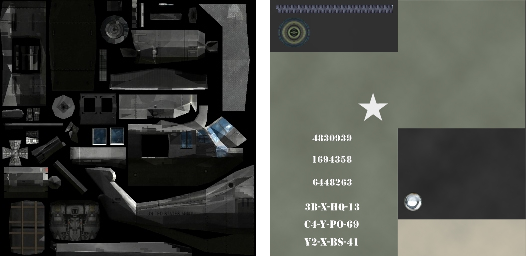
Left: Texture map for the helicopter
Right: Texture map for the jeeps
A single bitmap can provide the texture for a complicated object, provided you control its texture coordinates with a modifier called Unwrap UVW. This is the subject of the next tutorial, Controlling a Texture with Unwrap UVW.


 open
open