In this lesson, you add some detail to the rear of the cowl, and then adjust its shape to better fit the blueprint image.
The engine cowl fits over the front of the main fuselage, a bit like a bottle cap on top of a glass bottle. So the rear of the cowl also has a recessed area, though not as pronounced as the air intake.
 Polygon Modeling panel, click
  (Polygon).
 Orbit the Perspective viewport
so you can see the back of the cowl.
Orbit the Perspective viewport
so you can see the back of the cowl.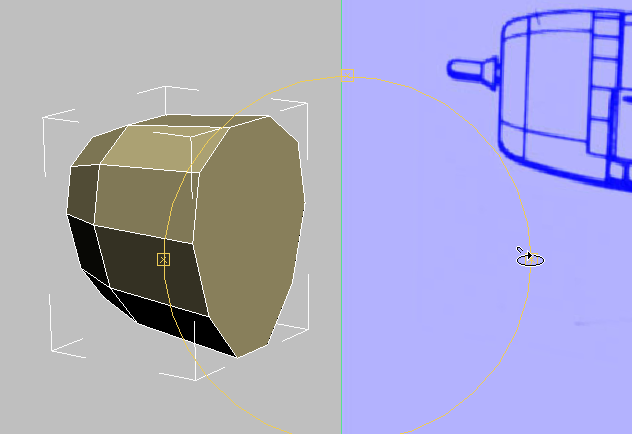
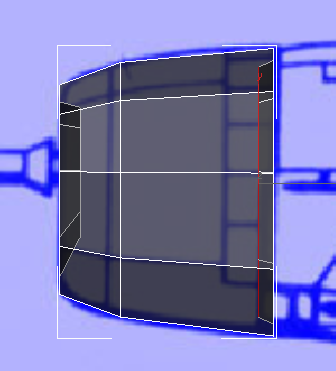
 Click to select the polygon
at the rear of the cowl.
Click to select the polygon
at the rear of the cowl.
Polygons panel, click  (Inset). In the Perspective
viewport, drag the mouse down to inset the rear of the cowl.
(Inset). In the Perspective
viewport, drag the mouse down to inset the rear of the cowl.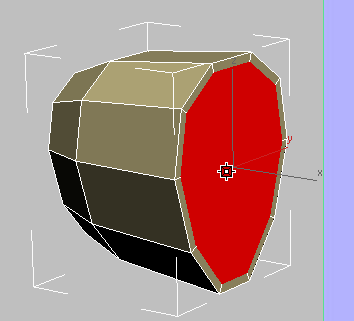
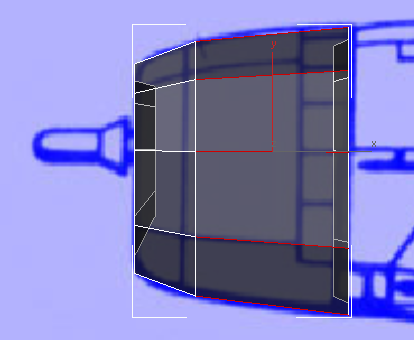
Polygons panel, click  (Bevel). In the Perspective
viewport, drag downward to create a shallow recess at the rear of
the cowl.
(Bevel). In the Perspective
viewport, drag downward to create a shallow recess at the rear of
the cowl.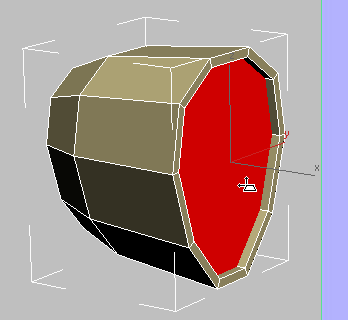
Release the mouse, then drag it downward a bit more to reduce the size of the recessed polygon.
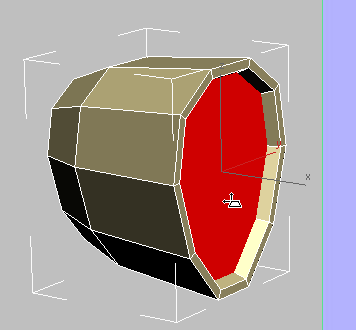
You can check your work by pressing Alt+X to turn on X-Ray display once again, and looking at the Front viewport.
Adjust the curvature of the cowl:
The engine cowl is almost done: To complete it, you adjust its curvature to better match the blueprint.
Polygon Modeling panel, click  (Edge).
Click to select one of the
longer edges along the length of the cowl.
(Edge).
Click to select one of the
longer edges along the length of the cowl.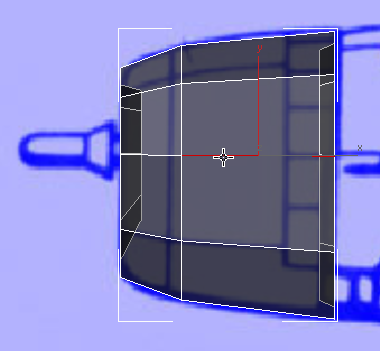
Modify Selection panel, click  (Ring).
The Ring tool selects a ring of comparable edges, about the circumference of the cowl.
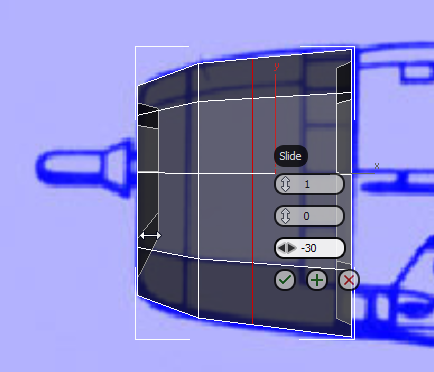
Loops panel, Shift+click  (Connect).
Shift+clicking Connect displays the caddy controls for the Connect tool. These let you adjust the edge connection interactively.
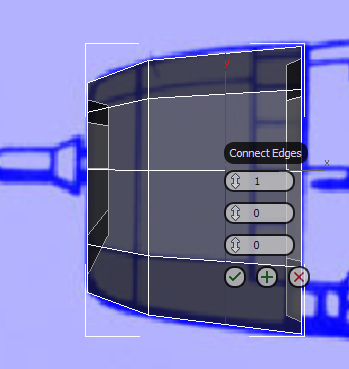
 (OK).
(OK).
 Scale the new edge up along
the Y axis so the cowl has a bulge that better matches the blueprint
image.
Scale the new edge up along
the Y axis so the cowl has a bulge that better matches the blueprint
image.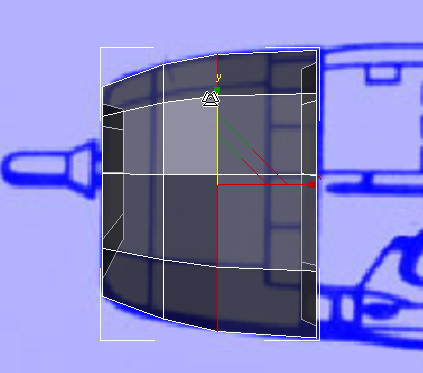
 (Edge) again to exit the
Edge sub-object level.
(Edge) again to exit the
Edge sub-object level.
Now the P-47 engine cowl is essentially complete, as far as polygon shapes go. (You will add some detail later, to improve the way 3ds Max smooths this part of the model.)


