| Illumination | Transparency
Category: Illumination
Shader Family: Surface Material
Output: Color
Controls the diffuse, ambient, and specular RGB colors, as well as the transparency and lighting model of hair objects. You
can also set up a BSP tree especially for rendering hair.
For other topics related to rendering hair, see Rendering Hair.
|
|
The shader's name. Enter any name you like, or leave the default.
|
Illumination
All of the parameters on this page are mappable, meaning that you can connect texture maps to them to create specific effects.
For an example of using a texture map for colors, see Connecting a Texture Map to Hair Color Parameters.
Ambient
|
|
Defines the hair surface's underlying ambient (shadow) color. This color gets modified by the scene's ambience. To get luminescent
hair, use a high value for this parameter.
|
Diffuse
|
|
Defines the diffuse color of the hair roots. Setting this to a darker color than the tip colors usually adds more realism.
|
Tip Colors
|
|
Defines the main diffuse color of the hair strand's tips.
|
|
|
Defines a secondary diffuse color for the hair strand's tips. This provides an alternate color that gets added to random hair
strands.
|
|
|
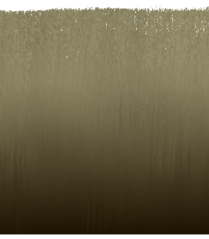
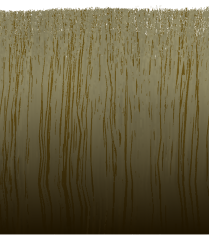
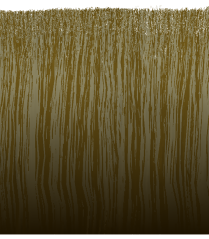
Controls the ratio of the tip colors A and B. At 0.0, all strands use Tip Color A and at 1.0, all strands use Tip Color B.
|
| Tip Colors A and B used for the following images.
|

|
|
|
|
| Tip Color A/B Balance at 0 shows only Tip Color A.
|
Tip Color A/B Balance at 0.2 shows more strands using Tip Color B.
|
Tip Color A/B Balance at 0.5 shows an equal amount of strands using Tip Color A and B.
|
Flat Shading
Reduces the effects of the Diffuse color values to make the hair less sensitive to light direction (Specular color is not
affected). This simulates the multiple scattering of light.
|
|
Percentage of flat shading on the hair roots.
|
|
|
Percentage of flat shading on the hair tips.
|
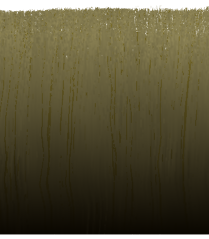
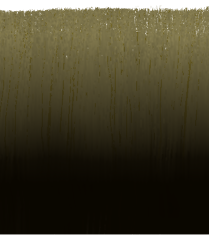
Root/Tip Crossover
|
|
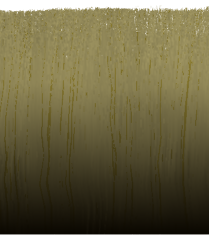
Defines the point along the entire length of the hair strand where the color "switches" from root to tip; that is, where the
Root Color and Tip Colors provide equal contributions to the result.
A value of 0 is mostly Tip Color and 1 is mostly Root Color.
|
|
|
|
| Root/Tip Crossover Center at 0.2 shows mostly the combined A and B tip colors.
|
Root/Tip Crossover Center at 0.5 shows tip colors and root color equally.
|
Root/Tip Crossover Center at 0.8 shows mostly the root color.
|
|
|
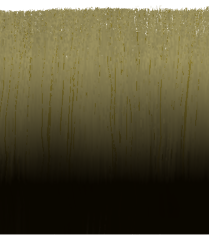
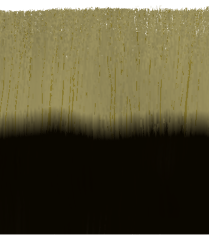
Controls the size of the blended region between the root and tip colors as a proportion of the hair strand length. A value of 0 gives a sharp transition with no blending, and larger values give smoother blending.
|

|
|
|
| Root/Tip Crossover Range at 1 shows full blending between the tip and root colors.
|
Root/Tip Crossover Range at 0.5 shows more of a contrast between the tip and root colors.
|
Root/Tip Crossover Range at 0.1 shows a sharp contrast between the tip and root colors.
|
|
|
Adds some hue jittering on the hair's final Diffuse color. For example, this may be useful to use when you want subtle variations
in white or light-colored hair. It mixes in random colors of the same value (not saturation).
The original color is converted to HSV, the saturation is set to 1, and a random hue is picked. Then this color is mixed with
the original color. A value of 0 is no mixing, while 1 is 10% mixing (you can type in values up to 10 for 100% mix). At 100%,
you will see only chromatically random colored hairs.
|
Specular
To set the Specular values of the hair's root and tip separately, you can do this by connecting other shaders to the Hair
Renderer shader — see Using Shaders on Hair [Hair]
|
|
Enables the calculation of specular highlights.
|
|
|
Defines the color of specular highlights. This value should be very high for dark hair and very low for light hair.
|
|
|
Controls the size and falloff of specular highlights. Lower values give a larger highlight area indicating less decay.
|
Transparency
|
|
Enables calculation of transparency values.
|
|
|
The transparency value at the hair tips. A value of 0 is completely opaque and 1 is completely transparent.
|
|
|
The transparency value at the hair roots. A value of 0 is completely opaque and 1 is completely transparent.
|
Root/Tip Crossover
|
|
Defines the point along the length of the hair strand where the transparency "switches" from the Transparency Root value to
the Tip value; that is, where the Root and Tip values provide equal contributions to the result.
A value of 0 is mostly Tip and 1 is mostly Root.
|
|
|
Controls the size of the blended region between the Transparency Root and Tip values as a proportion of the hair strand length.
A value of 0.0 gives a sharp transition with no blending, and larger values give smoother blending.
|
Indirect Illumination
Final Gathering
|
|
Controls the color and intensity (strength) of the final gathering effect over the hair object's surface. If you connect a texture map to this parameter, you can reveal a final gathering on a given location on the hair. The color that is received on the hair from final gathering is multiplied by the color value you set here and then added on
top. Be aware when you're setting this value that hair is very sensitive to final gathering because it's like thousands of
tiny objects blasting color at each other in a short distance.
|
Render Settings
Shading Model
|
|
Allows you to choose between two different diffuse shading models depending on the length of hair you're rendering. The Diffuse
Models are used for calculating an artificial normal that is used for the diffuse color results.
-
The model is optimized for short, spiky hair or fur. This method uses the normal of the hair emitter's surface to determine the
normal of the hair. This means that if the normal of the surface is pointing away from the light, no light contribution applies
to that hair (as with the emitter's surface).
-
The model is appropriately optimized for longer hairs. This method tries to aim the hair's normals toward the light currently
being calculated for contribution. There will always be some light on the hair even if the hair emitter's surface is pointing
away from the light.
|
|
|
Controls the mixing between the normal (as dictated by the short or long hair model) and the actual underlying geometry of
the hair object.
You may want to increase this value for doing close-up shots of the hair because a higher value will make the hair look cylindrical
and more realistic than a flat "brush stroke" when this slider is at a value of 0 (zero). However, a value of 0 is faster
to render. You can animate this value so that it's higher when the hair is closer to the camera and lower when farther from
the camera.
|
Render Tree Usage
This surface shader can be connected directly to the Surface and Shadow inputs of the Material node of a hair object. You
can use textures to control color inputs (such as Root or Tip Color), or use scalar output nodes (such as gradients or fractals)
to control sliders such as transparency. Alternatively, you can attach an illumination shader such as Phong to the hair object's
Material node to replace the illumination calculations.
 Except where otherwise noted, this work is licensed under a Creative Commons Attribution-NonCommercial-ShareAlike 3.0 Unported License