Volume deformations are a modeling tool consisting of a spherical control object that you can use to move an object's points. Only points within the control object are affected, with a proportional falloff from the center.
Volume deformations have two parts:
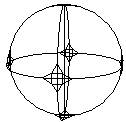
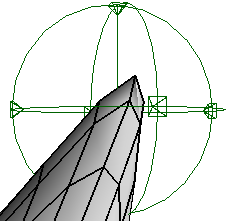
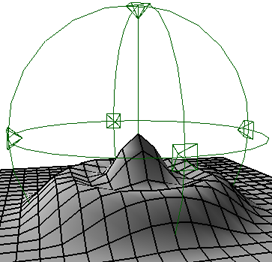
A volume-deform object, or volume deformer, is a control object you can use to deform geometric objects. It is represented by a spherical icon with little "clamps" in the 3D views. Points that lie inside the sphere's volume are affected by the deformation.
A Proportional Volume operator is applied to a geometric object when you attach and transform a volume deformer.
There are two ways to use volume deformations:
As a modeling tool, you attach the volume deformer, transform it, then detach it, re-attach it elsewhere, transform it again, and repeat. This adds a series of separate Proportional Volume operators to the construction history.
As an animation tool, you attach the volume deformer once and then animate its transformations.
Volume deformers are spherical shapes that define the points that are affected on the deformed object.
If desired, first select some objects, clusters, or points to deform. The control object will be automatically attached to the selected elements.
Choose Get  Primitive Control Object Volume Deform from any toolbar. A volume deformer is added to the scene.
If any geometric elements were selected, the volume deformer is attached to them. A Proportional Volume operator is automatically applied and its property editor opens.
If no geometric elements were selected, the volume deformer is initially attached to nothing and its property editor opens instead.
Open the volume deformer's property editor. A quick way to do this is to select the volume deformer and press Enter.
Radius controls the untransformed size of the volume deformer.
Remember Attached Objects controls what happens when you attach the volume deformer.
If it is on, the deformation is applied to the same elements (objects or clusters) as before.
If it is off, the deformation is applied to all visible geometric objects that are wholly or partially within the control object's volume.
You can exclude geometric objects by hiding them before you attach the control object. Alternatively, you can attach elements manually as described in Attaching Geometry Manually.
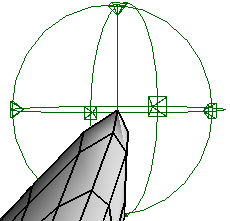
To deform by volume, you first use the volume deformer to define the volume of influence and then you apply the volume deformation operator.
If you want to animate the volume deformer's transformation to change the shape of the geometry, leave the volume deformer attached. Otherwise, you can use the volume deformer as a modeling tool by detaching it, defining a new volume of influence, applying another volume deformation operator, and repeating.
Select the volume deformer and do one of the following:
The volume deformer's icon changes to show whether it is attached or detached. When you attach it, the geometries that are affected depend on the deformer's Remember Attached Objects parameter — see To set volume deformer properties.
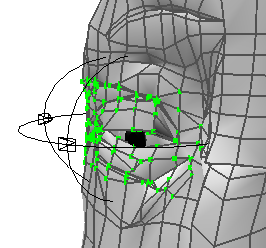
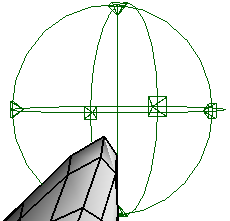
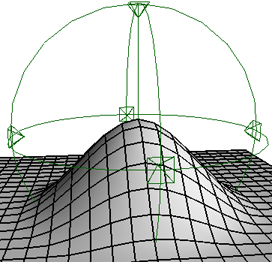
Scale, rotate, and translate the volume-deform control object. Points within the volume on the attached elements are deformed accordingly.
As you continue to transform the control object, no new Proportional Volume operator is applied; instead, the current operator is updated. You can adjust its falloff and other properties as described in To modify the current (last) operator.
When you are satisfied, you can detach the volume-deform control object, and then repeat the entire procedure to continue sculpting your objects.
You can attach geometric elements to volume-deform objects manually. This is useful, for example, if you want to restrict a deformation to a particular cluster.
The Proportional Volume operator controls parameters like the strength and falloff of the deformation. You can modify the current operator or set the defaults for future operators in your scene. Of course, you can always use an explorer to open the property editor of any previously applied operator as well.
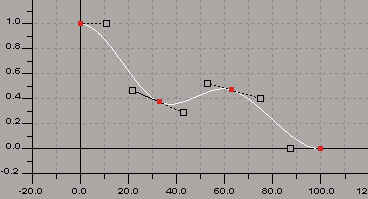
Power controls how closely the deformed points follow the center of the volume deformer as it is transformed.
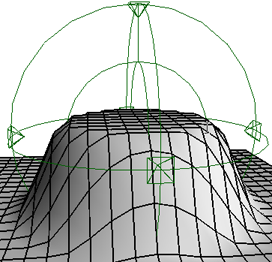
Start Damping defines a radius within which the deformation has full power and after which it falls off. Values are a percentage of the volume deformer's radius.
At 100, all points within the volume are deformed with full Power.
Between these values, an inner sphere shows the radius at which the falloff begins.
When Envelope Mode is on, the deformation is relative to the volume deformer's parent. This option is useful if you are using volume deformers parented to envelope deformers to create bulging muscles. The volume deformer will not affect the envelope as it moves with its parent, but only when it transforms relative to its parent.
 Except where otherwise noted, this work is licensed under a Creative Commons Attribution-NonCommercial-ShareAlike 3.0 Unported License