To bake surface attributes on an object, all you have to do is apply a RenderMap property to the object, set the parameters, and generate the maps.
Select the polygon mesh, polygon cluster, NURBS surface, assembled surface, hierarchy, or group for which you want to bake surface attributes.
You can apply multiple RenderMap properties to a single object.
Note that you cannot use RenderVertex on NURBS surfaces because they don't support vertex color properties.
For information specific to applying RenderMap to multiple objects, see Rendermapping Multiple Objects.
RenderMap uses the renderer specified for the current pass. To set the pass renderer, see Setting the Pass Renderer [Rendering].
From the Render toolbar, choose Get  Property Render Map.
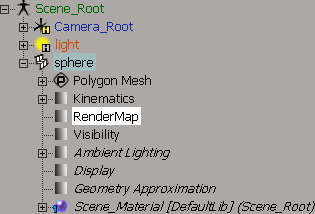
The RenderMap property is applied to the selected object(s) and the RenderMap property editor opens.
The first thing is to specify whether you want to bake to an image file or to a vertex color property. Do one of the following:
To bake to an image file, leave Sampling at its default value of Entire Surface (RenderMap). You also need to set the image resolution, path, and format. In addition, you need to either select an existing UV projection or create a new one. Unique UVs is a good choice for a new projection because you don't need to worry about how it unfolds and can spill into empty texels to reduce seams.
To bake to a vertex color property, set Sampling to Vertices Only (RenderVertex). In addition, specify an existing vertex color property to write to, or create a new one.
When you switch the Sampling option, some of the available options change.
On the Basic tab, specify the surface Map type to create. See Specifying the Surface Map Type.
On the Maps tab, specify any additional maps to generate. See Specifying Additional Maps.
Set any other options as desired. For example, if you want to bake objects between the virtual camera and the object into the rendermap, you will probably need to adjust the Virtual Camera settings. For a description of all options, see RenderMap Property Editor [Properties Reference].
Click Regenerate Maps at the top of any tab to generate all active maps.
You may need to adjust settings and click Regenerate Maps again. Repeat as necessary.
When you're finished, the next step is typically to apply the new rendermapped texture file as part of a new material, or to use the vertex color property in some way, for example, to drive illumination or some other parameter in the render tree.
 Except where otherwise noted, this work is licensed under a Creative Commons Attribution-NonCommercial-ShareAlike 3.0 Unported License