Each RenderMap property that you apply to an object can produce several different types of maps at once. Each type of map has its own unique options that, when combined with the other options, define its output image. When you regenerate the maps, all of the maps that you've activated in the current rendermap property are generated.
Use the Map parameter on the Basic tab to set the surface map type to generate, and use the Maps tab to specify additional maps to generate such as Normals.
Depending on the type of main map you are generating, you can consider bump information and specify which surface attributes to consider.
Each time you regenerate the maps for a given RenderMap property, you can generate one of the following types of surface color map:
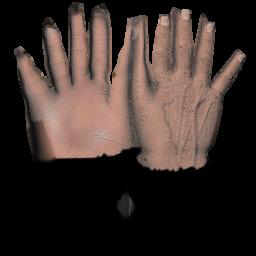
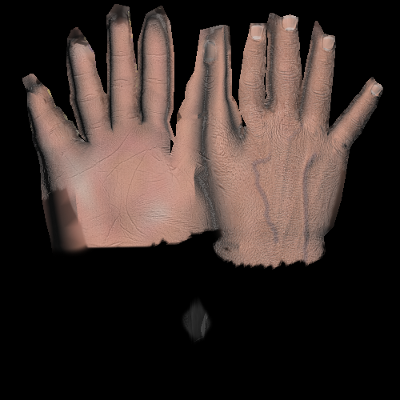
If you are generating a surface color map for a bump-mapped object, and wish to include the bump map information in the resulting image, you must apply the bump map to the rendermapped object in one of the following ways:
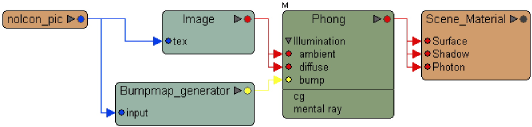
A bump map generator shader connected to the Bump Map input of the object's material node.
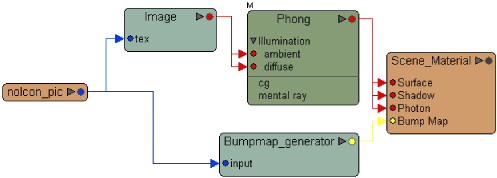
A texture shader, with bump mapping active, connected to the Diffuse input of a surface shader that is, in turn, connected to the Surface input of the object's material node.
When you generate a surface color map, the material node's Bump Map and then Surface inputs are evaluated. If the shaders connected to either of these inputs perturb the shading normals and leave them perturbed, then the bump information is baked in; otherwise, only the "bumpless" surface is captured.
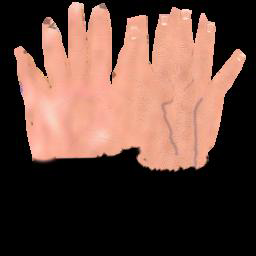
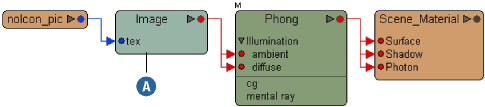
For example, while either of the render trees shown above produce correct surface color maps with bump, this render tree does not:
When you generate certain types of surface color map, you can use the Disable Surface Properties options on the Basic tab of the RenderMap property editor to control whether or not specific surface attributes are included in the resulting image.
The Disable Surface Properties options control whether shadows, refractions and/or reflections, as well as the ambient, diffuse and/or specular lighting components on the rendermapped object appear in the output image. When any of these boxes is checked, the corresponding attribute does not appear.
Properties that are view-dependent, including specular highlights, reflections, refractions, and so on, are probably not a good idea to rendermap because they get "baked in" and don't change from different viewpoints. The exception is when they're intended to be seen from a certain viewpoint only.
Of course these surface attributes can only be toggled provided they are active to begin with. For example, if the object is Blinn shaded, but the Blinn shader's specular component is deactivated, toggling the specular component in the RenderMap property editor has no effect.
In other words, these options are simply a mechanism to toggle surface attributes that are already activated for the object — not a mechanism for adding these attributes to the object.
Use the Maps tab of the RenderMap property editor to specify additional maps to generate. For each map, you should specify either a path for an image file or a vertex color property.
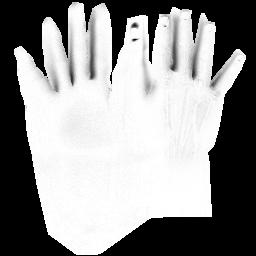
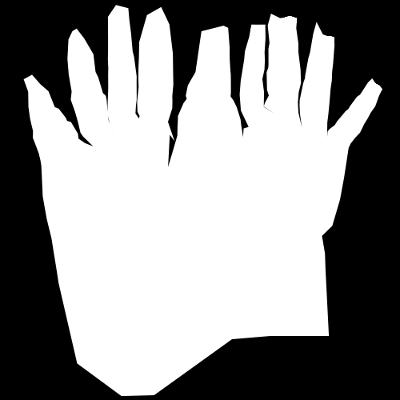
When you generate rendermap images, each one has a texel coverage pattern that indicates what percentage of the output image texel is located on the surface: black being no coverage and white being 100% covered. Practically speaking, this pattern can be used as a matte for the map images.
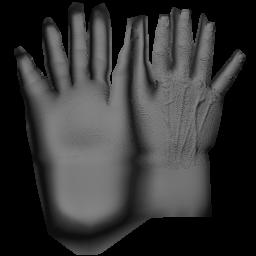
Normal maps allow you to burn the rendermapped object's normals into a file where they are stored as RGB values.
If you set Type to Relative to UV Basis, then you must either generate U and V basis maps (see the next section) or specify a user-defined basis on the Advanced tab.
Together with an object's interpolated normal, the U basis (tangent) and V basis (binormal) define a coordinate frame on the object's surface. Conceptually, the U and V bases are supposed to be tangent to the surface, while the interpolated normal is perpendicular to the surface. This coordinate frame is useful for relative normal computations for bump mapping in games.
The Basis Vector map options on the Maps tab of the RenderMap property editor allow you to burn the U and V bases into separate maps.
On the Advanced tab, you must either:
A surface position map burns the sampled position of an object's surface into a map. It stores the raw (X, Y, Z) position as a color, without biasing. For this reason, you will want to use a file format that supports floating-point bit-depth, or ensure that the object's coordinates are between 0 and 1.
Depth Maps, also called "height maps", are grayscale representations of the height of every point on an object's surface. Depth maps are often used by game developers to create a more realistic bump-mapping effect called parallax mapping, which simulates the correct displacement you perceive on an object's surface, based on the camera's point of view.
 Except where otherwise noted, this work is licensed under a Creative Commons Attribution-NonCommercial-ShareAlike 3.0 Unported License