Softimage automatically calculates normals for shading based on a polygon mesh's geometry. There are several ways to control how these auto normals are calculated:
You can control whether polygons are smooth or faceted by either setting the automatic discontinuity angle or by marking edges as hard. See Controlling the Discontinuity of Auto Normals.
You can control the accuracy of auto normals by setting angle-based normals. See Controlling the Accuracy of Auto Normals.
You can invert auto normals so that they point in the opposite direction. See Inverting Auto Normals.
Many of these procedures involve the Geometry Approximation property. To apply and edit this property, see the section Applying and Editing Geometry Approximation.
There are two ways to control whether auto normals result in smooth or faceted shading:
Using a Geometry Approximation property to set the threshold angle for determining whether an edge is smooth or faceted. See Controlling Discontinuity Using Geometry Approximation.
Explicitly marking specific edges as hard (faceted). See Marking Hard Edges.
You can mix these two methods on the same object.
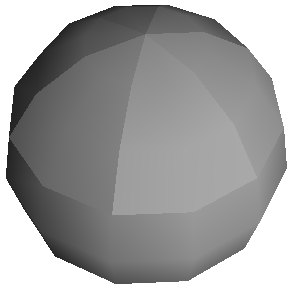
By default, Softimage uses a Geometry Approximation property to create a discontinuity in the shading when edges are sharper than 60 degrees.
However, the most efficient method is to turn off automatic discontinuity in the Geometry Approximation property and rely exclusively on marking hard edges. In this way, Softimage does not need to calculate whether edges should be smooth or faceted at each refresh. This also avoids shading artifacts that can result if an edge crosses the threshold and switches between smooth and faceted during animation.
The Discontinuity parameters on the Polygon Mesh page of the Geometry Approximation property editor control whether the objects are faceted or smooth at the edges.
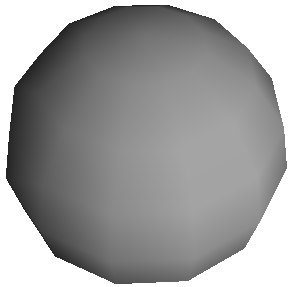
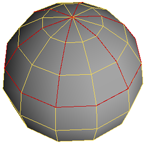
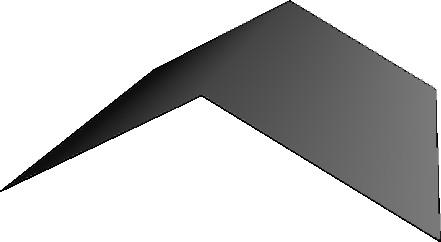
The illusion of smoothness is created by averaging the normals of adjacent polygons. When normals are averaged in this way, the shading is a smooth gradient along the surface of a polygon. When normals are not averaged, there is an abrupt change of shading at the polygon edges.
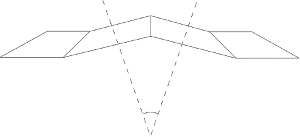
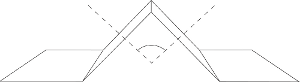
Automatic discontinuity lets you turn off the averaging of normals for sharper edges and the discontinuity Angle lets you specify how sharp edges must be before they appear faceted. If the dihedral angle (angle between normals) of two adjacent polygons is less than the Discontinuity Angle, the normals are averaged; otherwise, they are not averaged.
You can achieve different effects by adjusting these two parameters:
If Automatic is on, then the Angle determines the threshold for faceted polygons. At flatter edges, normals are averaged resulting in smooth shading while at sharper edges, the normals are not averaged resulting in faceted shading.
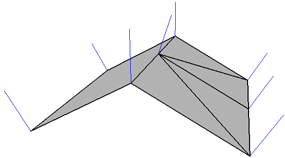
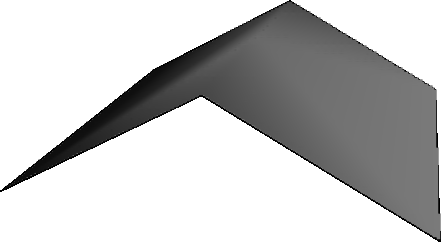
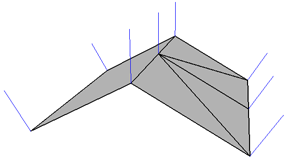
If Automatic is on and Angle is 0, the object is completely faceted.
If Automatic is off, the object is completely smooth.
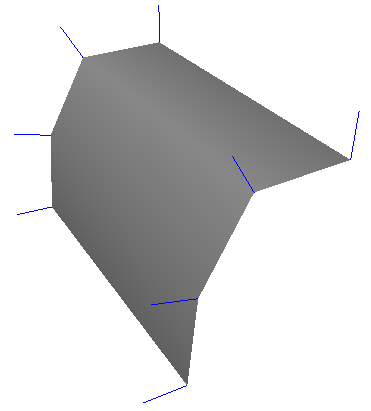
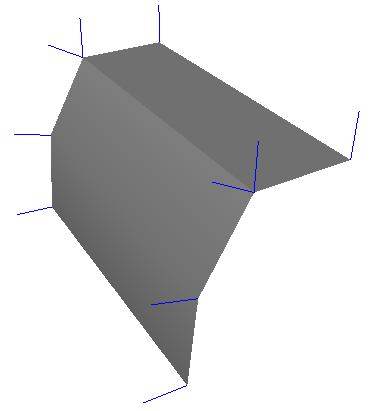
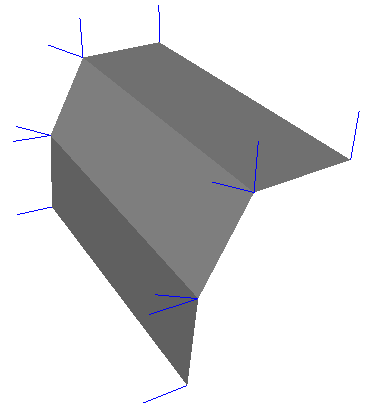
As an alternative to setting the geometry approximation for an entire object, you can make selected edges discontinuous by marking them as "hard."
You can display edges that have been marked as hard in the geometry views. This may be useful if your display mode is set to Wireframe and you can't see the effect of hard edges on the shading.
Click on a view's Show menu (eye icon) and choose Boundaries and Hard Edges.
Polygon mesh edges that have been marked as hard are highlighted in dark blue, while boundary edges are light blue. You may
need to turn off Display  Attributes Clusters (except Sample) to see the effect on hard edges.
For other ways of setting this and other display options, see Displaying Types of Elements and Other Data [Basics].
The Angle-based normals option on the Polygon Mesh page of the Geometry Approximation property editor controls the method used to calculate the normal at each vertex when rendering:
When off, Softimage uses the unweighted average of the adjacent polygon normals.
This option is substantially faster. Although it is less accurate, the result may not be noticeable in many situations.
When on, Softimage uses the average of the adjacent polygon angles, weighted according to the angle of the corresponding polygon at the point.
The result is more accurate in some situations but takes longer to calculate.
The Modify Poly. Mesh Invert Polygons command on the Model toolbar changes the direction of the normals of a polygon mesh object. It can also invert the normals
of selected polygons. Note that this command has no effect on user normals — to invert user normals, see Setting User Normals with Commands.
When you invert a polygon, it changes the ordering of vertex references in the polygon's definition.
 Except where otherwise noted, this work is licensed under a Creative Commons Attribution-NonCommercial-ShareAlike 3.0 Unported License