


Fluid dynamics is the study of fluids in motion and the effect of fluid collisions, which may be either solid objects or other fluids. Liquids consist of fairly close-packed molecules with a strong cohesive force. They tend to retain their volume and will form a free surface if unconfined.
This section shows you some quick ways of getting started with Lagoa fluid effects. The compounds shown here all provide you with a starting point for creating your own effect, or for just noodling around and getting familiar with Lagoa.
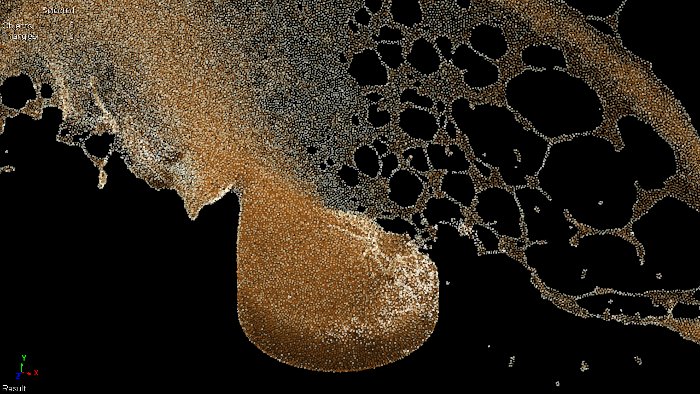
Image courtesy of Lagoa Multiphysicsª
When you emit fluid particles, the emitter object is the region in which the fluid is initially contained and calculated. The simulation region is divided up into Softimage units. The Resolution parameter in the Lagoa Emit node sets the density of the particles based on the number of units into which the emitter is divided, and then scales the particles appropriately.
See Setting Up Emissions in Lagoa Simulations for more information.
The commands in the Particles  Create Lagoa Particles menu of the ICE toolbar put you in a picking session that allows only one emitter object and one collision object at a time.
However, you can use multiple emitter objects and multiple collision objects as you like once you have an ICE tree set up
for the point cloud.
Create Lagoa Particles menu of the ICE toolbar put you in a picking session that allows only one emitter object and one collision object at a time.
However, you can use multiple emitter objects and multiple collision objects as you like once you have an ICE tree set up
for the point cloud.
To use multiple objects, you need to put these objects into a group. Groups allow you to easily add objects to, or delete objects from, the group while keeping the same Get Data node plugged into the ICE tree.
See Setting Up Emissions in Lagoa Simulations for more information for emitter objects.
See Setting Up Collisions for Lagoa Effects for more information about collision objects.
You can create a basic volume emission using the Volume Emission command. This creates a simple one-frame emission of a point cloud, with all the Lagoa nodes set up for you.
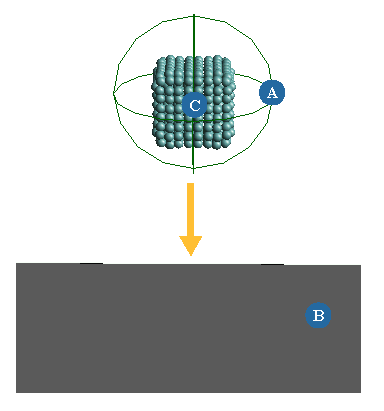
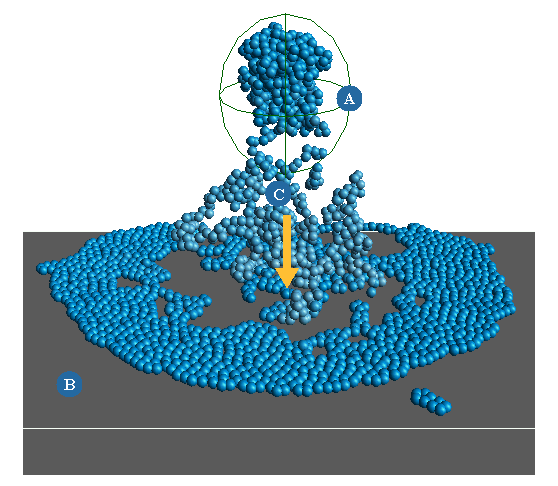
You will need to create a null for the emitter object and a surface geometry object for the collision object.
Change the null's shape to a volumetric one, or at least increase size of default null shape so that there is enough space for the particles to be created.
Create a surface object to be the collision object (obstacle) (B). If you want to use multiple collision objects, add them all to a group.
You can select the emitter object now, or pick it after choosing the command.
Choose Particles Create Lagoa Particles Volume Emission from the ICE toolbar.
Pick the null emitter object if you haven't already selected it, then pick the collision object or group.
If you right-click to cancel picking, a default emitter and a default collision object are created as necessary.
To add more collision objects later, see Setting Up Collisions for Lagoa Effects.
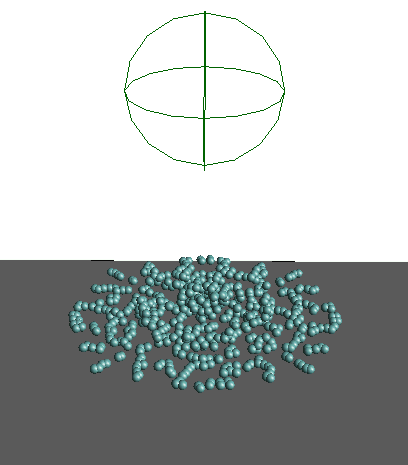
When you're done picking the objects, a point cloud and its ICE tree are created. Play back the scene to see the particle emission (C).
|
|
Set the parameters in the Lagoa Setup Basic Emission property editor that appears.
Select the point cloud and open the ICE tree view by pressing Alt+9.
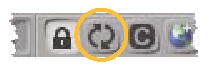
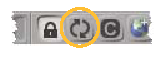
You may need to click the Refresh icon if the ICE Tree view is locked in order to display the ICE tree.
You will see a basic Lagoa ICE tree that uses the Lagoa Setup Basic Emission compound. This compound is exploded to show you all the inner nodes. — see Anatomy of a Basic Lagoa ICE Tree for information on each node in the ICE tree.
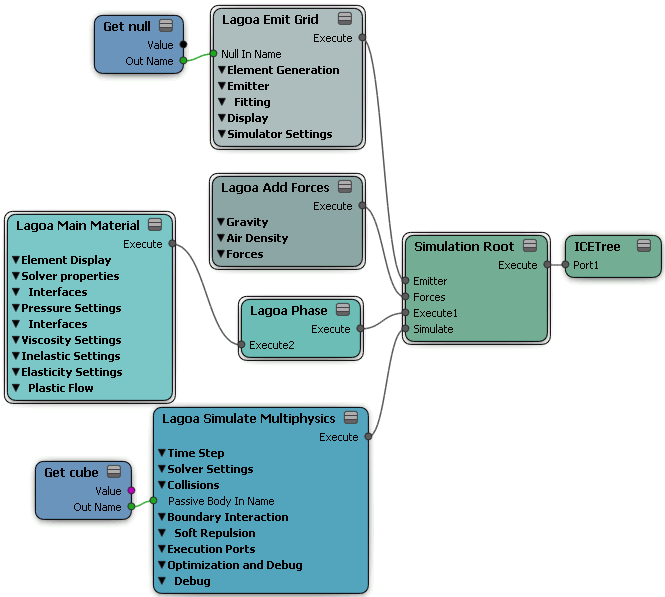
Adjust the node's settings to get the desired effect, notably the parameters in the Lagoa Main Material and the Lagoa Emit Grid property editors.
See Lagoa Material Properties for general information about material properties.
You can create a basic liquidy emission using the Pouring Liquid command. This creates a continuous-frame emission of a point cloud, with all the Lagoa nodes set up for you.
You will need to create a null for the emitter object and a surface geometry object for the collision object.
Change the null's shape to a volumetric one, or at least increase size of default null shape so that there is enough space for the particles to be created.
Create a surface object to be the collision object (obstacle) (B). If you want to use multiple collision objects, add them all to a group.
You can select the emitter object now, or pick it after choosing the command.
Choose Particles Create Lagoa Particles Pouring Liquid from the ICE toolbar.
Pick the null emitter object if you haven't already selected it, then pick the collision object or group.
If you right-click to cancel picking, a default emitter and a default collision object are created as necessary.
To add more collision objects later, see Setting Up Collisions for Lagoa Effects.
When you're done picking the objects, a point cloud and its ICE tree are created. Play back the scene to see the particle emission (C).
Set the parameters in the Lagoa Setup Pouring Liquid property editor that appears.
Select the point cloud and open the ICE tree view by pressing Alt+9.
You may need to click the Refresh icon if the ICE Tree view is locked in order to display the ICE tree.
You will see an ICE tree that uses the Lagoa Setup Pouring Liquid compound.
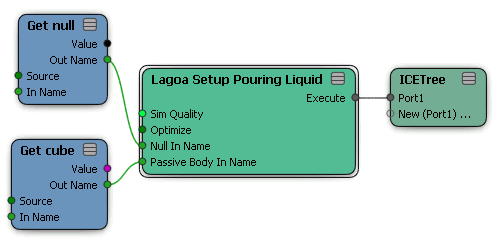
Select the Lagoa Setup Pouring Liquid compound and choose Compounds Explode Compound from the ICE Tree's toolbar to expose its inner nodes.
You could also edit the inner nodes directly, but in that case make sure that you do not export the Lagoa Setup Pouring Liquid compound without first giving it a new name; otherwise, the modified compound in your user location will take precedence over the factory compound.
With the compound exploded, it's similar to the one displayed in Anatomy of a Basic Lagoa ICE Tree.
Adjust the node's settings to get the desired effect, notably the parameters in the Lagoa Main Material and the Lagoa Emit Grid property editors.
See Lagoa Material Properties for general information about material properties.
You can create a particle emission that has high surface tension using the Surface Tension command. This creates two emission points for the same point cloud, with the points from each group constantly moving together because of high surface tension.
See Surface Tension for general information, as well as Pressure.
You will need to create a surface geometry object for the collision object.
Create a surface object to be the collision object (obstacle).
Choose Particles Create Lagoa Particles Surface Tension from the ICE toolbar.
If you right-click to cancel picking, a default collision object is created.
When you're done picking, a point cloud, two emission points, and an ICE tree are created. Play back the scene to see the particle emission.

Set the parameters in the Lagoa Setup Surface Tension property editor that appears.
Select the point cloud and open the ICE tree view by pressing Alt+9.
You may need to click the Refresh icon if the ICE Tree view is locked in order to display the ICE tree.
You will see an ICE tree that uses the Lagoa Setup Surface Tension compound.
Select the Lagoa Setup Surface Tension compound and choose Compounds Explode Compound from the ICE Tree's toolbar to expose its inner nodes.
With the compound exploded, it's similar to the one displayed in Anatomy of a Basic Lagoa ICE Tree.
Adjust the node's settings to get the desired effect, notably the Pressure parameters in the Lagoa Main Material property editor.
See Lagoa Material Properties for general information about material properties.
 Except where otherwise noted, this work is licensed under a Creative Commons Attribution-NonCommercial-ShareAlike 3.0 Unported License